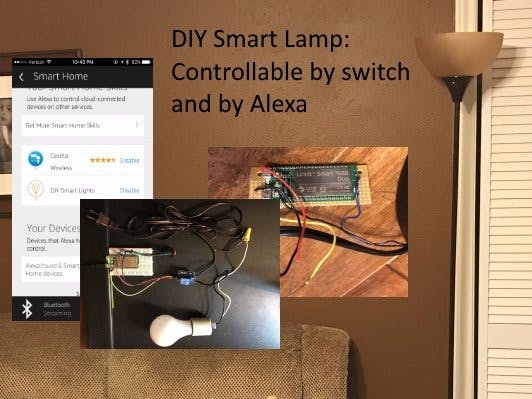
I recently added smart lighting to my home. Specifically, I installed smart light switches: the switches allow my wife (who is not smart home advocate) to control the lights as she normally does (by touch), while giving me the option to use Alexa to control the lights.
Unfortunately, I didn't find a great solution for lamps. There are smart lamp modules that exist, but they are physically cumbersome to use. The module is typically "installed" at the outlet. No one wants to reach down (or behind the couch) to control a lamp.
Smart bulbs aren't much better; they can easily be controlled by voice, but turning off the power at the light source renders the bulb inoperable.
So, I decided to build my own, using a MediaTek Linkit Duo as the board.
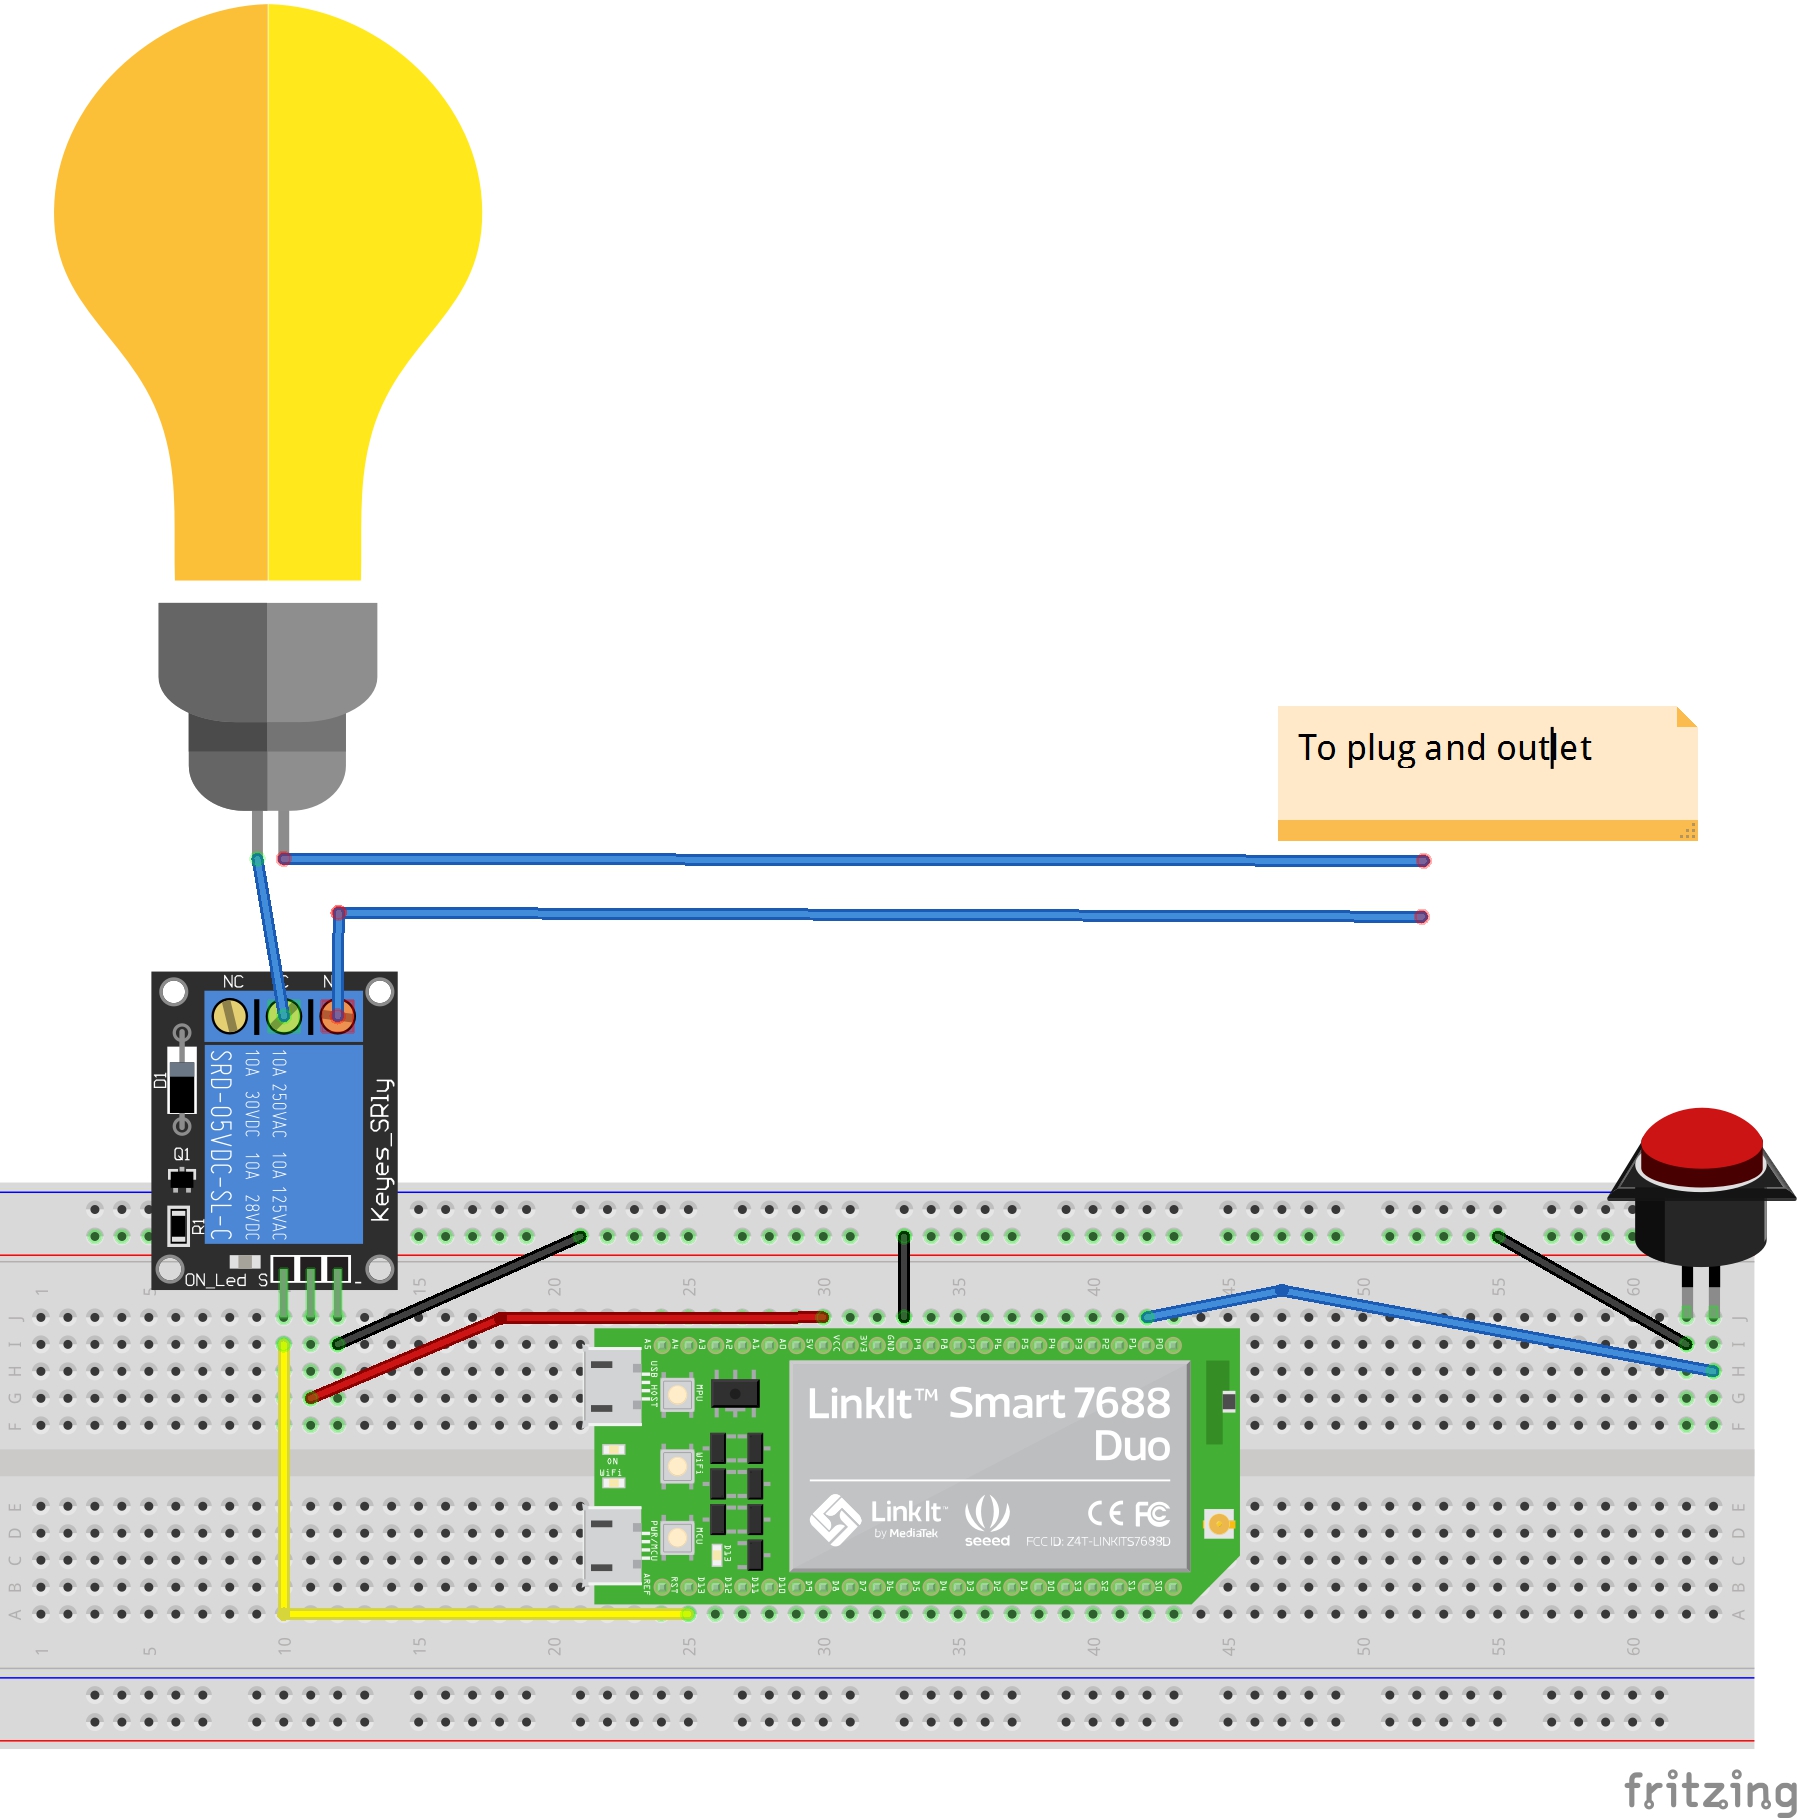
Step 1 - Designing the Touch ControlThe light bulb is connected to a simple 5V relay - with connections to the Ground, 5V, and GPIO3 pins. There are two ways change the GPIO3 pin state: 1) touch (a switch/button) and 2) Alexa.
Button
I used a push button in my first prototype. The controlling code, written in Python, simply waits to see if the button fires. When fired, the relay pin is set to High or Low (depending on its current state). [Note: Button is connected to the Ground and GPIO43 pins.]
import mraa
import time
# Refer to the pin-out diagram for the GPIO number
#button pin
buttonpin = mraa.Gpio(43)
buttonpin.dir(mraa.DIR_IN)
relaypin = mraa.Gpio(3)
relaypin.dir(mraa.DIR_IN)
relaypin_out = mraa.Gpio(3)
relaypin_out.dir(mraa.DIR_OUT)
while True:
	if buttonpin.read() == 0: #button was pressed
		time.sleep(0.5)
		print "button pressed"
		print "relay:", relaypin.read()
		if relaypin.read() == 0:
			relaypin_out.write(1)
		else:
			relaypin_out.write(0)
The Alexa solution required two components :
- An Alexa skill
- An Python script that would take a command from the Alexa Skill and change the state of the relay pin.
Alexa Skill
Amazon has a specific API created for Smart Home skills (these skills do not require the user to say the skill name when using the skill). There is a great five- part tutorial on their blog with very clear instructions; I created my first draft of the skill within 30 minutes of starting.
Once my base skill was completed, I updated the code for use with my lamp prototype.
Device Discovery Function (getAppliances)
The Smart Home Skill must provide Alexa with a list of valid/approved/installed smart devices. Typically, this code would sit in a device manufacturer's "cloud". Because I was building my own, I hard-coded the device information:
var getAppliances = function(event) {
 // var accessToken = event.payload.accessToken
 return [
   {
       "applianceId": "DEVICE-NAME", //office-room-lamp1
       "manufacturerName": "Darian Johnson",
       "modelName": "DIY Office Light",
       "version": "1",
       "friendlyName": "Office",
       "friendlyDescription": "DIY Smart Light",
       "isReachable": true,
       "actions": [
           "turnOn",
           "turnOff"
       ],
       "additionalApplianceDetails": {
           "extraDetail1": "This is a light that is reachable"
       }
   }
 ];
};
Device Control Function (callDeviceCloud)
The Smart Home Skill must also provide the ability to control the device. I used AWS IoT to send MQTT messages to the device.
var callDeviceCloud = function(event, command, commandValue) {
 var deviceId = event.payload.appliance.applianceId;
 log(deviceId, command + " = " + commandValue);
 var email = 'user@email.com';
 var iotTopic = email + "/" + deviceId + "/" + commandValue;
 var iotPayload = '{ "message": "Toggle Light"}'
 publishMessage(iotTopic,iotPayload);
};// callDeviceCloud
AWS IoT Setup
I needed to create an AWS IoT "thing" to receive/route the messages. The following guide explains how to create a device. A key part of this is creating the certificates, which you'll need to download and install on your Linkit.
MQTT Script on the Linkit Duo
I created a script similar to the Button code; this script waited for an MQTT message and set the relay pin start to High or Low based on the message.
import mraa
import time
import paho.mqtt.client as paho
import ssl
import json
# relay pin out
relaypin_out =  mraa.Gpio(3)
relaypin_out.dir(mraa.DIR_OUT)

# Parameters
topic = "user@email.com"
applianceId = ""DEVICE-NAME" #office-room-lamp1
def on_connect(client, userdata, flags, rc):
	print("Connection returned result: " + str(rc) )
	# Subscribing in on_connect() means that if we lose the connection and
	# reconnect then subscriptions will be renewed.
	#client.subscribe("#" , 1 )
	client.subscribe(topic + "/" + applianceId + "/#" ,1)
def on_message(client, userdata, msg):
	print("payload: " + msg.payload)
	parsed_json = json.loads(msg.payload)
	if msg.topic ==topic + "/" + applianceId + "/on":
		relaypin_out.write(1)
	if msg.topic ==topic + "/" + applianceId + "/off":
		relaypin_out.write(0)
mqttc = paho.Client()
mqttc.on_connect = on_connect
mqttc.on_message = on_message
#variables to connect to AWS IoT
#Note these certs allow access to send IoT messages
awshost = "data.iot.us-east-1.amazonaws.com"
awsport = 8883
clientId = applianceId # + str(uuid.uuid4())
thingName = applianceId
caPath = "certs/verisign-cert.pem"
certPath = "certs/Light.certificate.pem.crt"
keyPath = "certs/Light.private.pem.key"
mqttc.tls_set(caPath, certfile=certPath, keyfile=keyPath, cert_reqs=ssl.CERT_REQUIRED, tls_version=ssl.PROTOCOL_TLSv1_2, ciphers=None)
mqttc.connect(awshost, awsport, keepalive=60)
mqttc.loop_forever()
Before I could use skill, I had to enable it and perform device discovery.
Once that was complete, I was able to control my prototype via button and voice.
Final Solution BuildOnce I confirmed that the code worked, I went about build a more robust solution.
Step 1 - Wire the switch and run the wires through the lamp
I decided to go with a pole style floor lamp. This would allow be to snake the switch wires from the stop of the lamp to the base.
There were two challenges with this approach.
1) I had to drill two small holes in the back of the lamp to install the button. I used heat wrap to cover the wires.
2) My small push button that I planned to used was defective, so I changed to a toggle switch. This was actually a more aesthetically pleasing solution, but required that I change my "button" code.
import mraa
import time
# Refer to the pin-out diagram for the GPIO number
#button pnb
buttonpin = mraa.Gpio(43)
buttonpin.dir(mraa.DIR_IN)
current_button = buttonpin.read()
relaypin = mraa.Gpio(3)
relaypin.dir(mraa.DIR_IN)
relaypin_out = mraa.Gpio(3)
relaypin_out.dir(mraa.DIR_OUT)
while True:
	if buttonpin.read() != current_button: #button was flipped
		time.sleep(0.25)
		print "button flipped"
		print "relay:", relaypin.read()
		if relaypin.read() == 0:
			relaypin_out.write(1)
		else:
			relaypin_out.write(0)
		current_button = buttonpin.read()
Step 2 - Solder the device to a Protoboard.
Full disclosure - I haven't soldered anything since my senior year in college and I barely passed by circuits 101 class, so my final solution was never going to be pretty.... but it works.
Step 3 - Connect the relay and assemble the device
I clipped the power cord to the lamp, soldered the ends, and connected them to the relay (I chose the "always open" connection, but either would work). From there, I connected the relay to the Linkit Duo (see the red [5V], black [ground], and yellow [signal] wires in the picture above).
Once connected, I placed the Linkit and relay and and placed both components inside the plastic project box.
Step 4 - Final steps
My final activity was to create two services on the Linkit to automatically start the button and mqtt Python programs on reboot. The scripts can be installed with the following commands:
mv initScript /etc/init.d/
chmod +x /etc/init.d/initScript
/etc/init.d/initScript enable
As you can see, the lamp looks like a "dumb" lamp - no crazy wiring or out-of-place indicators. Total price, about $35:
- $16 - Linkit Duo
- $8 - Floor Lamp
- $3 - Relay
- $3 - Toggle Switch
- $5 - Project Box
- Michael Palermo's posts on Alexa Smart Home Skills
- Alex Glow's Intro to Soldering


Comments