


Hardware components | ||||||
_ztBMuBhMHo.jpg?auto=compress%2Cformat&w=48&h=48&fit=fill&bg=ffffff) |
| × | 1 | |||
| × | 1 | ||||
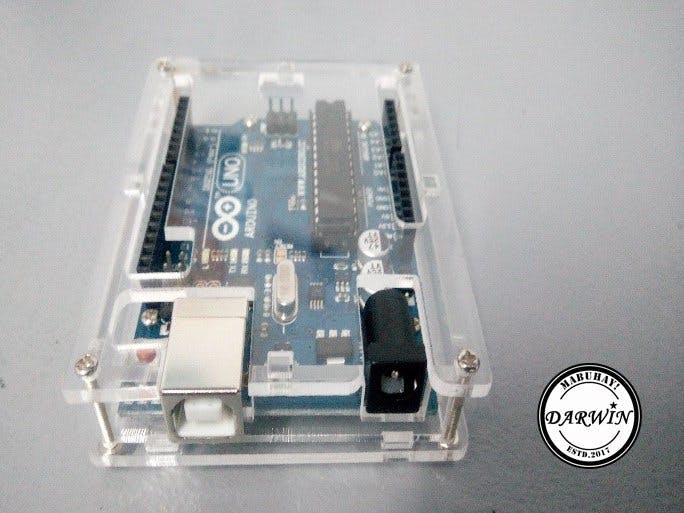
In this video I will show you how to install an acrylic case for the Arduino Uno. This case will protect your Arduino board from sudden unintentional misuse or accidents that can occur when making things using the board. It also gives some new looks for your board. I will leave a link indescription below where you can buy your acrylic case. So, let’s get started.
Materials needed:Arduino Uno | https://goo.gl/T1pRVk
Acrylic Case for Uno | https://goo.gl/kSeN8M
Screw Driver | https://goo.gl/FvbXoD
Step 1: Peel off the protective paper on the acrylic caseThe acrylic case has a protective paper comes to it, to protectthe case from scratches. First, we must remove this so the transparent part ofthe case will show after this it’s ready to install to the Arduino Uno board.
The acrylic case has cut out design that follows the Uno board design, so it was easy to intuitively place the case pieces to the boardand fits to the case perfectly.
The acrylic case comes with bolts and screw that will use aslocking mechanism. There are two (2) types of screws that the case had. Firstthere was a four (4) short length size that will place to the board and to thebody of the case. Second was a four (4) long length size that will place to theedges of the case.
The screw driver will use to fasten the screw and bolts.
Now I completed the install the acrylic case in Arduino UNO board.
......................................................
To give support on this channel.
Donate.
Paypal: https://www.paypal.com/paypalme2/dardelacruz/5
Bitcoin: 3HHaJVzMhAKX5NUc6cayo7xcCdKJov5MDg
Ethereum: 0x04ba643cFC5EBcC8E57B038d39Eec2E52ED85710
Like and Follow.
Twitter: twitter.com/dardelacruz
Facebook: facebook.com/darwindelacruzofficial


Comments
Please log in or sign up to comment.