


Hardware components | ||||||
 |
| × | 1 | |||
 |
| × | 1 | |||
 |
| × | 1 | |||
I was introduced to the Particle Photon Starter Kit at Dallas Nodebots Day 2017. Since my preferred programming language is Python, I was eager to learn how to interact with Photon in the Python environment. I researched the topic online, but to my dismay, the results were scant and of little value. This project demonstrates how to interact with the Photon using a command line interface developed in Python. It also demonstrates associative arrays in C++ and passing variables to and from a function exposed by a Photon.
Setup
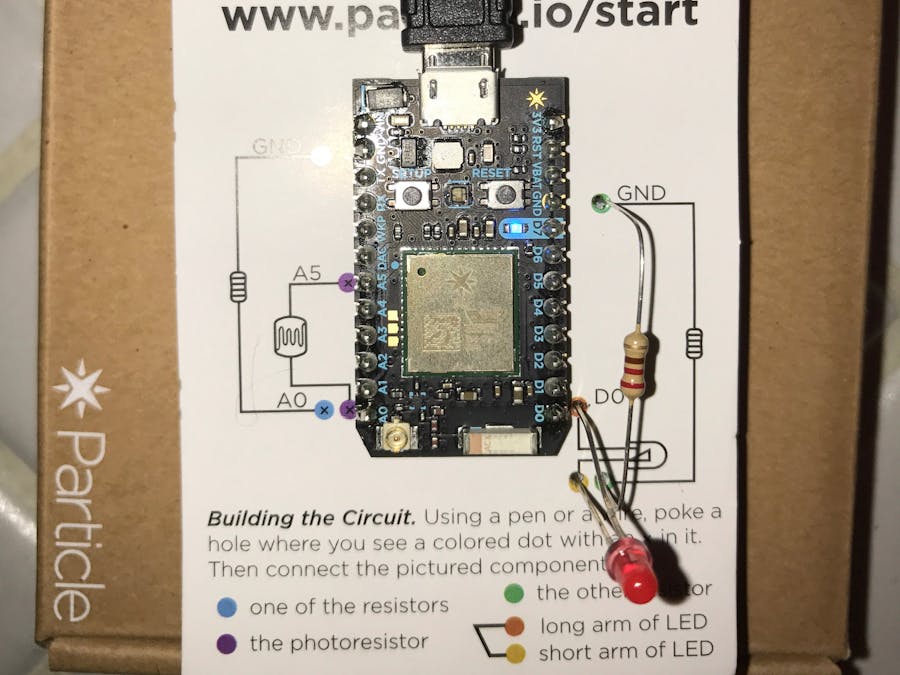
This project uses the built-in blue LED at D7 and a red LED wired to D0 in accordance with the Photon Starter Kit wiring diagram.
The Particle Build website can be used to create a new app, copy and paste the code of the smartled.ino, and flash the device.
The smartled.py file can be copied to any device running Python 2.7, such as a Windows workstation or a Raspberry Pi. The Python script requires the requests module with the security extras. It can be installed using the following command.
python -m pip install requests[security]
Before first use, the smartled.py requires one edit. The MYPARTICLETOKEN global variable value must be set to your Access Token found on the Settings tab of the Particle Build website.
Usage
Open a console window and set the current directory to that of smartled.py. Below are some sample commands.
python smartled.py -h
Show help message
python smartled.py crazy-monkey turnOn red-led
On device named 'crazy-monkey', turn on the red LED.
python smartled.py crazy-monkey getStatus blue-led
On device named 'crazy-monkey', get status of blue LED.
python smartled.py crazy-monkey turnOff red-led
On device named 'crazy-monkey', turn off the red LED.
Conclusion
This project demonstrates how to interact with the Photon using a command line interface developed in Python. This project is intended to be a building block rather than a final product. For instance, the Photon code can be modified to control additional pins/devices. In addition, the Python code can be incorporated into a cron job or integrated with other Python-based projects.


Comments
Please log in or sign up to comment.