During the Black Friday/Cyber Monday sales of 2014, I had picked up a nice supply of WS2812 LED strips (from Pololu.com), and needed a project for them, so I created a fun Christmas star decoration seen in the video below:
Here's the same star, seen from outside:
While the big star was a fun project, I was looking for something a little more portable, and decided to make a smaller star as a custom Gadgeteer module, which would make it very easy to use in a variety of projects.
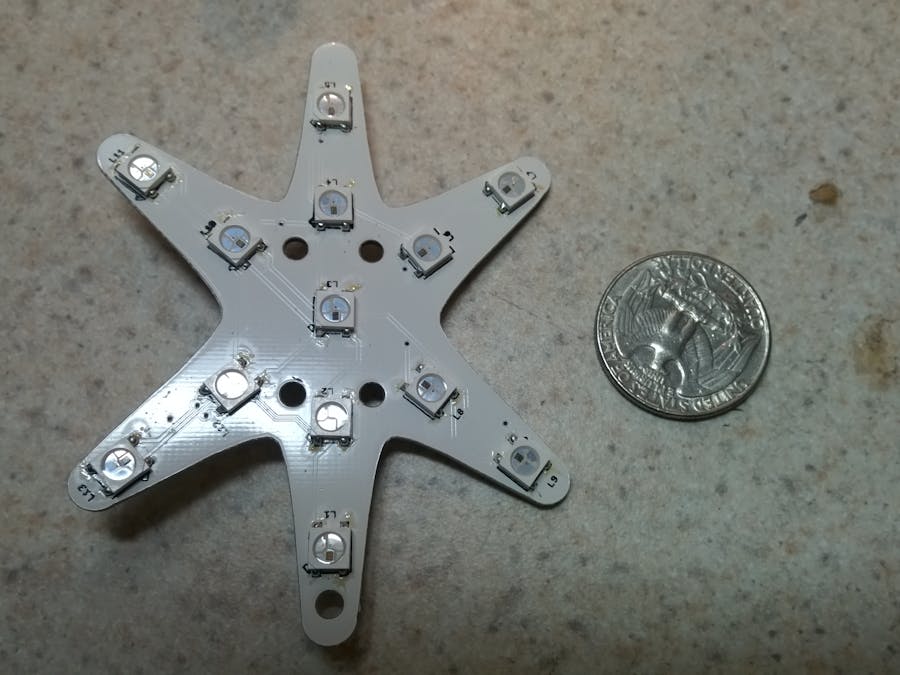
What I decided to create was a custom PCB using individual WS2812B LEDs, in a pattern similar to the larger star. Given the cost of custom PCBs, I kept the number of LEDs a little smaller, and the board size reasonably small (about 3.25 x 2.4 inches).
I used Eagle CAD (free version) to complete the 2-layer board design. Thanks to the fact that the WS2812B LEDs have the driver IC integrated into the LED, the board design was pretty simple, just the LEDs, a Gadgeteer socket, and a by-pass capacitor for each LED. To make the board easier to assemble, I put only the LEDs on the top of the board, and the socket and caps on the bottom.
Here's what the board looks like:
And the bottom:
Once the board design was ready, I ordered a run of prototypes from DF Robot, which arrived pretty quickly, and started soldering.
One of the lessons I learned is that when working with the individual WS2812B LED pixels, it pays to make the pads bigger than you think you need. I used an existing Eagle part for laying out the LEDs, and the pads were small enough that it was very hard to solder them quickly. I initially tried with solder paste and a stencil, but found that without using an oven, it just wasn't practical to get the paste hot enough with my hot air station without ending up blowing the LED off the board. In the end, I just used an iron, but it was pretty tedious. Larger pads for both the LEDs and the caps would have made assembly a good bit faster and more reliable (I had to rework a couple of the caps on one board, due to bridging).
This picture gives something of an idea of the issues I was running into with soldering the LEDs. Some of this may have been poor skill on my part, but a larger footprint would likely have made it easier overall:
And here's a first test of the Star Board module, using a GHI Electronics FEZ Cobra II mainboard:
The LED patterns for both the original star and the Star Board module are created with a simple C# class library that addresses the LEDs in rings or lines, and provide a simple API that the Gadgeteer module user can call to display a pattern. This means that using the module is as simple as plugging it in, making the connection in the Gadgeteer designer (as shown below), and then calling a few simple commands. I created the driver module using a Gadgeteer module template supplied by Microsoft. The result of the module template is an MSI that installs the driver and makes the module available in the Visual Studio toolbox.
The image below shows the Gadgeteer designer for a project where I use a wireless heart rate monitor to control the star. The heart rate monitor receiver simply toggles a pin high when a heartbeat is detected, so it appears to Gadgeteer the same as a button module, which is what I use in the designer to represent the heart rate receiver. This project uses the FEZ Cerbuino Bee Gadgeteer mainboard, but thanks to the Gadgeteer platform, the module will work with any Gadgeteer mainboard that has an available S socket (for SPI):
The code for using the module is very simple:
The mere act of dropping the module onto the design surface and wiring it up to the mainboard creates an instance of the driver class. Handling the toggling of the receiver pin is as simple as handling a button click in any .NET project, and in the handler I just call the "ShowPattern" function exposed by the Star Board driver, and tell it the pattern I want to show (note that I defined all the patterns using an enum, to take advantage of Intellisense to make it easy to discover the patterns that are available).
ConclusionThe StarBoard module was my second Gadgeteer module, and was the first for which I wrote a somewhat polished driver. The Gadgeteer platform makes it very straightforward to build hardware modules that are easy to use in a plug and play fashion, with high-level APIs that make combining a variety of modules into a finished project a breeze. For prototyping electronics I've found nothing faster or more fun.
Want to learn more? Check out my Vimeo site for more hardware videos, or my blog for more posts on hardware and software development. You can also follow me on Twitter.


Comments
Please log in or sign up to comment.