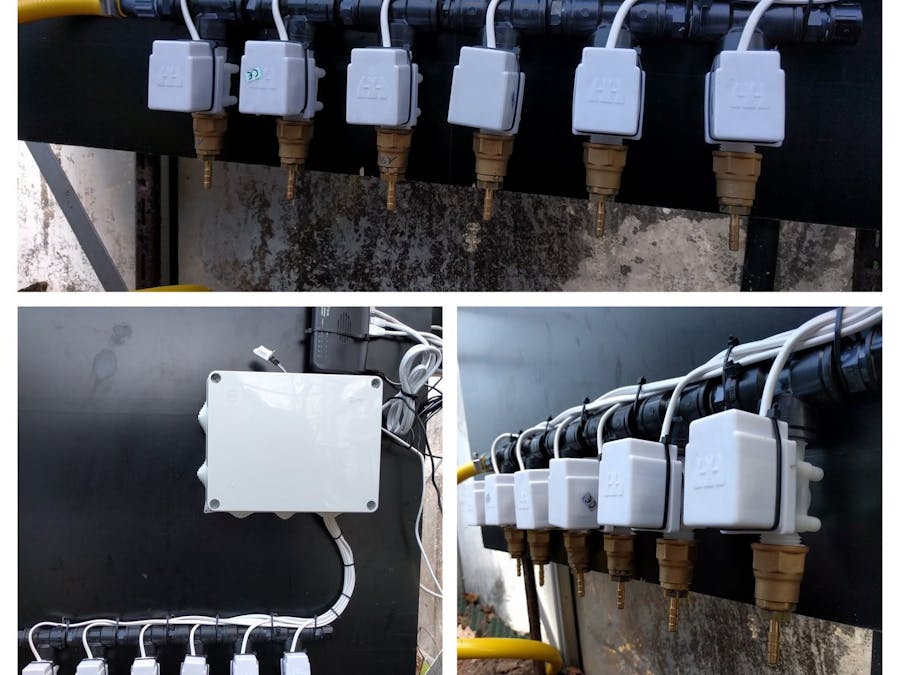
After years of struggeling and always forget to give the tomatoes water, it was time for a solution, an irrigation system. No ready-made package but something that I made by myself in order to learn something.
The challenge was there!
But how to start? How do you make sure the tomatoes are automatically getting some water.After searching the web, I soon realized that a Raspberry Pi was a solution to control all this. The Raspberry Pi is a super tiny computer, as big as a bank card, the operating system I have used is Linux.
- WebcamI wanted to have a webcam view, a clear picture of the growth of tomatoes. For the last years I always started enthusiastically but maintenance was always a struggle, due to leave home or other subterfuge ;)
- Temperature and humidityThe temperature and humidity of the greenhouse. An overview of the temperature was important because the greenhouse is quite a number of hours a day in the sun. A protective layer of scale is added and two automatic opening skylights are keeping the temperature under control.Currently there are maximum peaks of 36°c which is still too much. Max 30° should be the perfect temperature.
- Tabs or water pumpsSomething to control the water pumps or valves.
Phase 1 was already quite challenging, especially since I had never had a Raspberry Pi in my hands. But the worldwide web has a lot of information to build several things with it.
Phase 1 = a webcam image, temperature, humidity and watering the tomatoes.
I use an FOSCAM outdoor webcam that is simply connected to the internal network, every 5 minutes I get an image to place on the web.
The temperature and humidity meters, 1 external module that can be easily connected to the Raspberry Pi, every 5 minutes are the values saved in a database. With this values I create a graph on the website.
The biggest challenge were the water pumps or valves, Many people work with 220V valves or pumps, but it was too dangerous for me. After a lot of “googl-ing” I’ve found a Chinese website that sells 12V water valves, after ordering it was another 4 weeks waiting for the delivery.
The building could start... how do I make of all this a working thing. The Raspberry Pi, the relay board to control the valves and a transformer 220V-V12 had to be provided in a box.
I have visited several construction markets in the region, I found a pond center in the region to build good connections to connect to the water valves. The module with the valves and connections was the most expensive part of the project. But the result looks pretty nice :)
The valves are currently controlled by a schedule, the water valves are open at certain times. This is now three times a day, morning, afternoon and night this each time for 120 seconds.
On the water valves I’ve attached a drip system that I bought last year, but it was not really a success, this was a system with water bags which were immediately empty.
The tubes of the drip system are linked to the water valves, "drippers" are fully open and all the plants are well watered according to the set time. Currently I have five water valves in use, so five circuits that provide a total of 28 tomato plants of water.
When the shedule is done, an email is sent with a detailed webcam image (USB webcam) and a overview of the areas which has got water and for how long.
All information is displayed on a website, where a webcam image, graph of temperature, humidity and processor temperature is displayed. For the website I’ve used Wordpress, everything is hosted on the Raspberry Pi.
The valves can also be operated remotely via a smartphone, but currently it has little value as it is still done automatically by the schedule.


Comments
Please log in or sign up to comment.