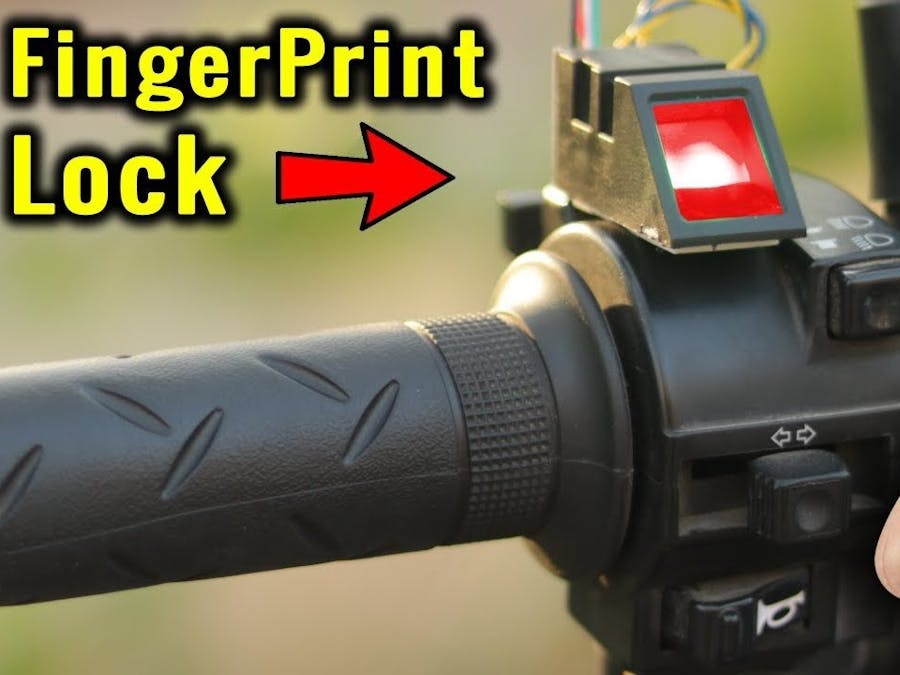
In this project, we will be Interfacing Fingerprint Sensor with Arduino to design Fingerprint Sensor Based Bike Starter.
The type of fingerprint module we are using is the R305 Fingerprint Scanner Module. Security is a major concern in our day to day life, and digital locks have become an important part of these security systems. Fingerprint sensor-based is one of the safest bike starting systems as it has the ability to identify and distinguish every person individually without making any error. Also, the module is very small that it can be kept anywhere, and with the portability feature and less power consumption, you can carry it to any place as well.
Components Required:
1, Arduino Board, or PCB Arduino UNO R3 Development Board
2, Fingerprint Sensor, R305/R307 Fingerprint Sensor
3, Relay, Module1 Channel 5V Relay Module
R305 Fingerprint Scanner Sensor ModuleThis is a fingerprint sensor module with a TTL UART interface for direct connections to microcontroller UART or to PC through MAX232 / USB-Serial adapter. The user can store the fingerprint data in the module and can configure it in 1:1 or 1: N mode for identifying the person.
The Fingerprint module can be directly interfaced with any microcontroller as well as Arduino Board. This optical biometric fingerprint reader with great features and can be embedded into a variety of end products like access control system, attendance system, safety deposit box, car door locking system.
How does fingerprint scanner works:Fingerprint is a pattern made up of ridges and valleys on our fingertip skin. While storing the entry in database, scanner takes an image of these patterns and stores in its own memory. Then while performing search operation, it again takes pattern of fingerprint of that user who needs to gain access. This pattern is compared with all patterns previously stored in memory. In short it performs a task which is related to Digital image processing. It performs various iterations and executes matching algorithms and if it finds exact match then it gives out fingerprint ID number. Otherwise it gives out error signal.
Circuit DiagramMake the connections as shown in the figure above. Connect the relay module to input to digital pin 12 of Arduino. Similarly, connect Tx and RX pin of the fingerprint sensor to digital pin 3 and 2 of Arduino Uno.
NextPCB PCB Manufacturers Company1st Thanks NextPCB for sponsor this project. Nextpcb offer For New Customer, Your First Order Will Be 10 PCBs for just $0 at Free.
NextPCB one of the world’s most professional PCB manufacturers based in China. With professional PCB manufacturing capabilities, for each file of our customer will be double-checked by more than 14 years PCB engineers. they handle the whole process of PCBs including the PCB assembly, PCB manufacturing, testing and final shipment.
Connections
we have two types of code which needs to get upload in a systematic way, upload code number 1 all the links for this codes is given in the following link
#include <Adafruit_Fingerprint.h>
SoftwareSerial mySerial(2, 3);

Adafruit_Fingerprint finger = Adafruit_Fingerprint(&mySerial);

void setup()
{
pinMode (12,OUTPUT);
Serial.begin(9600);
while (!Serial); // For Yun/Leo/Micro/Zero/...
delay(100);
Serial.println("\n\nAdafruit finger detect test");

// set the data rate for the sensor serial port
finger.begin(57600);

if (finger.verifyPassword()) {
Serial.println("Found fingerprint sensor!");
} else {
Serial.println("Did not find fingerprint sensor :(");
while (1) { delay(1); }
}

finger.getTemplateCount();
Serial.print("Sensor contains "); Serial.print(finger.templateCount); Serial.println(" templates");
Serial.println("Waiting for valid finger...");
}

void loop() // run over and over again
{
getFingerprintIDez();
delay(50); //don't ned to run this at full speed.
}

uint8_t getFingerprintID() {
uint8_t p = finger.getImage();
switch (p) {
case FINGERPRINT_OK:
Serial.println("Image taken");
break;
case FINGERPRINT_NOFINGER:
Serial.println("No finger detected");
return p;
case FINGERPRINT_PACKETRECIEVEERR:
Serial.println("Communication error");
return p;
case FINGERPRINT_IMAGEFAIL:
Serial.println("Imaging error");
return p;
default:
Serial.println("Unknown error");
return p;
}

// OK success!

p = finger.image2Tz();
switch (p) {
case FINGERPRINT_OK:
Serial.println("Image converted");
break;
case FINGERPRINT_IMAGEMESS:
Serial.println("Image too messy");
return p;
case FINGERPRINT_PACKETRECIEVEERR:
Serial.println("Communication error");
return p;
case FINGERPRINT_FEATUREFAIL:
Serial.println("Could not find fingerprint features");
return p;
case FINGERPRINT_INVALIDIMAGE:
Serial.println("Could not find fingerprint features");
return p;
default:
Serial.println("Unknown error");
return p;
}

// OK converted!
p = finger.fingerFastSearch();
if (p == FINGERPRINT_OK) {
Serial.println("Found a print match!");
} else if (p == FINGERPRINT_PACKETRECIEVEERR) {
Serial.println("Communication error");
return p;
} else if (p == FINGERPRINT_NOTFOUND) {
Serial.println("Did not find a match");
return p;
} else {
Serial.println("Unknown error");
return p;
}

// found a match!
Serial.print("Found ID #"); Serial.print(finger.fingerID);
Serial.print(" with confidence of "); Serial.println(finger.confidence);

return finger.fingerID;
}

// returns -1 if failed, otherwise returns ID #
int getFingerprintIDez() {
uint8_t p = finger.getImage();
if (p != FINGERPRINT_OK) return -1;

p = finger.image2Tz();
if (p != FINGERPRINT_OK) return -1;

p = finger.fingerFastSearch();
if (p != FINGERPRINT_OK) return -1;

// found a match!
digitalWrite(8,HIGH);
delay(1500);
digitalWrite(8,LOW);

Serial.print("Found ID #"); Serial.print(finger.fingerID);
Serial.print(" with confidence of "); Serial.println(finger.confidence);
return finger.fingerID;
}connect power supply of bike to relay module and place the fingerprint scanner
whichever being more convenient for you, placement on handle was more convenient for me ( shown in image above)
Precautions to be taken while accessing fingerprint sensor:Correct way to access Fingerprint sensor


_ztBMuBhMHo.jpg?auto=compress%2Cformat&w=48&h=48&fit=fill&bg=ffffff)


Comments
Please log in or sign up to comment.