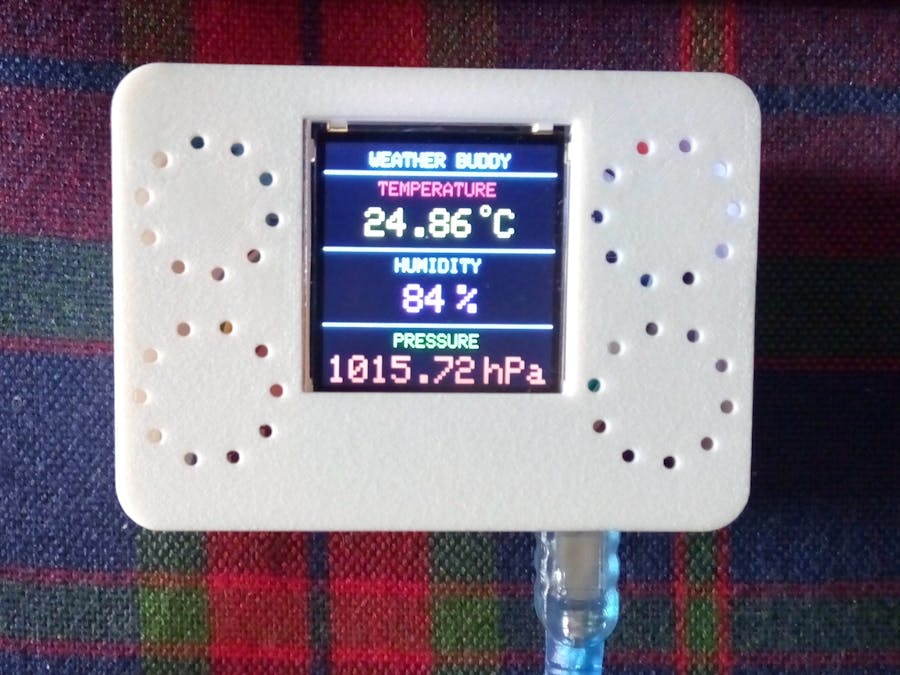
Capturing physical data in real-time is always fascinating. In this project, you will not only be able to capture three fundamental physical parameters for weather predication viz. temperature, humidity and atmospheric pressure, but will also be able to display the real-time data on a LCD screen.
Description and Working PrincipleThe two sensors used in this project are BMP-280 and DHT-11. The former senses the temperature and atmospheric pressure whereas the later senses the relative humidity. The DHT-11 could have been done with by using BME-280 (it can measure humidity also) instead of the BMP-280, but if the cost is taken into account then using the combination of sensors used here is much more economical for DIY projects. It should also be noticed that although DHT-11 is capable of sensing both temperature and humidity, it is used for humidity sensing only because its temperature sensing resolution is +/-2° compared to +/-.5° for BMP-280. The heart of this project is the Arduino NANO development board. Here also the NANO board has been chosen over the masspreferred UNO because of its affordable price. A 1.44” ST7735 series TFT LCDscreen is used as the display for our project. A bigger screen has been avoidedhere so that the Arduino NANO is not overloaded.
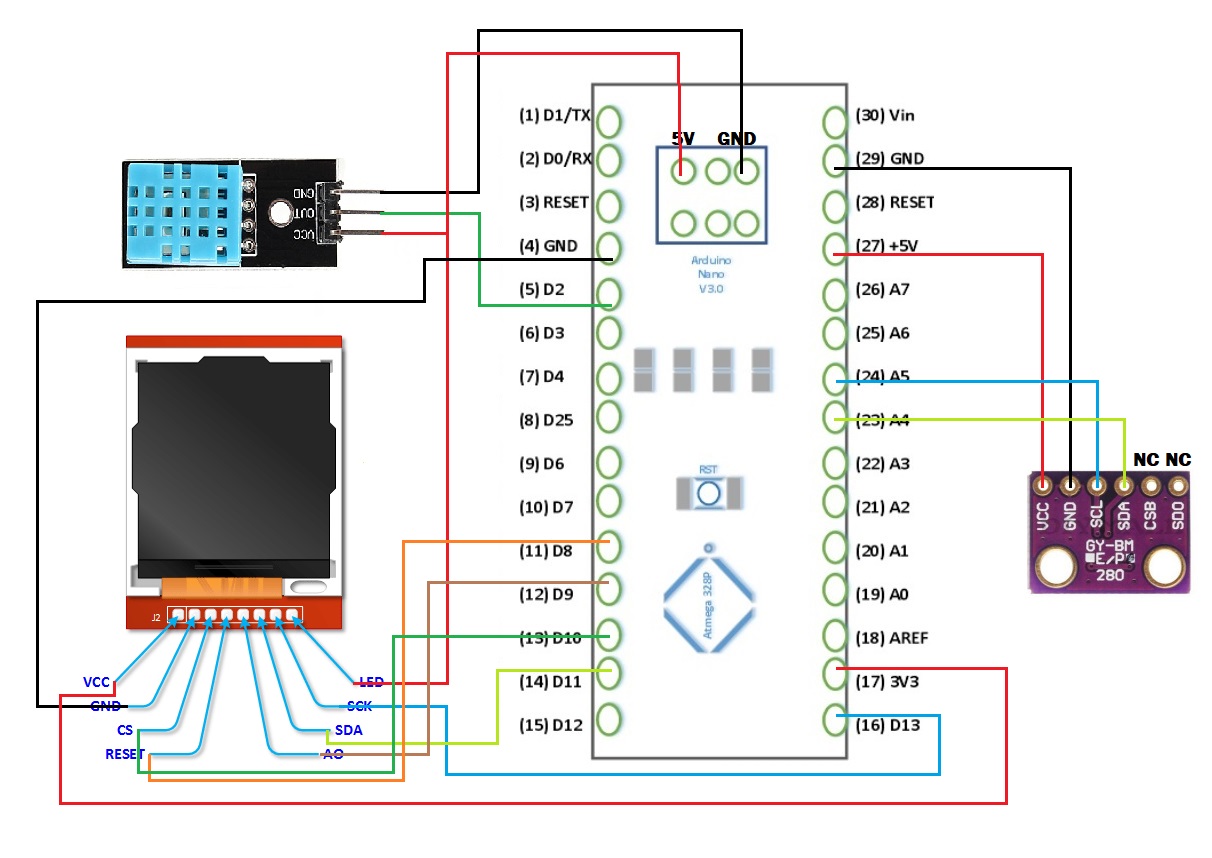
Circuit and ProgrammingA combination of circuit diagram and block diagram has been provided as conveniently as possible to help the makers understand the physical configuration and connection of the components. Tables for pin-out of the components is also provided to make things easier. Going through the diagram and tables one will notice that the 5V and GND pins of the ICSP header on Arduino NANO has been utilised for supplying power to the components along with the on-board power and ground pins. This has been done to do away with any additional power source which will make the system bulky.
Coming to the programming, in the first part an array of libraries have been included to keep the programming short and simple. Besides the obvious ones, the Wire.h and SPI.h libraries are worth mentioning because Wire.h is the one that allows the Arduino to communicate with the I2C/TWI devices such as the BMP-280 and the ST7735 LCD and SPI.h provides the serial peripheral interface with the ST7735 LCD. In the second part, the sensors are initialized and the layout, font colour, etc. of the LCD are set up for displaying the data as per our preferences. In the final part of our programming, the output from the sensors are obtained and displayed with a convenient delay between each reading to keep things stable.
Construction and TestingIn the prototype, the components have been kept modular and connected using jumper wires instead of soldering. This not only allows easy troubleshooting and repairing but also makes the assembly process hassle free. The device-case has been custom 3D-printed for a perfect fit for the components. The case is provided with proper ventilation in order to expose the sensors to the measurands and dissipate the heat generated by the system which will otherwise interfere with the sensing elements. The device is powered via the same type AUSB to type B mini USB used to program the Arduino. The prototype has beentested indoors at stretch for a few hours using both PC USB port and 5Vsmartphone charger as supply. The results are quite accurate compared with online meteorological data, considering the production cost and development time.
Conclusion
In conclusion it can be said that this project is quite economical, useful to say the least, and most importantly, it is fun having a small and handy weather station that fits right in your pocket.
To buy electronic parts order them from UTSOURCE
Bibliography· Google.com
· Arduino.cc
· Mytectutor.com


_t9PF3orMPd.png?auto=compress%2Cformat&w=40&h=40&fit=fillmax&bg=fff&dpr=2)


Comments
Please log in or sign up to comment.