The previous owner of my house installed remote controlled ceiling lights in all the bedrooms. This was really cool for a couple weeks, but now I’m realizing that it can be really annoying when I misplace the remote. Each room has a separate remote that only works for that room. Extra remotes are both expensive and hard to come by. Making my own rf remote is impractical as they run in the 400mhz range and there is generally very little documentation about the radio codes for this fan model.
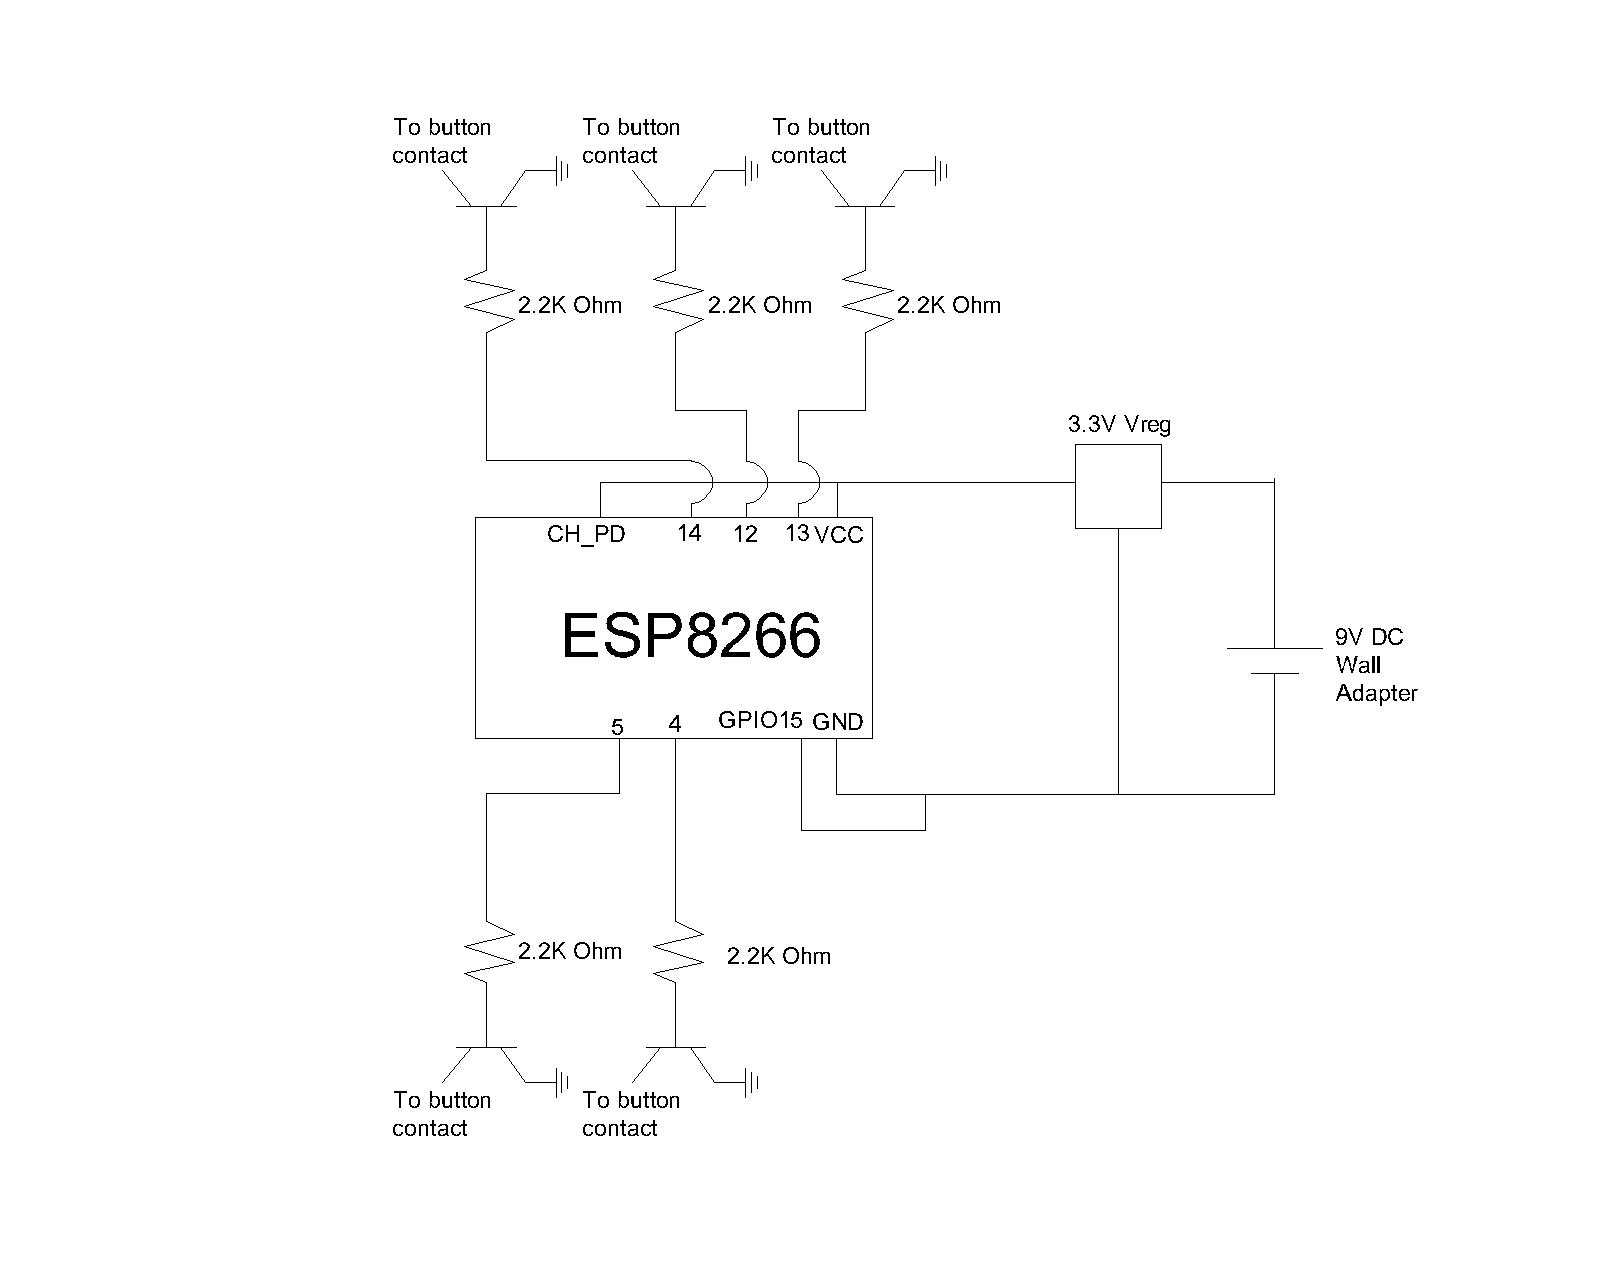
To circumvent this, I disassembled one remote and soldered transistors directly to the physical button contacts. An esp8266 is used to control the transistors, allowing me to switch them using the cayenne dashboard or via other wifi connected microcontrollers.
The old remote had functions for fan speed, light on/off and dimmer. The built in buttons and sliders in the cayenne dashboard allow me to use all functionality of the old remote, plus I can set the dimmer level to a specific value right away, rather than having to look at the light while I adjust it.
Furthermore, this all fits inside the old remote housing! I opted to add a barrel connector to the bottom for power, so when “docked” it works as either a physical remote or wifi-connected remote, and when unplugged the physical remote still works due to the internal 9v battery.
What's Connected5x 2N2222 Transistor 5x 2k ohm resistor ESP8266 microcontroller 3.3v switching regulator Female Barrel connector -> 9v DC wall power 9V alkaline battery
Arduino Sketchhttps://github.com/dpeters1/Wifi-Ceiling-Light-Fan-Remote
The arduino sketch is very simple and just deals with the inputs from the cayenne dashboard. For the light on/off and fan control, I am just controlling the HIGH/LOW behaviour of the GPIO pins. The dimmer is a bit more complicated because it is normally adjusted by long-pressing the on/off button on the remote. Cayenne does not have this functionality so instead the arduino has to keep track of the current dimmer level and calculate how long the pin should be pulled HIGH to reach the next desired brightness. As usual with the ESP8266 boards, I am using the OTA method to upload to them as it allows me to modify the code even once it's installed in the remote.
Cayenne IntegrationSimple but it works well. Finally a project where I can use the right widget logo!
Photos of the Project


Comments
Please log in or sign up to comment.