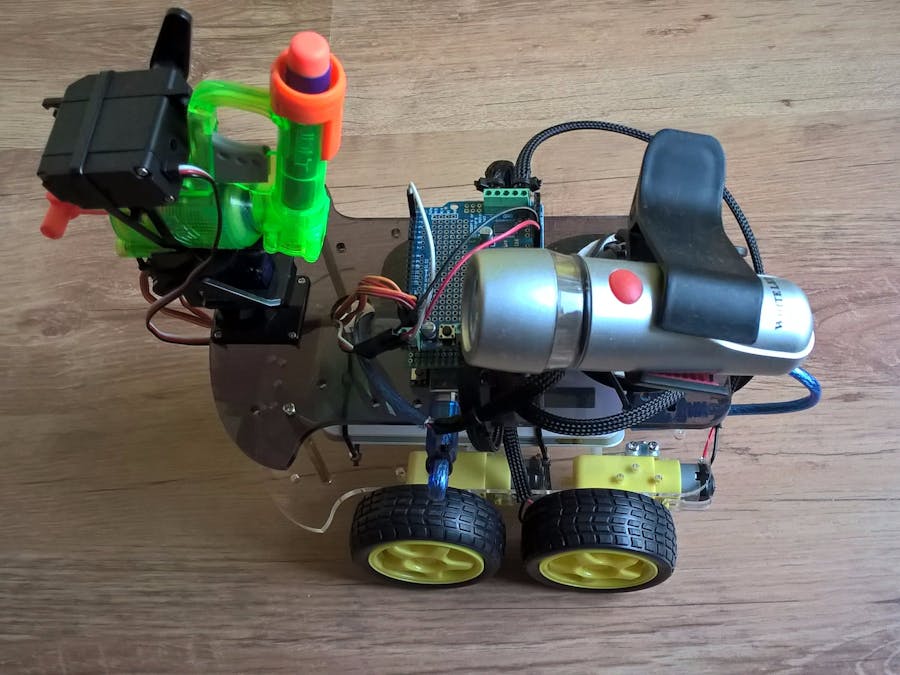
This four wheeled robot is able to move wirelessly via Bluetooth connection. It is controllable by a retrolink Nintendo 64 USB controller using Johnny-Five library. A Nerf gun is mounted to the chassis and users are able to shoot with it. There is also a flashlight attached to lighten dark areas.
You can see the circuit of the main parts in figure 1.
figure 1 - Fritzing diagram
Powering
Due to the amount of electronic components (4 DC motors, 3 servos, etc) the best option is the usage of an USB power bank with high capacity. I have used a 10000 mAh Proda bank for the project. There is only one problem with most power banks. If there is not enough current drained from the batteries, the bank will shut down within a few seconds. Thankfully there are enough active power consumers in the circuit so this feature will not cause any trouble. I had to break the original USB cable and create another endpoint for powering the motor shield as well. So Arduino gets 5V from the power bank directly through it's USB slot and the motor shield gets another 5V from parallel connection. If you remove the jumper from the motor shield, you can power both boards separately. This is more optimal than powering motors and servos directly from the Arduino board. You can find more info at Adafruit.
Bluetooth Connection
I have used an HC-06 Bluetooth module to establish connection between the car and my computer. I wanted to use as few cables as possible, so I decided to build a custom shield by soldering the Bluetooth module to an empty prototype shield and attach to the Arduino.
Movement
I have used a Nintendo 64 controller with USB connection. You can see it in figure 2.
figure 2 - USB Nintendo 64 controller
To be able to use this controller in Javascript context, you need to install some third party libraries which support it. I have used node-gamepad which can offer a simple API and understandable documentation.
The robot is able to do the following movements/actions:
Joystick - move forward, backward and can rotate the robot
C Up, C Down, C Right, C Left - Move the Nerf mount to the preferred direction
A - Move the trigger servo to shoot with the Nerf gun
B - Move back the trigger servo
Nerf Gun
The idea of the Nerf automation is to mount it onto a Pan/Tilt camera platform. There are tons of these on the internet, usually without servos, so make sure you have a pair if you ordered just the simple mount. I've used two TowerPro SG90 servos for positioning and one continuous servo for triggering fire. I have used a short fishing line attached to the servo and the gun trigger. The servo has the power to make enough force to pull the trigger when activated.
figure 3 - Nerf gun, mount, and three servos
See it in Action
You can see the Nerf gun in action in the following video. The project was in an early state when I captured this, so some parts are missing and the power sources are 4 rechargeable AA batteries plus a 9V battery for the Arduino instead of a power bank (they drained really fast).
video 1 - Nerf gun in action
The Code
I have used NodeJS with Johnny-Five to make this project. You can find the full code in my GitHub repository linked below.
There are three main components of the code:
Board Module - Handle the Arduino board
Motor Module - Handle the motor movements and control bindings
Servo Module - Handle the servo movements and control bindings
import { BoardModule } from'./src/boardModule';
import { MotorModule } from'./src/motorModule';
import { ServoModule } from'./src/servoModule';
const port = 'COM26';
const speed = 255;
let boardModule = new BoardModule(port);
let motorModule = new MotorModule(speed);
let servoModule = new ServoModule();
boardModule.initBoard().then(() => {
motorModule.initMotors();
servoModule.initServos();
});
After initialization of motors and servos, the gamepad should be instantiated and we are free to set the bindings for controlling each part via our Nintendo 64 controller. See this snippet for example:
As you can see, each key press triggers two events: press and release. Press callback will be executed after the button pressed and release will be executed when we release it. In this way, we have the opportunity to stop our moving parts.
The joystick of the gamepad have a bit more different configuration. It's about coordinates based on the direction where we move the stick. You can see the setup in the following code snippet:
gamePad.on('center:move', (coords) => {
    if (coords.x == 127 && coords.y == 0) this.motorsForward();
    if (coords.x == 127 && coords.y == 255) this.motorsBackward();
    if (coords.x == 0 && coords.y == 127) this.motorsLeft();
    if (coords.x == 255 && coords.y == 127) this.motorsRight();
    if (coords.x == 127 && coords.y == 127) this.motorsStop();
});
Last Words
Hope you like this little project which is another proof of concept about proving the power of Johnny-Five and Javascript robotics in general. The flashlight is just an extra, sitting on a phone mount. It is not controllable at the moment but can be with relays. Maybe in my next project.


_ztBMuBhMHo.jpg?auto=compress%2Cformat&w=48&h=48&fit=fill&bg=ffffff)


Comments
Please log in or sign up to comment.