


Hardware components | ||||||
 |
| × | 1 | |||
 |
| × | 1 | |||
 |
| × | 1 | |||
| × | 1 | ||||
 |
| × | 1 | |||
 |
| × | 1 | |||
 |
| × | 1 | |||
 |
| × | 4 | |||
 |
| × | 1 | |||
 |
| × | 1 | |||
Software apps and online services | ||||||
 |
| |||||
| ||||||
Hand tools and fabrication machines | ||||||
| ||||||
Raspberry Pi runs a Node.js 14 server. Because of that, the piano can be accessed by anywhere and by any device that has a network connection and an installed browser.
The server provides a website that contains 4 pages:
- "Piano" is the main page and presents tiles, a list of themes, a controller with which you can select Chords or Notes view, and buttons for the seven octaves.
- "About" page contains information about the Raspberry Pi development board and the project.
- "Demo" page has some videos and images with the project running.
- "Stats" page includes information about the development board like temperature of the processor, available RAM. There is also listed network data.
The default port of the server is 6789. In order to access the pages, you have to insert the authorization code which is also 6789. You can change the port and the authorization code by modifying the cfg.json file.
The static part of the interface is written in HTML 5 decorated with CSS 3. Keys are simple divs that have different classes.
The dynamic part of the interface is written in JavaScript (client side), and provides responses for actions like hovering, pressing a tile or changing visual aspects. The communication with the server (get and post methods) is also written in JavaScript. I used AJAX for asynchronous programming. Some elements like selected theme, selected octave, chords or notes view are stored on the server for a smooth experience.
The server processes requests for different pages (there is actually a layout for the entire site so the pages look similar), but also contains the logic for interpreting the pressed keys (with mouse or with keyboard (Z-M for tones and S-J for Semitones).
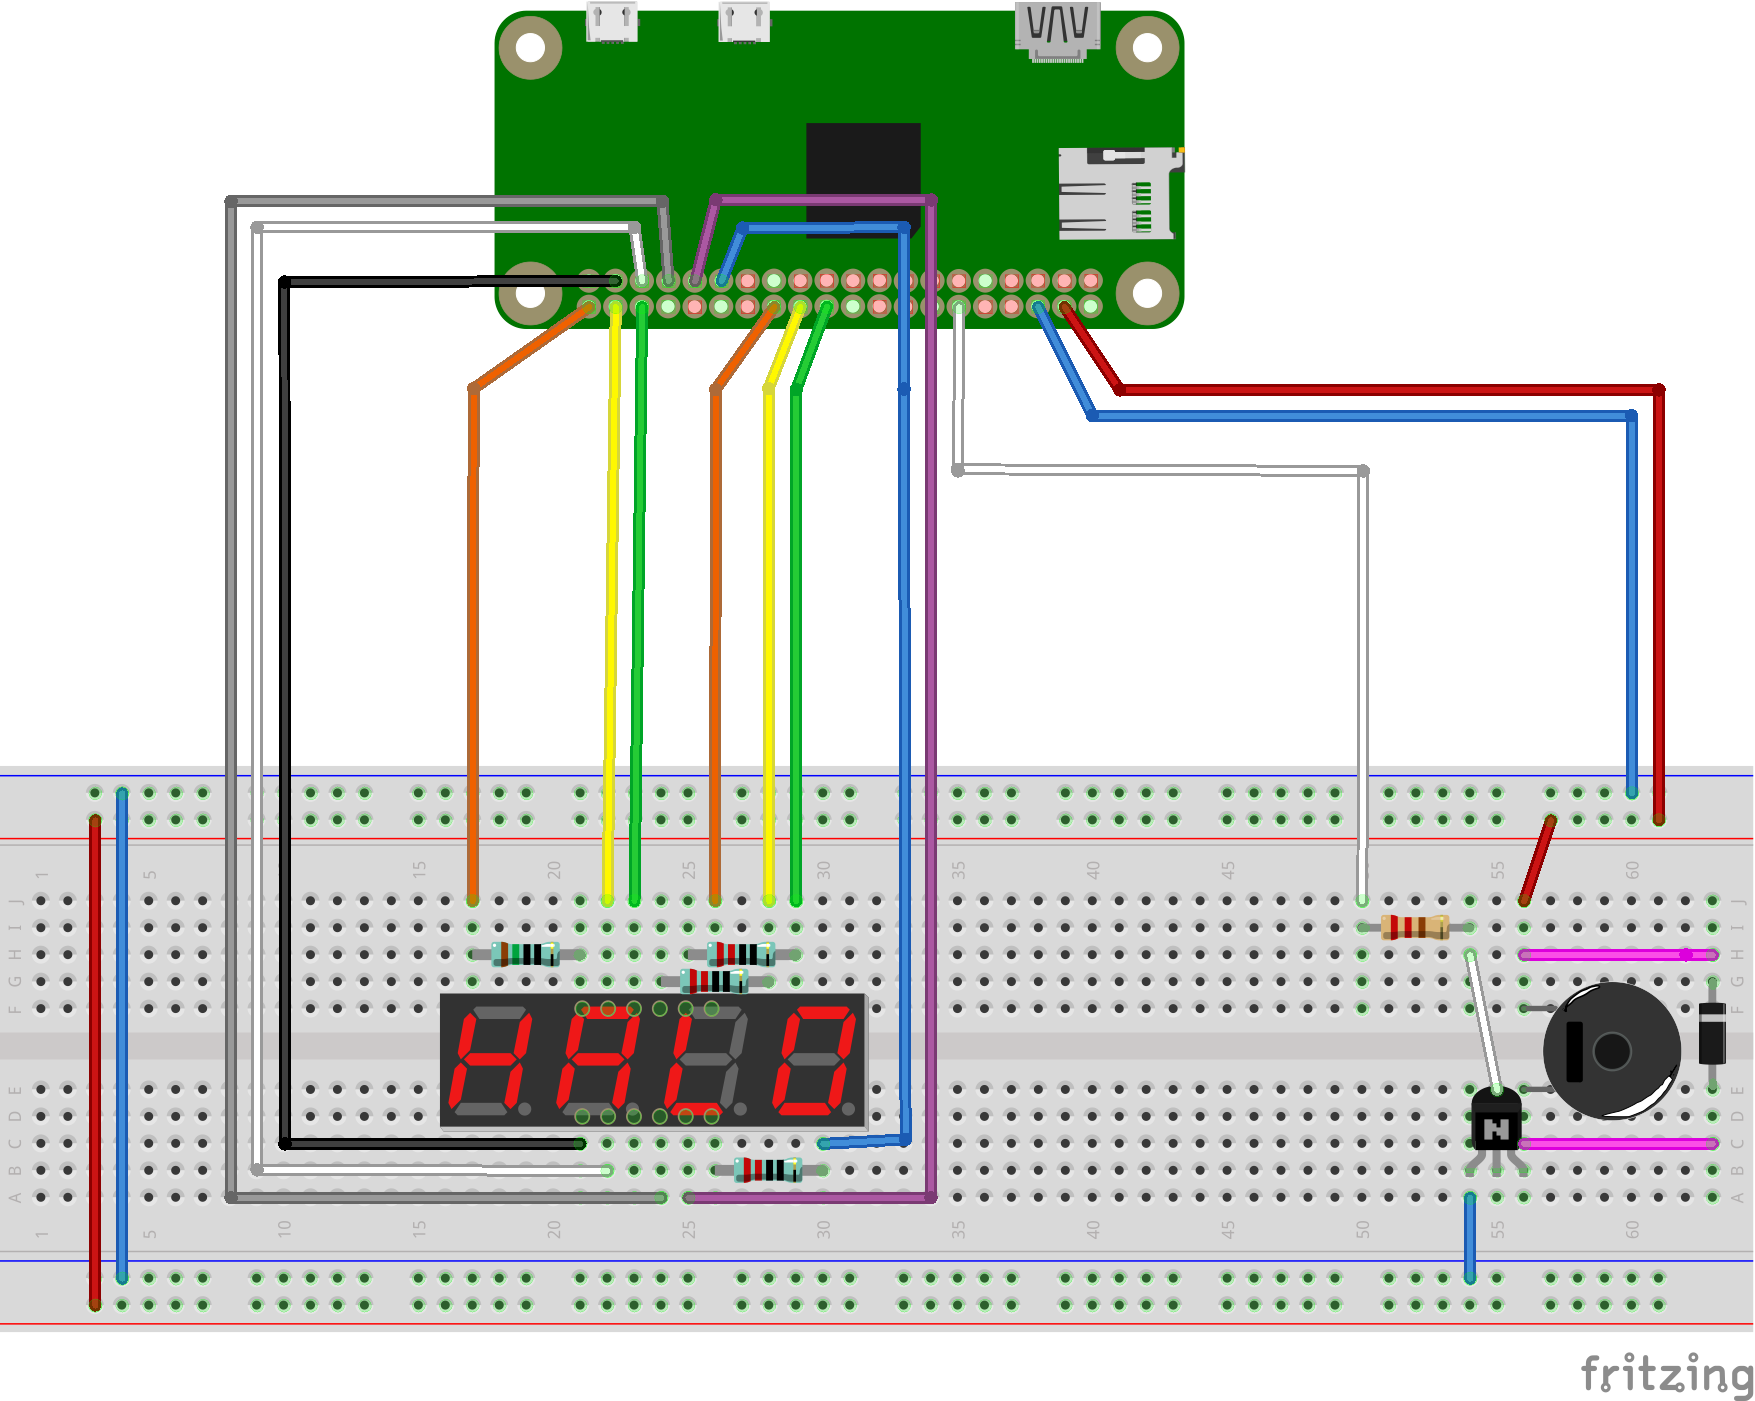
When the server starts, it spawns a python process that handles GPIO pins. When a key is pressed, the server passes the information to the python script which controls the buzzer and the display.
The buzzer is controlled by a PWM (Pulse Width Modulation). Frequency corresponds to the musical note and duty cycle is always 50%.
In the schematic you will see a BJT (bipolar junction transistor) for current amplification and to relieve stress of the pin. The output voltage of the ARM 11 processor is 3.3V, but because of the transistor, the buzzer uses 5V direct from the power supply.
The diode is present because the passive buzzer is a piezoelectric component that generates reverse voltage when unplugged.
The display is 4 digit 7 segments common Cathode display. It shows the frequency of the sound that the buzzer sings. Because it uses leds, I inserted 4 resistances on every digit cathode to limit current through it.
In order to replicate this project you need to clone the git repository linked bellow and install:
- Node.js (Chrome's V8 JavaScript engine based interpreter for server side JavaScript)
- Python 3
- pigpio library (to control hardware PWM)
- RPI.GPIO library (to control GPIO)
After that change directory to RPi-Piano and:
- Initialize the Node.js dependencies
npm init
npm install
npm install express --save
npm install ejs --save
npm install express-ejs-layouts --save
npm install body-parser --save
npm install express-ejs-layouts
npm install session- Spawn pigpio library daemon (you will need root permission)
sudo pigpiodThe repository contains only active files (javascript, server side javascript, HTML, CSS, images, python). Node.js packages and configurations are not saved because they depend on the operating system and, even more, on the processor. For example you will need different package configuration for RaspberryPi Zero W and RaspberryPi 3, although both of them run Raspbian (Debian for Raspberry) on an ARM processor.
Next you will see some demos.
And in the final, some photos I took.


Comments
Please log in or sign up to comment.