


Hardware components | ||||||
 |
| × | 1 | |||
 |
| × | 1 | |||
 |
| × | 1 | |||
 |
| × | 1 | |||
 |
| × | 1 | |||
 |
| × | 1 | |||
Software apps and online services | ||||||
| ||||||
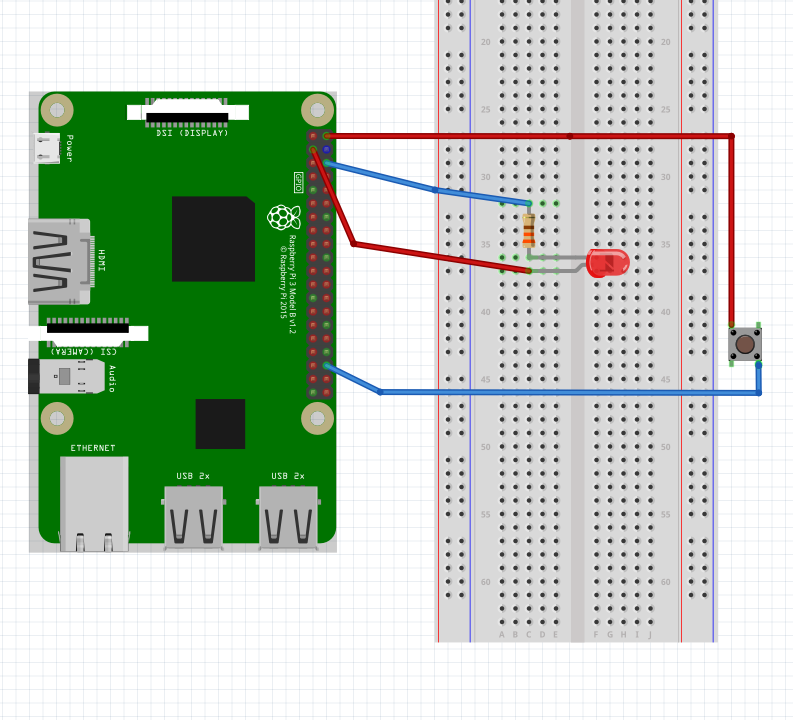
One of the first hardware hacking examples a new RPi owner is encouraged to try out is turning on an LED via the RPi’s GPIO interface. The standard examples use the Python programming language, but its also possible to do everything you need to do on the RPi with a browser base circuit/logic simulator like shown below.
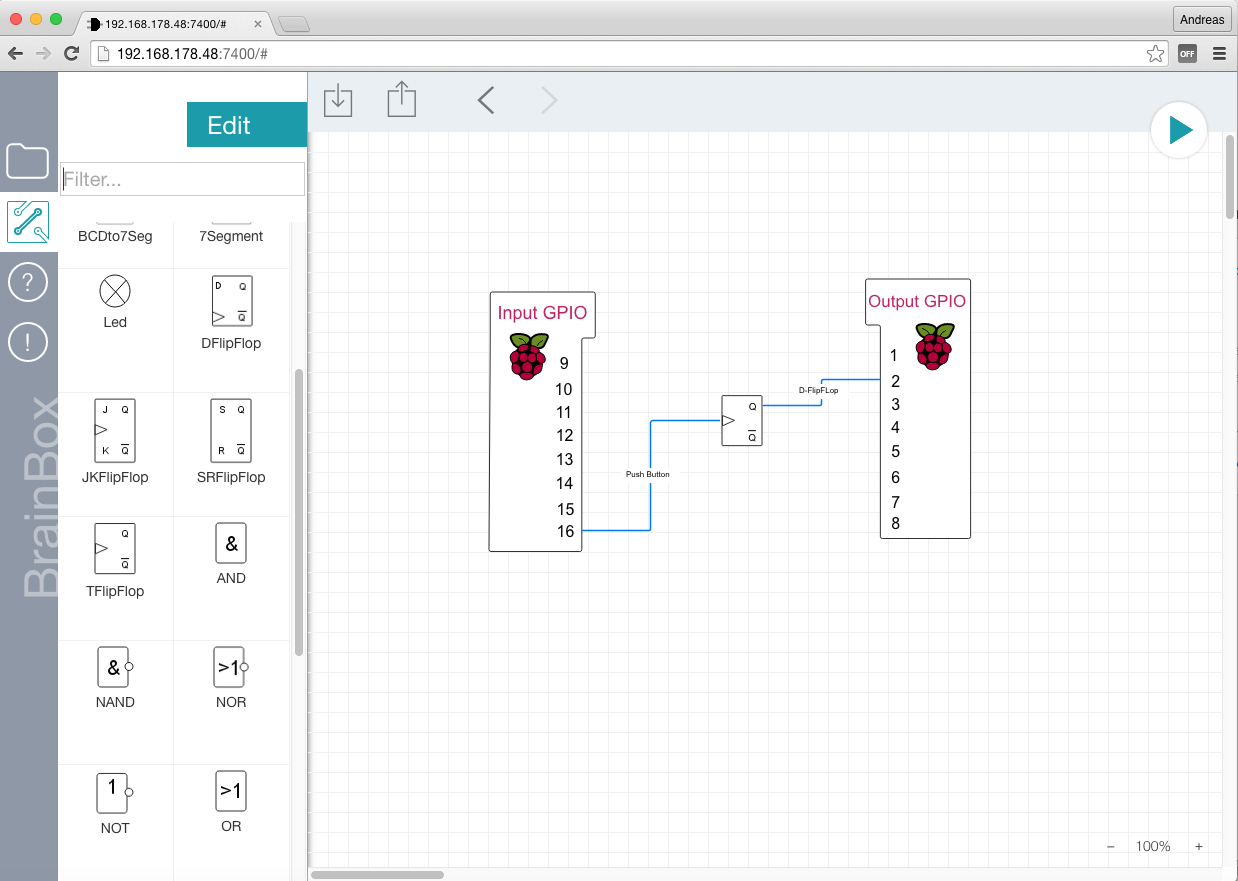
This example shows you how to use the RaspiGPIO element in the brainbox to read the push-button and control the LED's on the RaspberryPi board.
As the name of the software indicates - it works just as the brain of your circuit. In this case a simple D-Latch which drives the wanted behavior.
We turn on one LED when the button is pressed once, and off when pressed twice.
Sounds easy and far from rocket science, but keep in mind that we connect a real physical push button and an LED with a circuit simulator running in your web browser. The very first step to IoT.
Install Brainbox via npmBrainbox is a node application running on your Raspberry Pi. If Node.js is already running on your Raspberry you just need to install the node module with npm on your RPi console. If not - just read this nice blog how to install them.
> npm install -g brainbox
After this you can start the node application by enter brainbox. Now you can enter the URL, which is reported in the console with your web browser and getting started to wire up the diagram shown in the video below.
I hope that this has encouraged you to have a go at physical computing using the Pi's GPIO and the circuit simulator brainbox. It all starts with a simple LED, but it can take you to incredible places. Do not underestimate the fun, creativity, and sense of achievement you can get from a little computer and a bunch of pins.
Have fun! And if you do make something cool please let me know.


_3u05Tpwasz.png?auto=compress%2Cformat&w=40&h=40&fit=fillmax&bg=fff&dpr=2)
Comments
Please log in or sign up to comment.