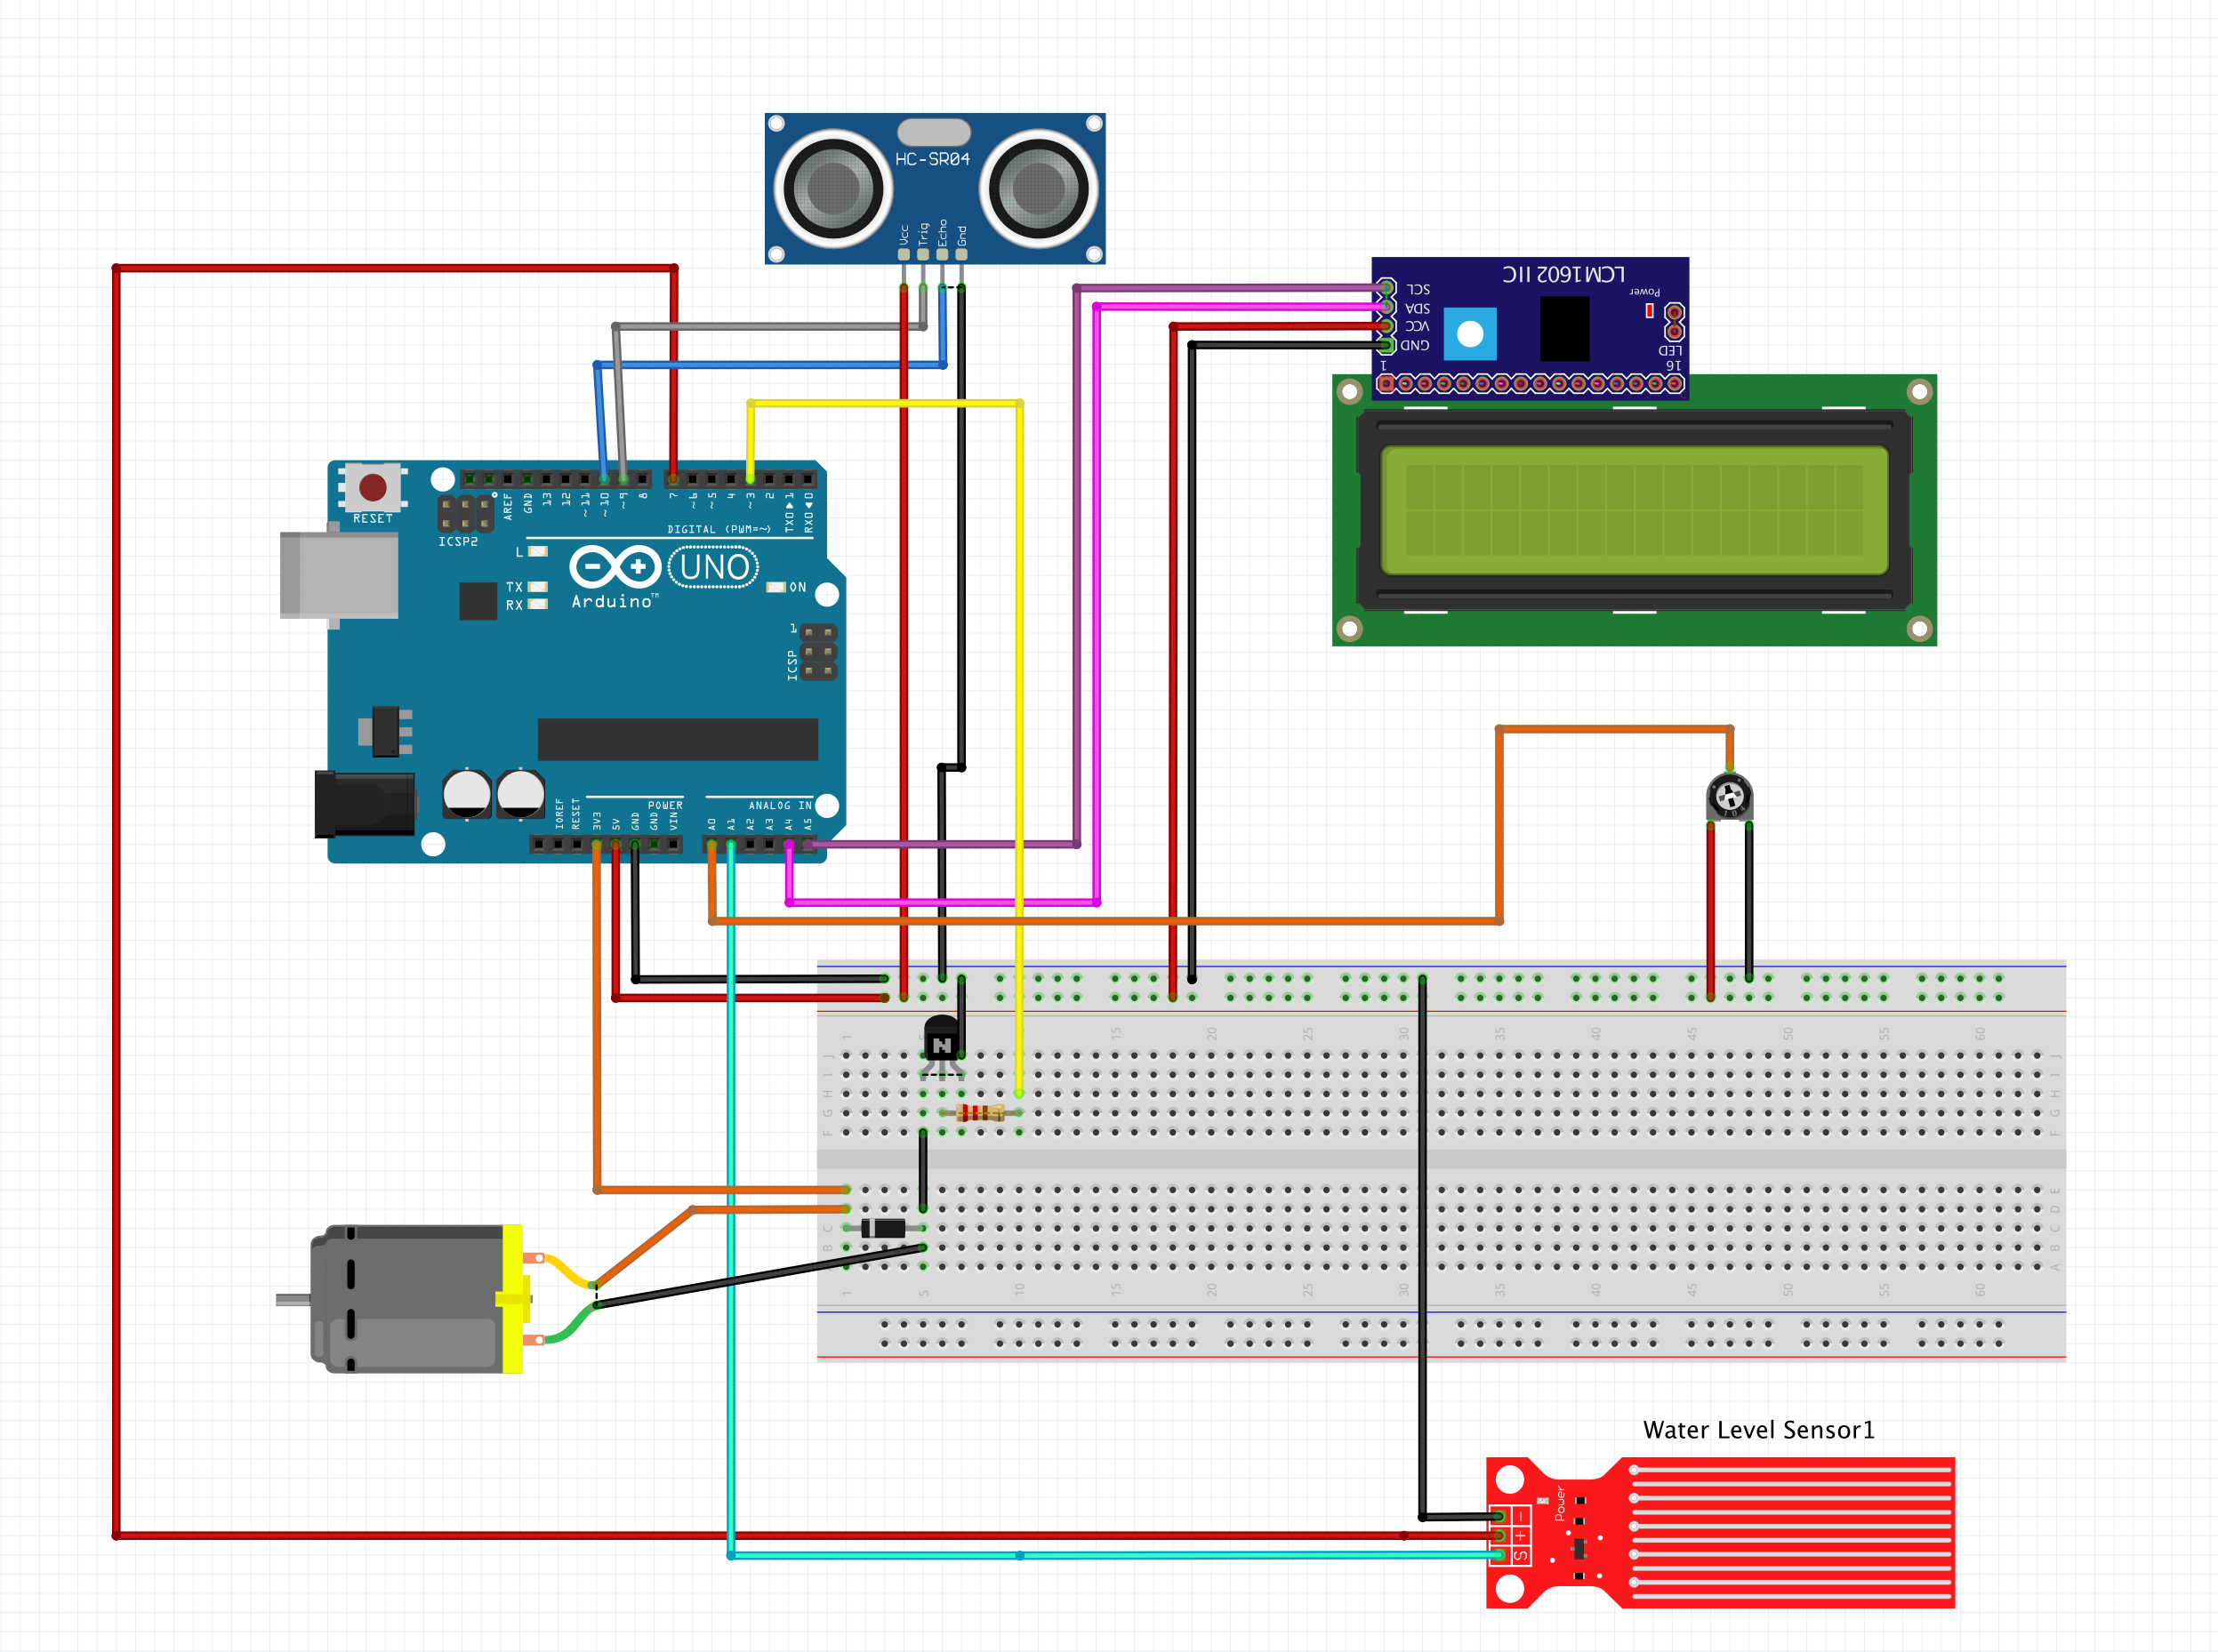
What if you could make certain amounts of hand sanitizer last the period of time you want to manage your spendings? Or what if you could manage the exact number of showers you want your gel to last? This solution could help you reduce, control and predict your spending on liquids.
This project consists of a smart dispenser that measures an initial volume of liquid, gets an input about the duration the user wants it to last, and it makes the calculations in order to dispense the correct amount of liquid in order to reach the duration goal set.
This is a specific usage of the smart dispenser system, but it can be later extended to achieve different objectives.
Functionality of the circuitThe idea is to have a smart dispenser that dispenses a calculated amount of liquid based on the duration input by the user (through the use of a potentiometer), and the initial liquid level measured by a water level sensor, which sends the information to the Arduino.
For the smart dispenser to dispense it waits for a signal from the presence sensor. When it gets the signal, the Arduino turns on the pump until the liquid drops to the desired water level. The following image is a logic table of the functionality.
The presence input is HIGH when the distance measured by the ultrasonic sensor is lower than the specified distance in the code. The water level input is HIGH when its value is bigger than the variable calculated in the code.
Circuit designWe are using an LCD L2C screen that already has a built-in resistance so the LCD does not get harm and another built-in a potentiometer that we use to protect and adjust the brightness of the screen.
The following subcircuit includes the motor. Since we have a motor and voltage going through it, we use a flyback diode to prevent voltage spikes from the inductor contained in the motor that may cause damage to circuit components. As you can see here, we also included a BJT transistor and this is an early step. We included the BJT to use as a switch to turn on and off the motor basing on the state of the other components in the circuit. Finally, we placed a 220-ohm resistance before this BJT for the transistor to work optimally.


_ztBMuBhMHo.jpg?auto=compress%2Cformat&w=48&h=48&fit=fill&bg=ffffff)


Comments
Please log in or sign up to comment.