*******
Please visit https://proteshea.com/serial-monitor-and-keypad-with-arduino-uno/ for a complete list of materials needed for this project.
*******
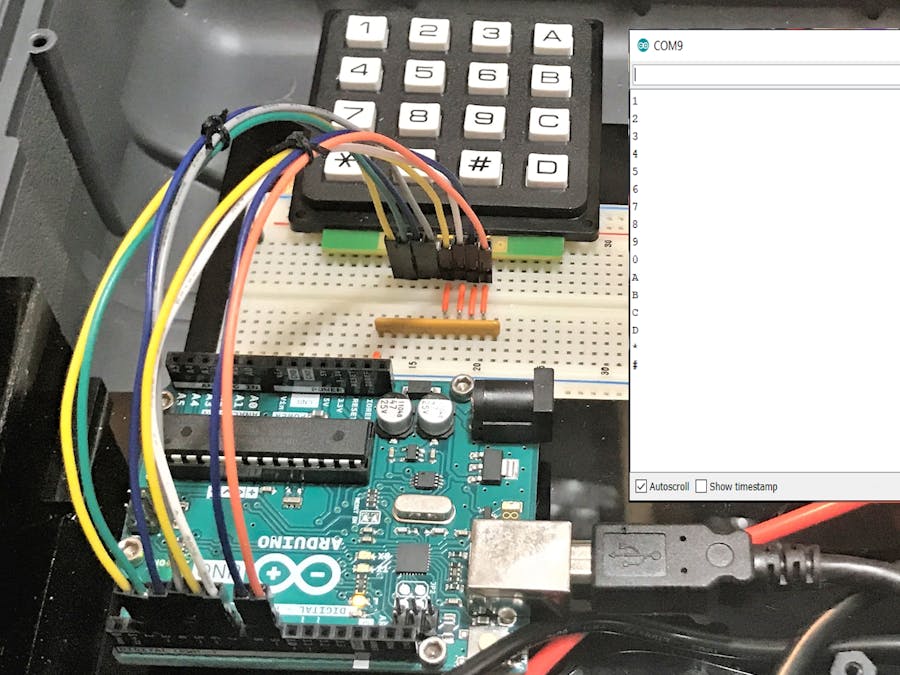
IntroductionIf you haven’t read our Getting Started Guide or Project 2 for the Arduino Uno Rev3 (Uno), please read that first. Otherwise, continue reading. In this tutorial, we’ll remove the LED Bar Graph from Project 2, and send the key pressed to the Arduino IDE’s built-in serial monitor. The serial monitor is very convenient since we don’t have to download our own serial terminal such as RealTerm.
16-Key Matrix KeypadPlease see Arduino Uno Rev3 Project 2 to learn more about the 16-key keypad layout and circuitry.
Serial TerminalThe serial terminal is useful when you want to send serial data to and from your laptop and Arduino. It uses a UART (Universal Asynchronous Receiver/Transmitter) protocol which consists of two wires, a transmit (Tx) and receive (Rx) line. Data flows from Tx -> Rx and vice versa. It uses a start and stop bit to define the beginning and end of the data packet being sent or received. You can configure the baud rate which is the transmission speed of the data. Typically, you see baud rates such as 1200, 2400, 4800, 9600, 19200, 38400, 57600, and 115200. To ensure that you have a successful communication link, both devices that are communicating with each other, must be set to the same baud rate. Otherwise, one device will sample the data either too fast or too slow, resulting in corrupt data.
For example, if you set the baud rate on one device to 9600, the other device it is communicating with must also be set to 9600. To set the Uno’s baud rate, we can leverage the function Serial.begin().All you have to do is pass in the baud rate as the argument. For the example above, we would use Serial.begin(9600).
To open up the Serial Monitor in the Arduino IDE, click on Tools -> Serial Monitor as shown in the image below.
Once the Serial Monitor opens up, we have to specify the baud rate which is located in the bottom-right corner of the window. In the top-left corner, you will see which COM port it is connected to. Make sure this port is set to the one that your Uno is connected to.
The serial terminal is a half-duplex system which means that it can transmit and receive data, but not simultaneously. For example, if we transmit data from the computer to the Uno, we can not receive data from the Uno.
WiringI’m using a breadboard instead of Modulus to mount the keypad and resistor array.
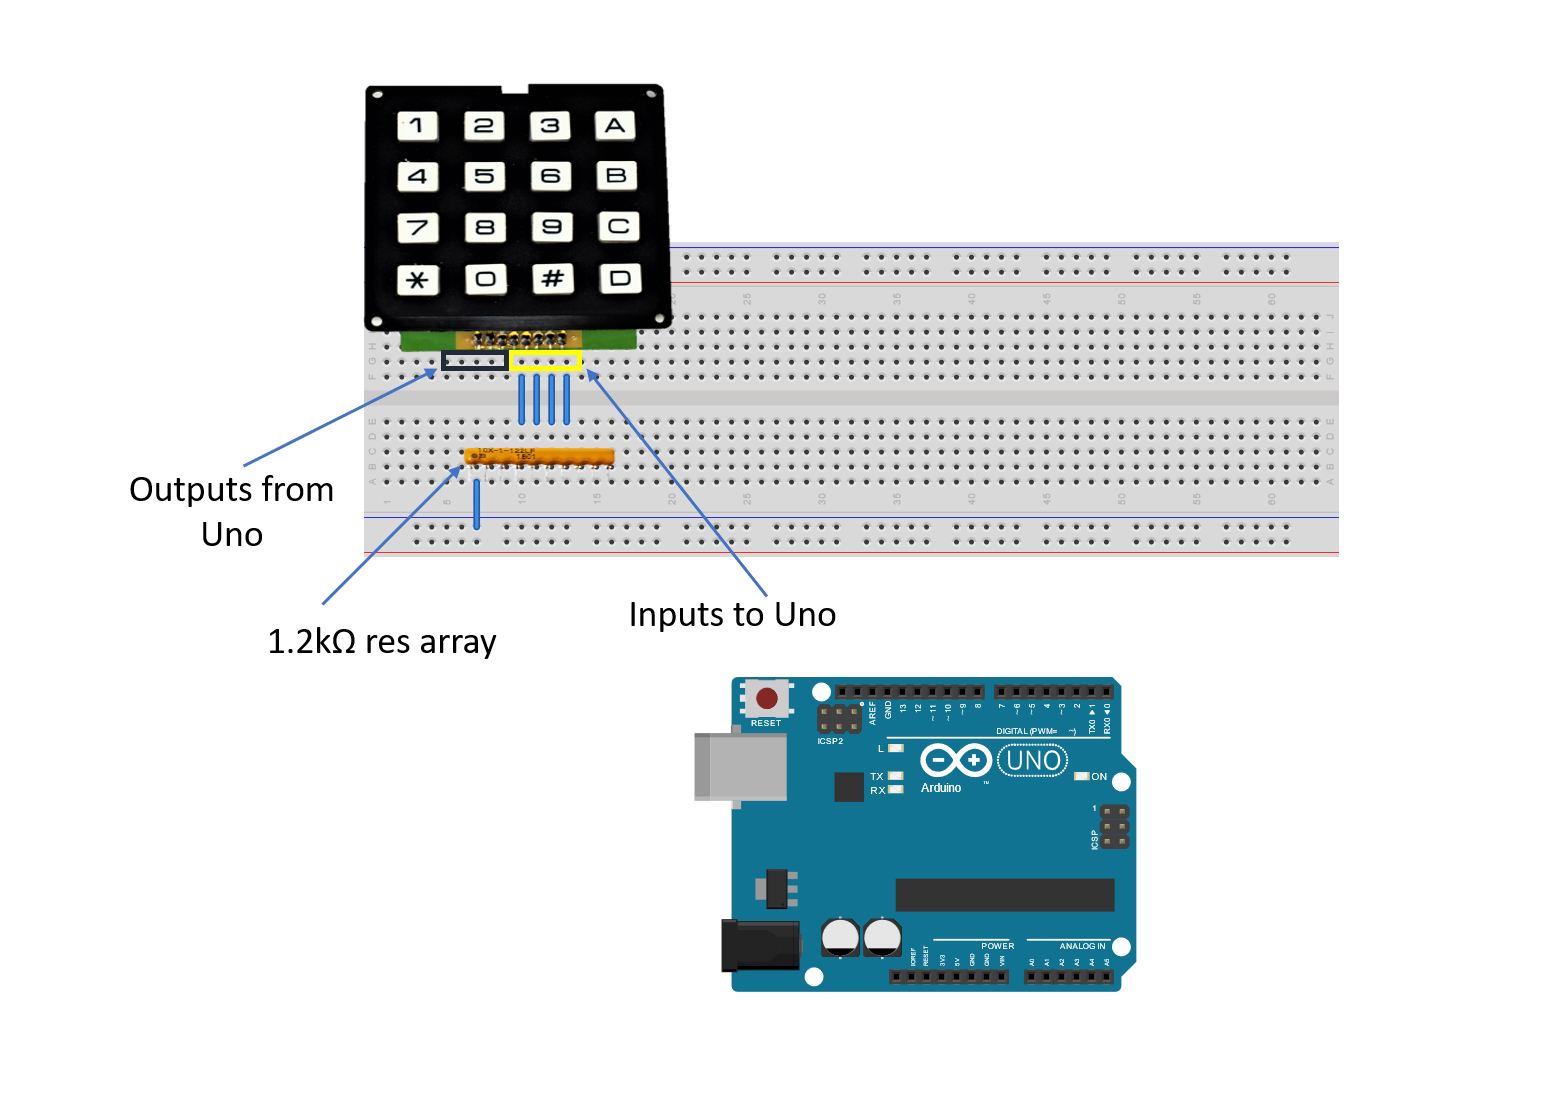
Place the 1.2k ohm resistor array as shown in the image below. Tie pin 1 of the array to GND, and make sure it does not connect to any of the pins on the keypad. The breadboard holes outlined in blue-grey will be tied to Uno pins 2-5. For example, pin 1 (column 1) on the keypad will be wired to Uno pin 2, pin 2 (column 2) on the keypad will get wired to Uno pin 3, and so on. The breadboard holes outlined in yellow get routed to Uno pins 6-9. For example, pin 5 (row 1) on the keypad will be wired to Uno pin 6, pin 6 (row 2) on the keypad will get wired to Uno pin 7, and so on.
If you haven’t mounted the Uno onto the prototyping area of the FuelCan, go ahead and do that. I placed the breadboard in the bottom storage compartment to limit the length of the jumper wires. We need to supply GND to the ground rail on the breadboard. Use the provided banana jack to test-lead clip cable to do so. You will need one male header pin to mount the test-lead clip to on the breadboard side. Plug the Type A side of the USB cable into the USB1 receptacle and the Type B side into the Uno’s receptacle. There is a UART-to-USB chip on the Uno so the serial data will get sent through the USB cable. Plug in the Type A to Type A USB cable into a USB port on your computer and the external USB connector of the FuelCan. Power up the FuelCan with the AC-DC power adapter.
SoftwareOnce the wiring is complete and the FuelCan is powered up, we can now load the sketch onto the Uno. The sketch is below. If you do not have the Serial Monitor open, go ahead and open that and make sure that the baud rate is set to 9600. Press each key on the keypad and watch as it displays the key pressed on the serial terminal. If you notice that the number or letter gets displayed twice, you can increase the delay to add more time for the switch to settle.


Comments
Please log in or sign up to comment.