


You can read this and other amazing tutorials onElectroPeak's official website
OverviewIn many electronic projects it is necessary to run an operation according to the time or date And the calculation of the time and date shouldn’t stop when the system shuts down. For this purpose, Real Time Clock (RTC) modules are used. In this tutorial, you will learn how to use RTC DS1 with Arduino to make a reminder.
What You Will Learn:- What RTC is
- Introduction to DS1307 module
- How to use DS1307 with Arduino
- How to make a smart reminder
Real Time Clock or RTC is a system that keeps track of the current time and can be used in any device which needs to keep accurate time.
You can also keep tracking the exact time without using RTC systems, but RTCs have some important advantages. Here are some of these advantages:
- Low power consumption
- Releasing system time from time calculation (this feature is critical because in many cases CPU is operating some delicate tasks like receiving sensors data. and if you don’t use RTC, CPU also has to keep track of the time and it can disrupt processors main tasks.)
- High accuracy
RTCs often have an alternate source of power, so that they can continue to keep time while the primary source of power is off or unavailable. RTCs often use a 32.768 kHz crystal oscillator. But why 32, 768? 32768 is equal to 215 and hence can generate 1 second easily. Also, the crystal must be small with proper width and low power consumption, which can be satisfied with using 32876 Hz. Higher frequencies are larger and fragile crystals, and the lower frequencies have more power consumption that 32, 768KHz.
DS1307 Module Feature & SpecificationsDS1307 module is one of the most affordable and common RTCs modules. It can accurately keep track of seconds, minutes, hours, days, months, and years.
Some of the DS1307 important features are:
- Ability of Generating Programmable Square-Wave
- Low Current Use; under 500nA in Battery Backup mode
- The Ability to Set the Date Up to Year 2100
- I2C Serial Interface
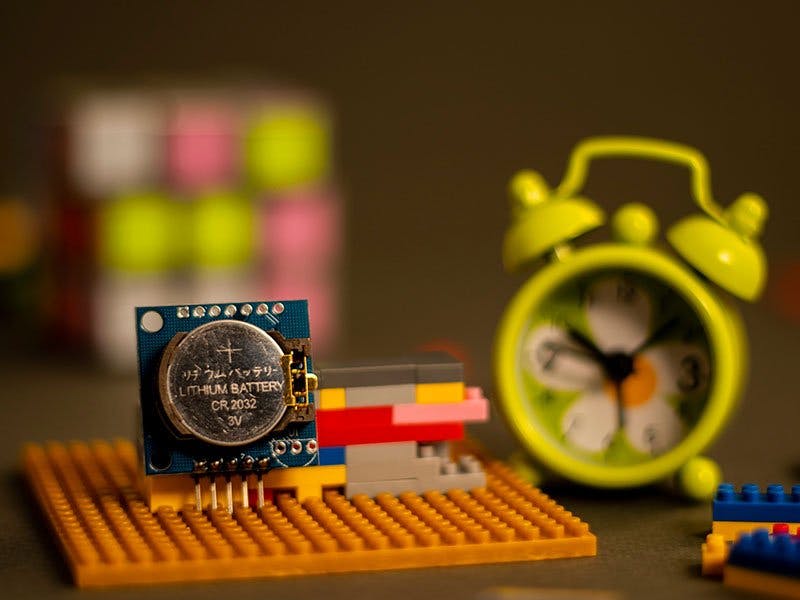
The DS1307 module has the capability to install a 3-volt CR2023 backup battery. there is also an embedded EEPROM 24c32 memory on this module that can save 32kb of data. In addition, you can measure the environment temperature by installing a DS18B20 sensor on the built-in-place. And you can also read the backup battery voltage from BAT pin.
Using this module is simple, RTC part communicates with the microcontroller using I2C protocol.
Circuit
Code
You need the RTClib library to use DS1307 with Arduino.
Now upload the following code on your board and see the result in the serial monitor window.
// Date and time functions using a DS1307 RTC connected via I2C and Wire lib
#include <Wire.h>
#include "RTClib.h"
RTC_DS1307 rtc;
char daysOfTheWeek[7][12] = {"Sunday", "Monday", "Tuesday", "Wednesday", "Thursday", "Friday", "Saturday"};
void setup () {
 while (!Serial); // for Leonardo/Micro/Zero
 Serial.begin(57600);
 if (! rtc.begin()) {
   Serial.println("Couldn't find RTC");
   while (1);
 }
 if (! rtc.isrunning()) {
   Serial.println("RTC is NOT running!");
   // following line sets the RTC to the date & time this sketch was compiled
   rtc.adjust(DateTime(F(__DATE__), F(__TIME__)));
   // This line sets the RTC with an explicit date & time, for example to set
   // January 21, 2014 at 3am you would call:
   // rtc.adjust(DateTime(2014, 1, 21, 3, 0, 0));
 }
}
void loop () {
 DateTime now = rtc.now();
 Serial.print(now.year(), DEC);
 Serial.print('/');
 Serial.print(now.month(), DEC);
 Serial.print('/');
 Serial.print(now.day(), DEC);
 Serial.print(" (");
 Serial.print(daysOfTheWeek[now.dayOfTheWeek()]);
 Serial.print(") ");
 Serial.print(now.hour(), DEC);
 Serial.print(':');
 Serial.print(now.minute(), DEC);
 Serial.print(':');
 Serial.print(now.second(), DEC);
 Serial.println();
 Serial.print(" since midnight 1/1/1970 = ");
 Serial.print(now.unixtime());
 Serial.print("s = ");
 Serial.print(now.unixtime() / 86400L);
 Serial.println("d");
 // calculate a date which is 7 days and 30 seconds into the future
 DateTime future (now + TimeSpan(7, 12, 30, 6));
 Serial.print(" now + 7d + 30s: ");
 Serial.print(future.year(), DEC);
 Serial.print('/');
 Serial.print(future.month(), DEC);
 Serial.print('/');
 Serial.print(future.day(), DEC);
 Serial.print(' ');
 Serial.print(future.hour(), DEC);
 Serial.print(':');
 Serial.print(future.minute(), DEC);
 Serial.print(':');
 Serial.print(future.second(), DEC);
 Serial.println();
 Serial.println();
 delay(3000);
}
You can set the date and time in two ways. First is to set them on your PC by using the following code:
rtc.adjust(DateTime(F(__DATE__), F(__TIME__)));
and the second way is to set date and time manually using the following code:
rtc.adjust(DateTime(YEAR, MONTH, DAY, HOUR , MINUTE, SECOND));
NoteYou need to set up date and time in your projects just once, and after that, you should delete the related line from your code. Otherwise, date and time will be set any time you turn the system on and it can cause some mistakes.
NoteUploading the code on your Arduino takes a few seconds and it can cause a few seconds delay in your time, compared to real time. So we suggest you to set your time a few seconds earlier before uploading the code.
Bonus Project: Make a Smart ReminderYou can make a simple and useful reminder using DS1307 module.
Other Required Materials
Circuit
Code
Upload following code on your Arduino board and your smart reminder is ready!
/*
Arduino Reminder
modified on 13 March 2019
by Saeed Hosseini @ Electropeak
https://electropeak.com/learn/
*/
#include <LiquidCrystal.h>
#include <Wire.h>
#include "RTClib.h"
#define NOTE_C4  262
#define NOTE_D4  294
#define NOTE_E4  330
#define NOTE_F4  349
#define NOTE_G4  392
#define NOTE_A4  440
#define NOTE_B4  494
#define NOTE_C5  523
#define NOTE_D5  587
#define NOTE_E5  659
#define NOTE_F5  698
#define NOTE_G5  784
#define NOTE_A5  880
#define NOTE_B5  988
//LCD Pin to Arduino
const int pin_RS = 8;
const int pin_EN = 9;
const int pin_d4 = 4;
const int pin_d5 = 5;
const int pin_d6 = 6;
const int pin_d7 = 7;
const int pin_BL = 10;
//BUZZER Pin to Arduino
const int buzzer = 2;
LiquidCrystal lcd( pin_RS,  pin_EN,  pin_d4,  pin_d5,  pin_d6,  pin_d7);
RTC_DS1307 rtc;
byte smiley[8] = {
 B00000,
 B10001,
 B00000,
 B00000,
 B10001,
 B01110,
 B00000,
};
String menuItems[] = {"1-Medicin", "2-Wake up", "3-Go out"};
int songspeed = 1.5;
int flag = 0;
int menuPage = 0;
int maxMenuPages = round(((sizeof(menuItems) / sizeof(String)) / 2) + .5);
int cursorPosition = 0;
int btn;
int h = 0, m = 0;
int duration[] = {         //duration of each note (in ms) Quarter Note is set to 250 ms
 125, 125, 250, 125, 125,
 125, 125, 250, 125, 125,
 125, 125, 250, 125, 125,
 125, 125, 375, 125,
 125, 125, 250, 125, 125,
 125, 125, 250, 125, 125,
 125, 125, 250, 125, 125,
 125, 125, 375, 125,
 125, 125, 250, 125, 125,
 125, 125, 250, 125, 125,
 125, 125, 250, 125, 125,
 125, 125, 125, 250, 125,
 125, 125, 250, 125, 125,
 250, 125, 250, 125,
 125, 125, 250, 125, 125,
 125, 125, 375, 375,
 250, 125,
 //Rpeat of First Part
 125, 125, 250, 125, 125,
 125, 125, 250, 125, 125,
 125, 125, 375, 125,
 125, 125, 250, 125, 125,
 125, 125, 250, 125, 125,
 125, 125, 250, 125, 125,
 125, 125, 375, 125,
 125, 125, 250, 125, 125,
 125, 125, 250, 125, 125,
 125, 125, 250, 125, 125,
 125, 125, 125, 250, 125,
 125, 125, 250, 125, 125,
 250, 125, 250, 125,
 125, 125, 250, 125, 125,
 125, 125, 375, 375,
 //End of Repeat
 250, 125, 375, 250, 125, 375,
 125, 125, 125, 125, 125, 125, 125, 125, 375,
 250, 125, 375, 250, 125, 375,
 125, 125, 125, 125, 125, 500,
 250, 125, 375, 250, 125, 375,
 125, 125, 125, 125, 125, 125, 125, 125, 375,
 250, 125, 375, 250, 125, 375,
 125, 125, 125, 125, 125, 500
};
int notes[] = {       //Note of the song, 0 is a rest/pulse
 NOTE_E4, NOTE_G4, NOTE_A4, NOTE_A4, 0,
 NOTE_A4, NOTE_B4, NOTE_C5, NOTE_C5, 0,
 NOTE_C5, NOTE_D5, NOTE_B4, NOTE_B4, 0,
 NOTE_A4, NOTE_G4, NOTE_A4, 0,
 NOTE_E4, NOTE_G4, NOTE_A4, NOTE_A4, 0,
 NOTE_A4, NOTE_B4, NOTE_C5, NOTE_C5, 0,
 NOTE_C5, NOTE_D5, NOTE_B4, NOTE_B4, 0,
 NOTE_A4, NOTE_G4, NOTE_A4, 0,
 NOTE_E4, NOTE_G4, NOTE_A4, NOTE_A4, 0,
 NOTE_A4, NOTE_C5, NOTE_D5, NOTE_D5, 0,
 NOTE_D5, NOTE_E5, NOTE_F5, NOTE_F5, 0,
 NOTE_E5, NOTE_D5, NOTE_E5, NOTE_A4, 0,
 NOTE_A4, NOTE_B4, NOTE_C5, NOTE_C5, 0,
 NOTE_D5, NOTE_E5, NOTE_A4, 0,
 NOTE_A4, NOTE_C5, NOTE_B4, NOTE_B4, 0,
 NOTE_C5, NOTE_A4, NOTE_B4, 0,
 NOTE_A4, NOTE_A4,
 //Repeat of first part
 NOTE_A4, NOTE_B4, NOTE_C5, NOTE_C5, 0,
 NOTE_C5, NOTE_D5, NOTE_B4, NOTE_B4, 0,
 NOTE_A4, NOTE_G4, NOTE_A4, 0,
 NOTE_E4, NOTE_G4, NOTE_A4, NOTE_A4, 0,
 NOTE_A4, NOTE_B4, NOTE_C5, NOTE_C5, 0,
 NOTE_C5, NOTE_D5, NOTE_B4, NOTE_B4, 0,
 NOTE_A4, NOTE_G4, NOTE_A4, 0,
 NOTE_E4, NOTE_G4, NOTE_A4, NOTE_A4, 0,
 NOTE_A4, NOTE_C5, NOTE_D5, NOTE_D5, 0,
 NOTE_D5, NOTE_E5, NOTE_F5, NOTE_F5, 0,
 NOTE_E5, NOTE_D5, NOTE_E5, NOTE_A4, 0,
 NOTE_A4, NOTE_B4, NOTE_C5, NOTE_C5, 0,
 NOTE_D5, NOTE_E5, NOTE_A4, 0,
 NOTE_A4, NOTE_C5, NOTE_B4, NOTE_B4, 0,
 NOTE_C5, NOTE_A4, NOTE_B4, 0,
 //End of Repeat
 NOTE_E5, 0, 0, NOTE_F5, 0, 0,
 NOTE_E5, NOTE_E5, 0, NOTE_G5, 0, NOTE_E5, NOTE_D5, 0, 0,
 NOTE_D5, 0, 0, NOTE_C5, 0, 0,
 NOTE_B4, NOTE_C5, 0, NOTE_B4, 0, NOTE_A4,
 NOTE_E5, 0, 0, NOTE_F5, 0, 0,
 NOTE_E5, NOTE_E5, 0, NOTE_G5, 0, NOTE_E5, NOTE_D5, 0, 0,
 NOTE_D5, 0, 0, NOTE_C5, 0, 0,
 NOTE_B4, NOTE_C5, 0, NOTE_B4, 0, NOTE_A4
};
void show_time()
{
 lcd.clear();
 DateTime now = rtc.now();
 lcd.setCursor(0, 0);
 lcd.print("* Electropeak *");
 lcd.setCursor(5, 0);
 lcd.print(now.hour(), DEC);
 lcd.print(":");
 lcd.print(now.minute(), DEC);
 if (now.hour() == h && now.minute() == m)
 {
   lcd.clear();
   lcd.setCursor(0 , 0);
   switch (flag)
   {
     case 1:
       lcd.print("** ءedicine Time **");
       break;
     case 2:
       lcd.print("You'r late!!");
       lcd.setCursor(0, 1);
       lcd.print("Come onnnnnnn");
       break;
     case 3:
       lcd.print("Befor you go:");
       lcd.setCursor(0, 1);
       lcd.print("Wallet,Keys,...");
       break;
   }
   for (int i = 0; i < 203; i++) {       //203 is the total number of music notes in the song
     int wait = duration[i] * songspeed;
     tone(buzzer, notes[i], wait);        //tone(pin,frequency,duration)
     delay(wait);
   }
 }
 delay(2000);
}
void welcome_menu(int show_delay)
{
 lcd.setCursor(0, 0);
 lcd.print("Arduino reminder");
 lcd.createChar(1, smiley);
 lcd.setCursor(7, 1);
 lcd.write(1);
 delay(show_delay);
 lcd.clear();
}
int detect_button() {
 int readkey = 0;
 int result = 0;
 int activeButton = 0;
 while (activeButton == 0) {
   readkey = analogRead(0);
   if (readkey < 790) {
     delay(100);
     readkey = analogRead(0);
     if (readkey < 60) {
       result = 1; // right
     } else if (readkey < 200) {
       result = 2; // up
     } else if (readkey < 400) {
       result = 3; // down
     } else if (readkey < 600) {
       result = 4; // down
     } else if (readkey < 800) { result = 5; // select } return result; } } activeButton = 1; } int choose_menu() { lcd.clear(); lcd.print("Remmeber what?"); while (btn != 5) { btn = detect_button(); if (btn == 1) { if (menuPage > maxMenuPages) menuPage = 0;
     lcd.clear();
     lcd.print("Remmeber what?");
     lcd.setCursor(0, 1);
     lcd.print(menuItems[menuPage]);
     menuPage = menuPage + 1;
   }
 }
 return menuPage;
}
void set_alarm() {
 int sit = 0;
 lcd.clear();
 lcd.setCursor(1, 0);
 lcd.print("**Set Alarm**");
 lcd.setCursor(5, 1);
 lcd.print("00:00");
 while (sit != 1)
 {
   sit = detect_button();
   if (sit == 2)
   {
     lcd.clear();
     lcd.setCursor(1, 0);
     lcd.print("**Set Alarm**");
     h++;
     if (h > 23)
     {
       h = 0;
     }
     lcd.setCursor(5, 1);
     lcd.print(h);
     lcd.print(":00");
   }
   else if (sit == 3)
   {
     lcd.clear();
     lcd.setCursor(1, 0);
     lcd.print("**Set Alarm**");
     h--;
     if (h < 0) { h = 23; } lcd.setCursor(5, 1); lcd.print(h); lcd.print(":00"); } } while (sit != 5) { sit = detect_button(); if (sit == 2) { lcd.clear(); lcd.setCursor(1, 0); lcd.print("**Set Alarm**"); m++; if (m > 59)
     {
       m = 0;
     }
     lcd.setCursor(5, 1);
     lcd.print(h);
     lcd.print(":");
     lcd.print(m);
   }
   else if (sit == 3)
   {
     lcd.clear();
     lcd.setCursor(1, 0);
     lcd.print("**Set Alarm**");
     m--;
     if (m < 0)
     {
       m = 59;
     }
     lcd.setCursor(5, 1);
     lcd.print(h);
     lcd.print(":");
     lcd.print(m);
   }
 }
 lcd.clear();
 lcd.setCursor(0, 0);
 lcd.print("Alarm set");
 lcd.setCursor(0, 1);
 lcd.print("I'll be on time");
 delay(1500);
}
void setup() {
 lcd.begin(16, 2);
 rtc.begin();
 pinMode(buzzer, OUTPUT);
 welcome_menu(1000);
 flag = choose_menu();
 set_alarm();
}
void loop()
{
 show_time();
}
If you need more information about LCD Keypad Shield read Using 1602 LCD Keypad Shield w/ Arduino [+Practical Projects].
A menu will be displayed on LCD after turning on the device. Choose your reminder mode ( you can move between options by Right key and select your desired mode by pressing Select key.) then set your alarm time (set the hour by UP and Down key, then go to minutes by pressing Right and set it up.) Now get to your daily works without any worry!
What's Next?- Try to make a wake-up alarm
- Install temperature sensors on DS1307 module and try to make a cool graphic clock showing the environment temperature with TFT LCD 2, 4


Comments