


Hardware components | ||||||
| × | 1 | ||||
 |
| × | 1 | |||
 |
| × | 1 | |||
Software apps and online services | ||||||
| ||||||
IoT-ready device (Ameba RTL8195) is applied in real-life scenarios. If you have watched my previous examples, you should have no problem understanding how an LCD display, a DHT Temperature Humidity sensor and our Ameba dev. Board can be put together to form a fully functional smart weather station. Simply follow the instructions in our examples as follows to DIY your own weather station,
1. LCD 24H Clock,
https://www.hackster.io/empero1991/lcd-24h-clock-realtek-ameba-rtl8195-af39fa
2. MQTT,
https://www.hackster.io/empero1991/mqtt-realtek-ameba-rtl8195-868b5a
3. DHT+MQTT,
https://www.hackster.io/empero1991/dht-mqtt-realtek-ameba-rtl8195-96ac68
The key to integrate these 3 examples successfully is to make sure that you have set up your MQTT server correctly and note that here we are using a different set of MQTT topics, namely “dht_data” and “dht_status”. Also, when connect DHT sensor, D13 pin is used as data input pin.
With this smart weather station, you may,
1. Check real-time temperature and humidity from the LCD display
2. Receive warning message when abnormal humidity (higher than 80%) is detected
3. Query your home/office humidity and temperature on-the-go
Step1Finish up all hardware connections. There are two side Weather station side and client side(hand-phone)
refer to https://github.com/Realtek-AmebaApp/Ameba_Examples/tree/master/RTL8195AM/004_WEATHER_STATION
Download Arduino IDE, install Ameba RTL8195 board.
refer to https://www.amebaiot.com/en/ameba-arduino-getting-started/
Upload the ino code into board from Step1.
Weather_Station_LCD_DHT_MQTT.ino (from Github link above)
Step3Hand-phone side. Install the APP MQTT client. And use it to test the preference of the weather station.
Official pageshttps://www.amebaiot.com.cn/en/
Facebook pageshttps://www.facebook.com/groups/AmebaIoT/
YouTube channel,https://www.youtube.com/channel/UCplqTUNYZEoIKs0nAWf9DCQ
BiliBili channel,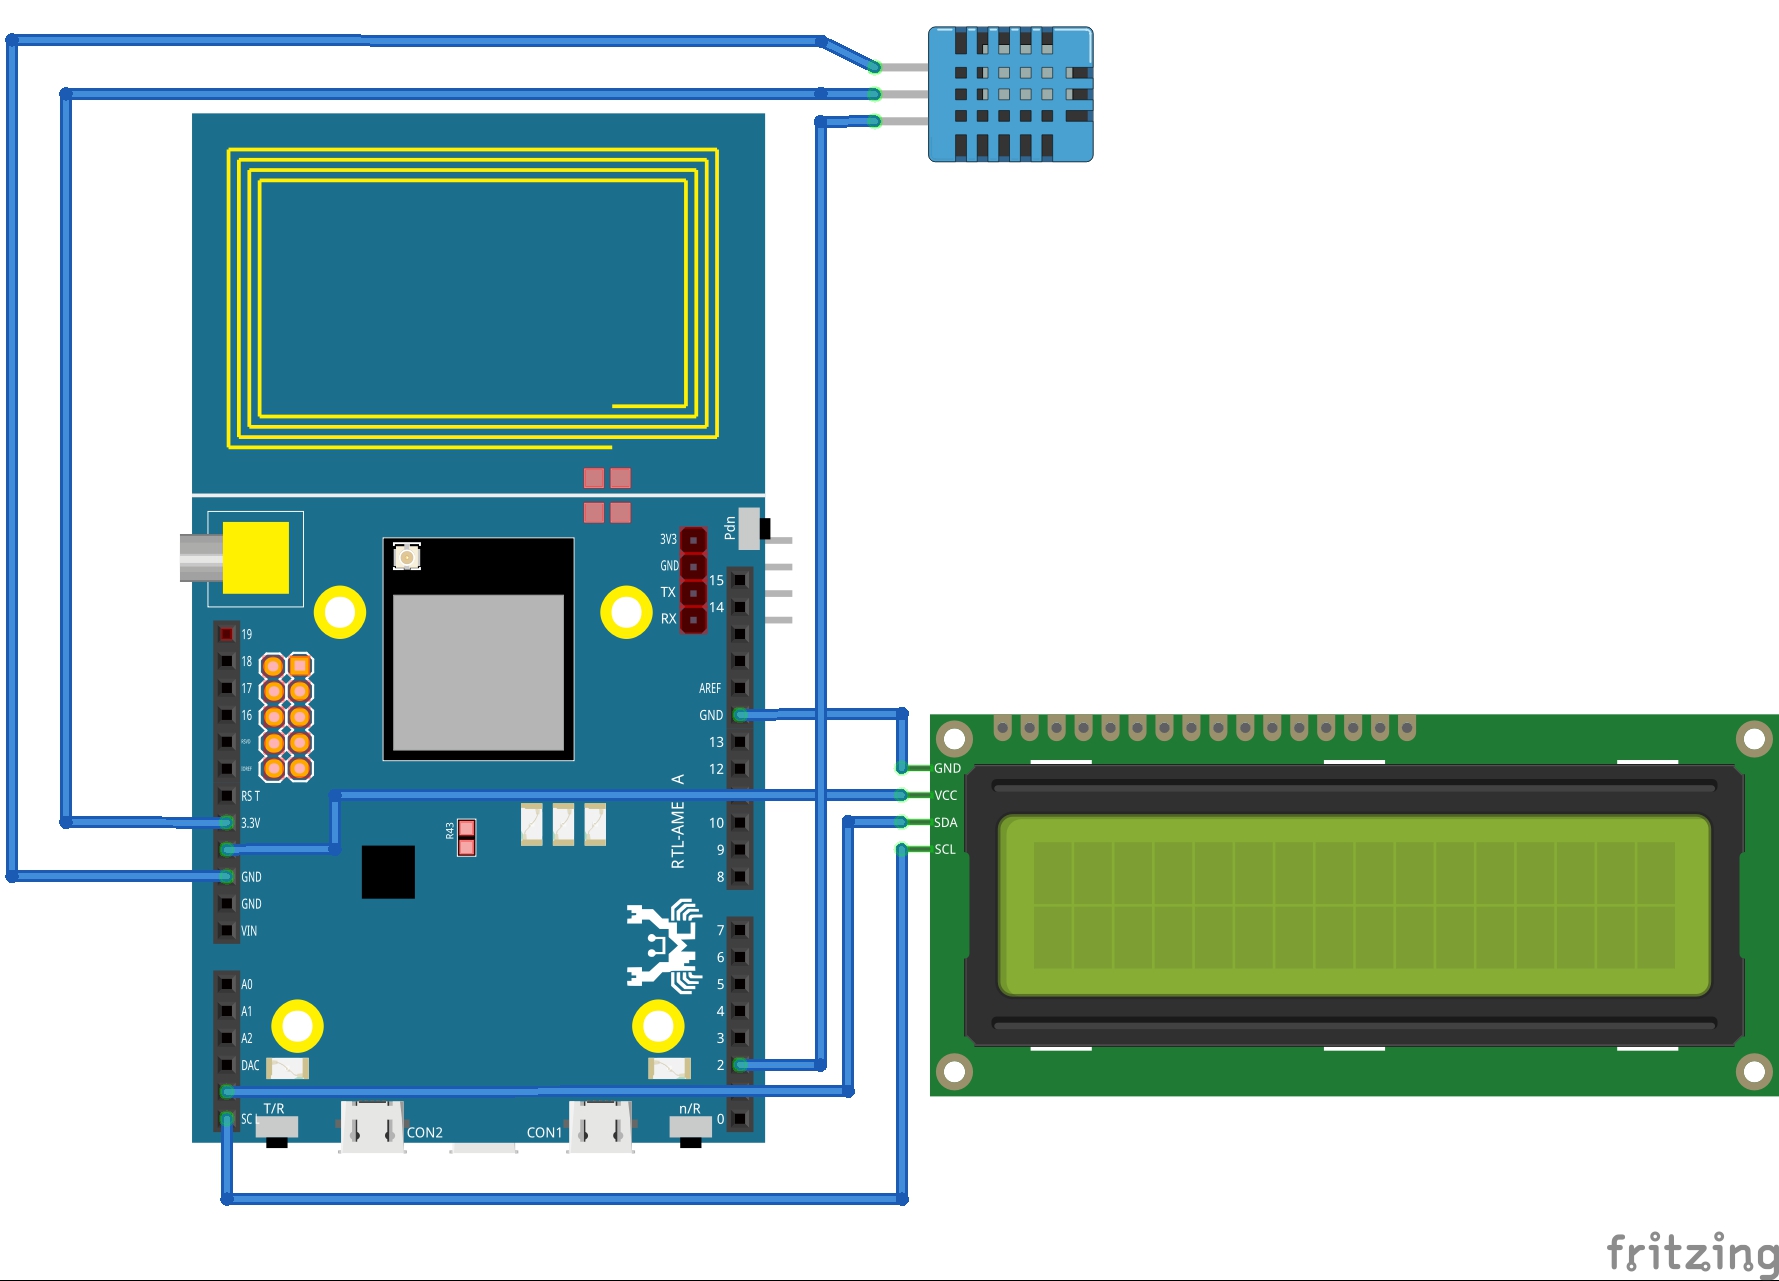


Comments
Please log in or sign up to comment.