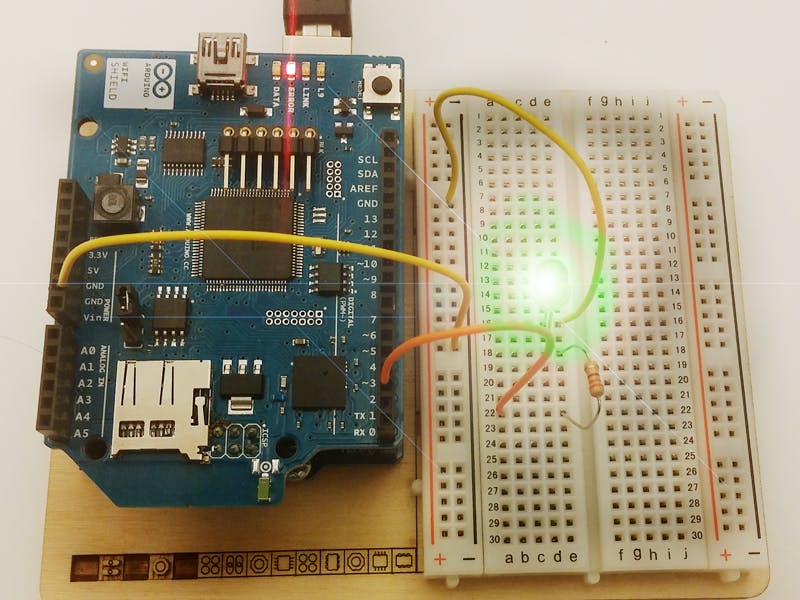
This example shows how to make an app that controls an Arduino board, by communicating over the TCP networking protocol. Communication with the Arduino is made using either a WiFi shield or an Ethernet shield. It also works fine with the Intel Edison version of the Arduino SDK.
When using a WiFi shield, you communicate directly from your mobile device to the Arduino. Make sure you are on the same LAN for this to work. When using an Ethernet shield, you communicate from the Arduino via a WiFi router, which in turn connects over WiFi to the smartphone (as phones don't have Ethernet connectors). The only prerequisite is that the phone and Arduino can reach each other over the network, using the same address range or DHCP server.
This is what you'll need in terms of parts, apart from computer, phone, small breadboard and cables:
- One LED diod in your favorite color
- One resistor, about 200Ω
- Arduino software, the Arduino SDK http://arduino.cc/download
- Desktop software, the Evothings Studio, https://evothings.com/download
- Evothings Viewer app from your favorite app store, simply search for "Evothings Viewer"
The example code for TCP blinking, is bundled with the Evothings Workbench.
Preparing the ArduinoThis is the Arduino schematics (note; there's no shield visible on top of the Arduino, in this illustration, for clarity). The short leg of the LED connects to GND (minus), plus end goes into Digital pin 2, as stated in the .ino file.
After downloading Evothings Studio, you'll find a sketch (.ino file) for the Arduino in the examples folder, corresponding to the Arduino TCP example. More specifically inside the Evothings main folder, you'll find the subfolder examples/arduino-input-tcp and the .ino file in either the arduinoethernet or arduinowifi folder depending on the shield hardware you want to use.
If you're connecting your Arduino over WiFi, you'll need to alter the access point name and password to suit your preferences, on line 62 and 66. If you're brave and don't use a password, just leave the pass[] empty.
Upload the sketch to your Arduino microcontroller, and open up the Serial monitor in the Arduino SDK. You should see something like the following:
Make a note of the IP Address, as you'll use it to make a connection from your phone in a bit. You'll see more messages in the Serial monitor, so you can keep it open.
Evothings Studio 101If you haven't started Evothings Studio yet, you can open it now by double-clicking. On a mac, you might need to get into System Preferences>Security & Privacy and click "Open anyway" to allow Evothings Studio to run for the first time.
Well inside the Evothings Studio, there are three important tabs for this tutorial; the Connect tab for connecting the PC to your phone, an Examples tab with templates and a third tab called My Apps. Select Examples and Copy the "Arduino TCP Blink" to "My Apps". The workbench switches to My Apps automatically. Press the Code button right by your fresh copy to see the app's files:
The two most important files in this project on the mobile side are the index.html file, where you'll find most of the structure, layout and links to all the resources. The javaScript file arduinotcp.js includes most of the action and there are functions for several low-level operations, such as reading analog input, which are useful many times but not part of this example.
Pro tip: Editing the default IP Address in the index.html (line 52)first, to the one leased to the Arduino saves you from the tedious work of entering it manually using the on-screen keyboard of your phone.
Once you've connected your Workbench to the Viewer app, you can press the Run button corresponding to your Arduino TCP example in My Apps in the Workbench.
Your Evothings Viewer updates and after pressing "Connect" it should be possible to turn the LED on and off from the phone over the network. Have a look into the Serial monitor for corresponding status messages, to see what's going on!
Automatic reloading!Now you can start editing your example, and every time you save one of the files, the code is pushed automagically to the connected Evothings Viewer app. No need to compile, sign, manual upload, in this world it just works!
There are plenty more code and examples, for Arduino, its compatibles and tons of other hardware.
Download Evothings StudioIt's easy to get started with Evothings Studio, and get started with your mobile IoT development today!
https://evothings.com/download


_ztBMuBhMHo.jpg?auto=compress%2Cformat&w=48&h=48&fit=fill&bg=ffffff)


Comments
Please log in or sign up to comment.