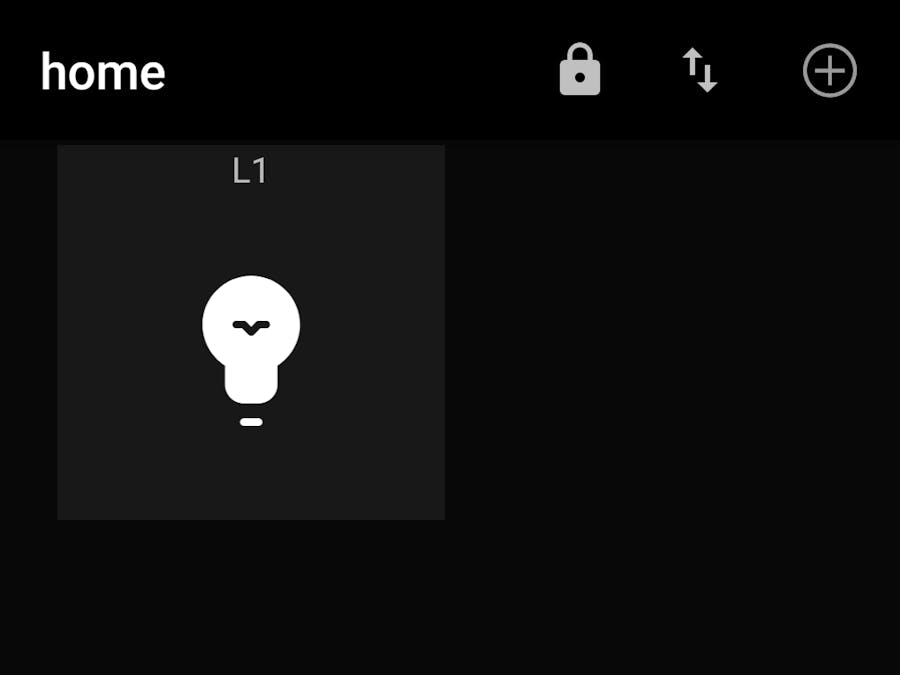
MQTT Dash is one of the best GUI apps on Android smartphone. It has a nice interface, easy customization and configuration, being one of the best applications I have ever used for this purpose.
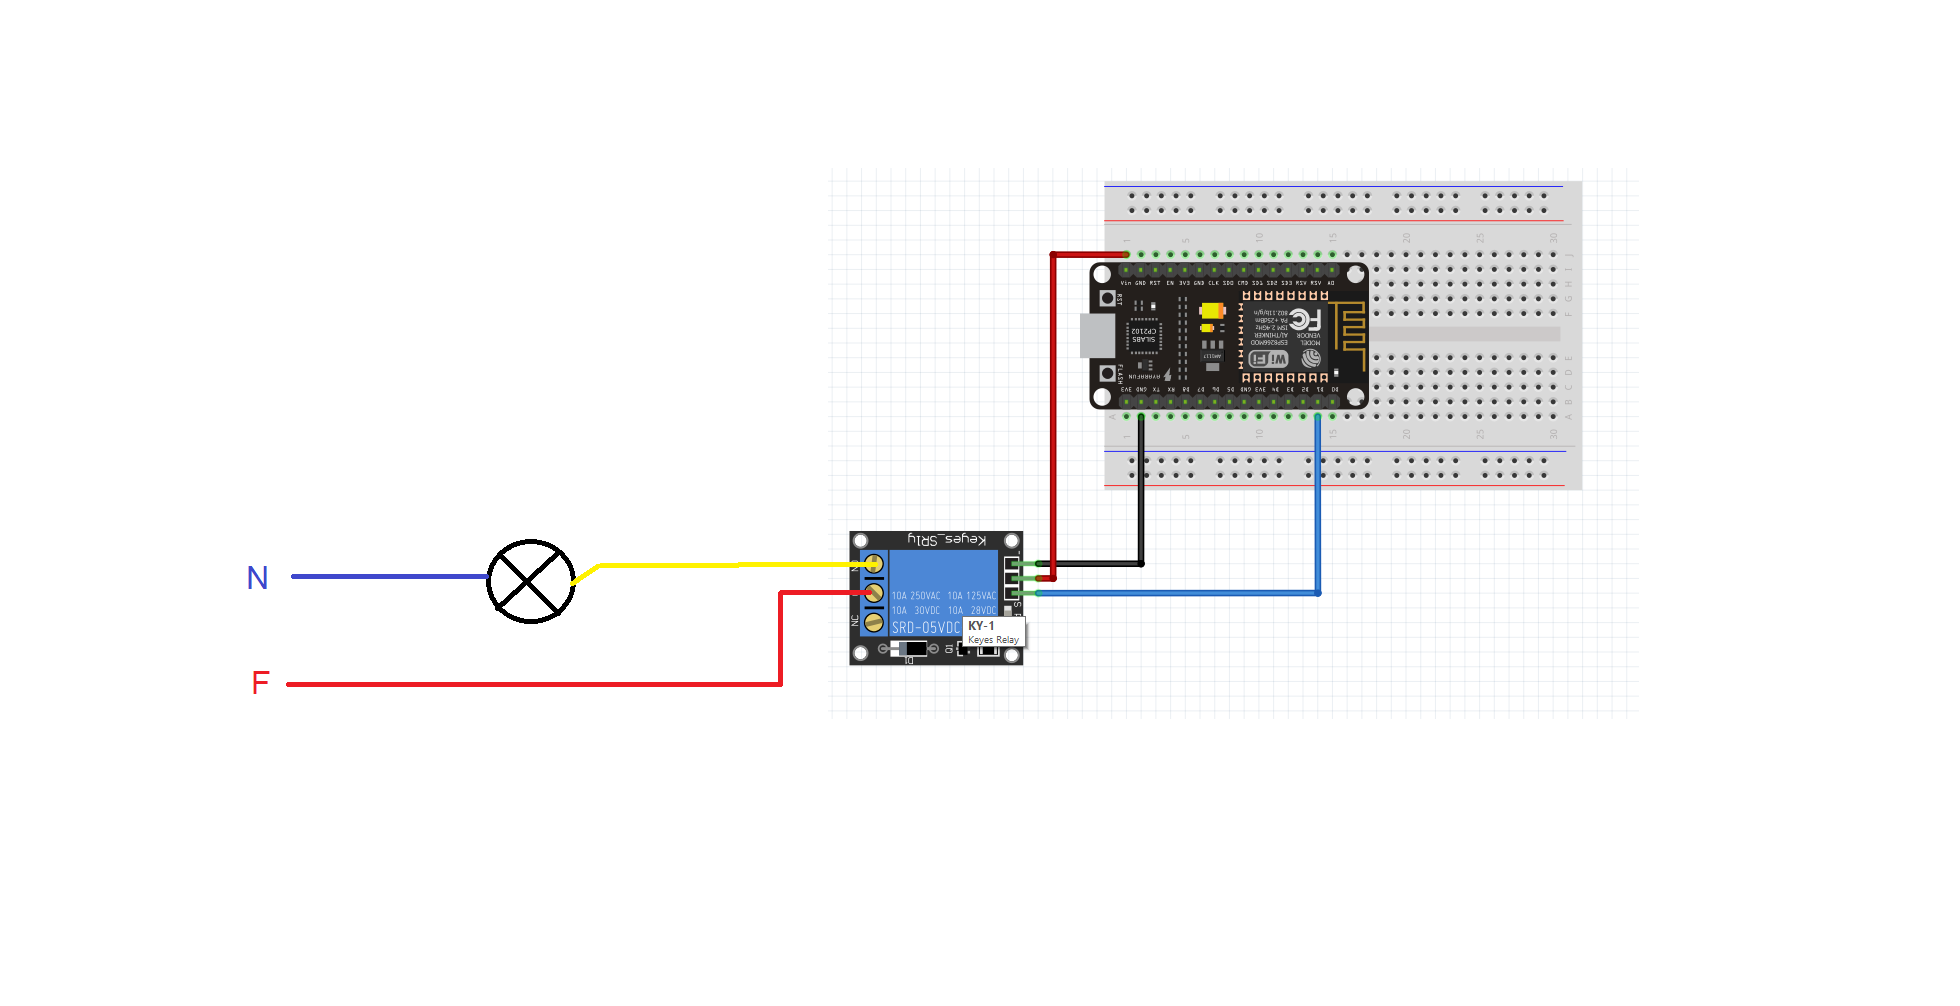
Here's how to use this app in conjunction with ESP8266 and an MQTT broker on CloudMQTT configured to remotely control a lamp over the Internet. See how easy it is!
Materials- NodeMCU ESP8266
- Relay module
- AC lamp
- Wire jumpers
- Android smartphone
You can also test the example presented here without relay and lamp just by using a board with ESP8266 and LEDs on a protoboard, for example.
WARNING! BE CAREFUL WHEN WORKING WITH AC POWER.Programming
For this application we need a MQTT broker. There are several MQTT Broker options available, and for our project will use CloudMQTT.
CloudMQTT manages a Mosquitto server in the cloud. It has has a free plan that allows 10 connections with a speed of 10 Kbit/s.
Creating an Instance in CloudMQTTVisit the CloudMQTT websiteand register. After login, click the "+ Create New Instance" button:
Give a name, choose the Free (Cute Cat) plan, and click Create a New Instance.
Open the newly created instance:
Here is the information you need to connect to MQTT Broker: Server, User, Password, and Port. We'll use this information later in the ESP8266 code and the MQTT Dash app.
CodeAs a subscriber, we will use a nodeMCU board that will drive a light bulb.
Replace WIFI (ssid, password) and Broker MQTT network (mqttServer, mqttUser, mqttPassword, mqttPort) information, indicated with x in the following code. Compile and upload to your board with ESP8266.
//Use MQTT Dash to control a lamp over the internet
//by Fábio Souza
#include <ESP8266WiFi.h>
#include <PubSubClient.h>

#define DEBUG
#define L1 2   //output pin to control Lamp state

//WIFI configuration
const char* ssid = "xxxxxxxx";           //SSID
const char* password =  "xxxxxxx";    //password

//MQTT broker information - Verify the information generated by CloudMQTT
const char* mqttServer = "soldier.cloudmqtt.com";   //server
const char* mqttUser = "vmcudkes";              //user
const char* mqttPassword = "0YK2MLj06TL3";      //password
const int mqttPort = 17226;                     //port
const char* mqttTopicSub ="home/L1";            //topic


WiFiClient espClient;

PubSubClient client(espClient);

void setup() {
 Serial.begin(115200);
 pinMode(L1, OUTPUT);
 WiFi.begin(ssid, password);
 while (WiFi.status() != WL_CONNECTED) {
   delay(500);
   #ifdef DEBUG
   Serial.println("Connected to WiFi network..");
   #endif
 }
 #ifdef DEBUG
 Serial.println("Connecting to a WiFi network");
 #endif
 client.setServer(mqttServer, mqttPort);
 client.setCallback(callback);
 while (!client.connected()) {
   #ifdef DEBUG
   Serial.println("Connecting to MQTT Broker...");
   #endif
   if (client.connect("ESP8266Client", mqttUser, mqttPassword )) {
     #ifdef DEBUG
     Serial.println("Connected");
     #endif
   } else {
     #ifdef DEBUG
     Serial.print("state failure  ");
     Serial.print(client.state());
     #endif
     delay(2000);
   }
 }
 //Topic
 client.subscribe(mqttTopicSub);
}

void callback(char* topic, byte* payload, unsigned int length) {
 //stores the received message in a string
 payload[length] = '\0';
 String strMSG = String((char*)payload);
 #ifdef DEBUG
 Serial.print("The message arrived from the topic: ");
 Serial.println(topic);
 Serial.print("message:");
 Serial.print(strMSG);
 Serial.println();
 Serial.println("-----------------------");
 #endif
 //set output pin
 if (strMSG == "1"){        //if msg equal "1"
    digitalWrite(L1, LOW);  //output LOW to turn on the Lamp -> the RELAY module used has inverted logic . If necessary adjust for your module
 }else if (strMSG == "0"){   //if msg equal "0"
    digitalWrite(L1, HIGH);   //output LOW to turn off the Lamp -> the RELAY module used has inverted logic. If necessary adjust for your module
 }
}

//Function to reconnect MQTT broker
void reconect() {
 //while disconnected
 while (!client.connected()) {
   #ifdef DEBUG
   Serial.print("Trying connect to MQTT broker");
   #endif
   bool connected = strlen(mqttUser) > 0 ?
                    client.connect("ESP8266Client", mqttUser, mqttPassword) :
                    client.connect("ESP8266Client");
   if(connected) {
     #ifdef DEBUG
     Serial.println("Connected!");
     #endif
     //subscribe to the topic
     client.subscribe(mqttTopicSub, 1);
   } else {
     #ifdef DEBUG
     Serial.println("Failed during connection. Code: ");
     Serial.println( String(client.state()).c_str());
     Serial.println("Retrying in 10 sec");
     #endif
     //Waiting 10 seconds
     delay(10000);
   }
 }
}

void loop() {
 if (!client.connected()) {
   reconect();
 }
 client.loop();
}
MQTT Dash is one of the best free apps for using MQTT on your smartphone. It has a very nice interface with many graphic resources and is very simple to use. You can download it in Google Play.
Once installed, click the "+" sign on your home screen:
A new connection configuration will open. Enter the following information:
- Name
- Address
- Port
- User Name
- User Password
Finally, save by tapping the floppy disk icon at the top right.
Open the created connection. If the settings are correct no message will be displayed. Otherwise the connection failed message will be displayed. If this happens, redo the settings.
With the connection set up correctly, click the "+" sign inside the created dashboard:
Insert a switch/button:
The button will be used to control the Lamp. You can name it L1 or whatever you like. For the topic set to “home/L1”.
For the button graphic, set to display icons of a lamp on and a lamp off. For lamp on, we’ll send the value “1” and for lamp Off the value “0”:
Finally, select QoS(1)
Now your app is connected and configured:
Open the Websocket UI tab in CloudMQTT:
Press the L1 button in MQTT Dash and see if the message arrived in Websocket UI:
You can also send a message via Websocket UI:
Verifique se o estado do botão no aplicativo mudou.
Control the Lamp with MQTT DashNow let’s testing the ESP8266 board. Make sure it can connect to the WIFI network and Broker MQTT through the messages on the serial terminal:
Press the button in App and see if the board received the message:
If received the right message the state of the configured pin will toggle.


Comments
Please log in or sign up to comment.