The Internet of Things is getting everywhere - so more important it is to understand the principals behind. In this example we show how easy everybody can build its own ideas for the digital world based on open standards like Arduino, MQTT, Node-RED... in a simple and easy "visual" coding. You will not type any line of code - but of course you can modify later on the generated sketch as you want.
Ready?
Let's get started: All you need is to down load the "IoT Werkstatt" package in the link which includes a portable version of Arduino 1.8.5, all needed libraries and more important the Ardublock - where we created "superblocks" for the IoT for.
Next you should have Raspberry Pi with the Node-RED (pre-insatalled) up and running - only thing you need to add we do need a https://mosquitto.org MQTT broker installed (just google for a tutorial).
All done?
Lets build the data flow from sensors to a graphical dashboard using MQTT as the data transport layer.
To get the code for the Arduino / ESP8266 generated just load the attached xml into Ardublock... set your WIFI SSID/password and the settings for the MQTT broker on you Raspberry PI. The sensor we do use here is a Bosch Sensortec BME280 for temperature, air pressure and air humidity. We create for each an own "topic". Press "Hochladen auf Octopus"... the Arduino IDE now should compile the generated code and upload it to the ESP8266. Our sensor device will now publish the sensor data to the MQTT broker. Done!
Copy and Past the Flow as attached into you Node-RED... double click on the "red" MQTT receivers to set your security and network setting for your MQTT broker. Now you should see the message coming in on the debug panel (right). Done!
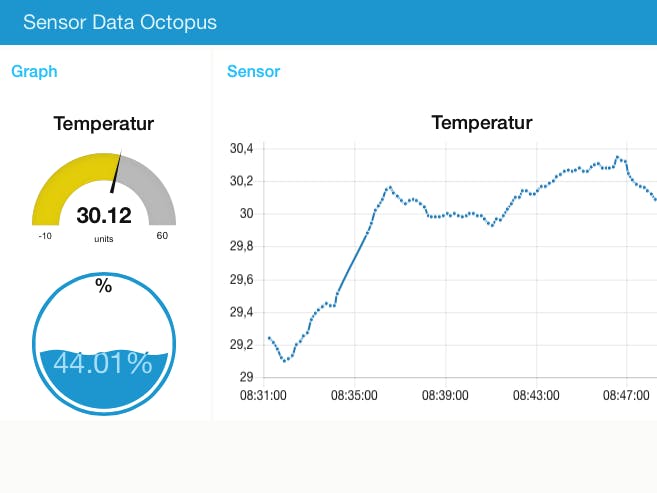
If you want to the see the data in a graphic like this, you do need to install the Node-RED dashboard in Node-RED. The flow used here includes the configuration for that part. The install of the dashboard addon you do need to do yourself.
-- DONE --
Backup: Raspian install and config, tested with release 2018-06-27
Just in case you don't know who to get the raspberry Pi setup done, here you go
a. Download raspian OS from the raspberry Pi webpage and follow instructions to write it on to an SD Card (32GB)
b. Enable WiFi and SSH following a headless installation, you do need to copy to the /boot partition these two files:
- ssh (just an empty file called ssh / no appendix)
- wpa_supplicant.conf with following content about your Wifi network:
country=US
ctrl_interface=DIR=/var/run/wpa_supplicant GROUP=netdev
update_config=1
network={
      ssid="YourNetworkSSID"
      psk="Your Network's Passphrase"
      key_mgmt=WPA-PSK
}
c. Update raspian OS to the latest version
sudo apt-get update
sudo apt-get upgrade
d. MQTT broker installation, in this case we use the open mosquitto
sudo apt-get install mosquitto mosquitto-clients
e. As of June 2018, Node-RED is not any more pre-installed you need to run from menu (if you have a monitor connected) or run this (also for updates):
bash <(curl -sL https://raw.githubusercontent.com/node-red/raspbian-deb-package/master/resources/update-nodejs-and-nodered)
f. Set autostart for Node-RED on boot
sudo systemctl enable nodered.service
f. Install now the Node-RED dashboard (you can also use the palette in Node-RED to do this task, you can skip just start it with node-red-start)
sudo apt-get install npm
sudo npm install -g npm
hash -r
cd ~/.node-red
npm i node-red-dashboard
// now start node-RED
node-red-start
To test the Node-RED open http://localhost:1880
To test the Node-RED dashboard open http://localhost:1880/ui
-- DONE --
Optional: you can use the httpNodeAuth property in your Node-RED settings.js file to secure the Dashboard as it is created the same way as other HTTP nodes are. The details can be found at the bottom of this page in the docs http://nodered.org/docs/security
Helpful tools for managing Node-RED
node-red-start
node-red-stop
sudo systemctl
// sudo systemctl disable nodered.service
sudo journalctl -f -u nodered -o cat
Coming next ... stay tuned ...
First install tensorflow on Raspberry Pi (for Python3.n, check with pip3 -V)
pip3 install tensorflow
Second install the Node-RED machine learning with tensorflow package:
cd ~/.node-red
npm i node-red-contrib-machine-learning


Comments
Please log in or sign up to comment.