


Hardware components | ||||||
| × | 2 | ||||
 |
| × | 1 | |||
Software apps and online services | ||||||
 |
| |||||
 |
| |||||
Today I bring you a fun little project. The goal of the project is to measure the speed of toy cars as they run the length of a track. Kids and adults can compete to see who has the fastest car.
What you’ll need:
- Hot Wheels Cars
- A track – I used baseboard molding from a home improvement store
- Two 5 mm IR break beam sensors
- Your existing Windows IoT Core setup
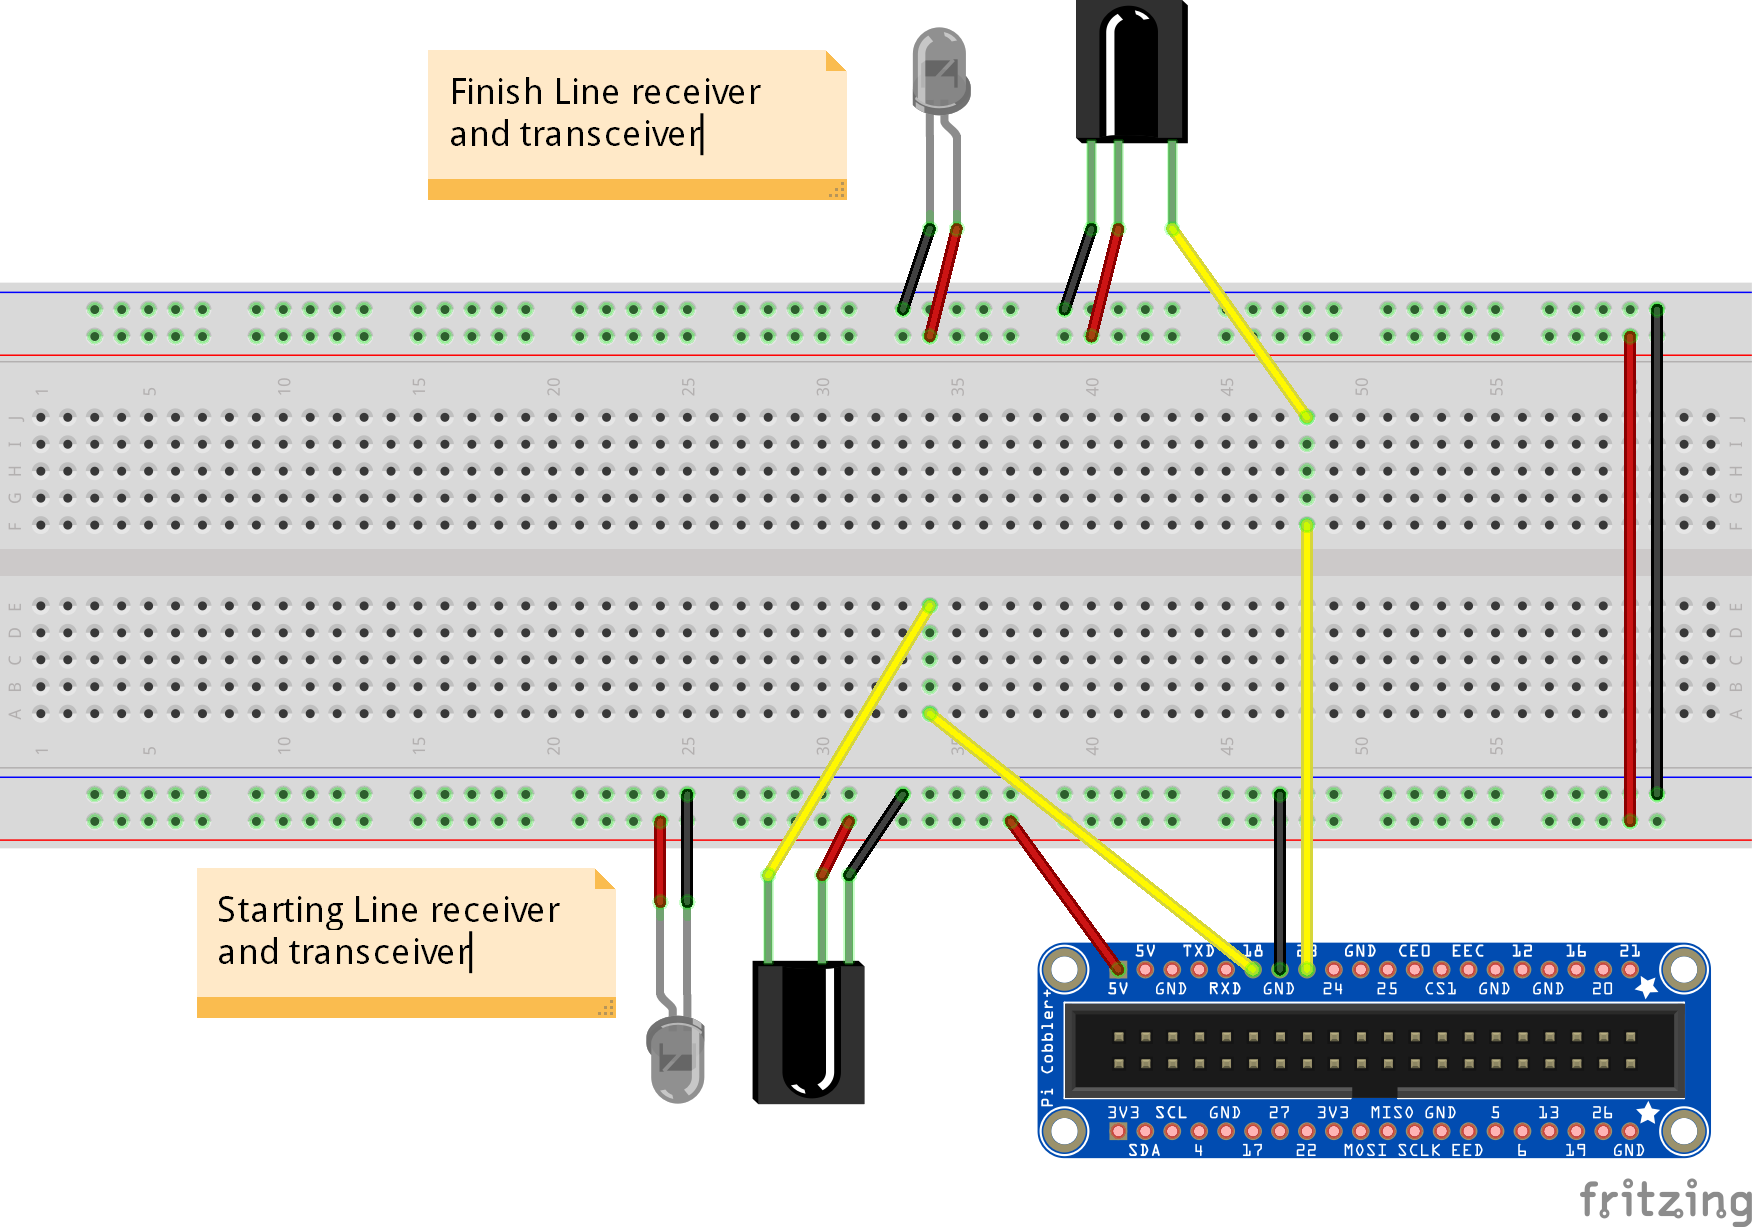
Wiring Diagram
Wiring Details
- (x2) IR Break beam transceiver black wire to GND
- (x2) IR Break beam transceiver red wire to 5V
- (x2) IR Break beam receiver black wire to GND
- (x2) IR Break beam receiver red wire to 5V
- Starting line IR receiver yellow wire to digital pin 18
- Finish line IR receiver yellow wire to digital pin 23
Setting up the hardware
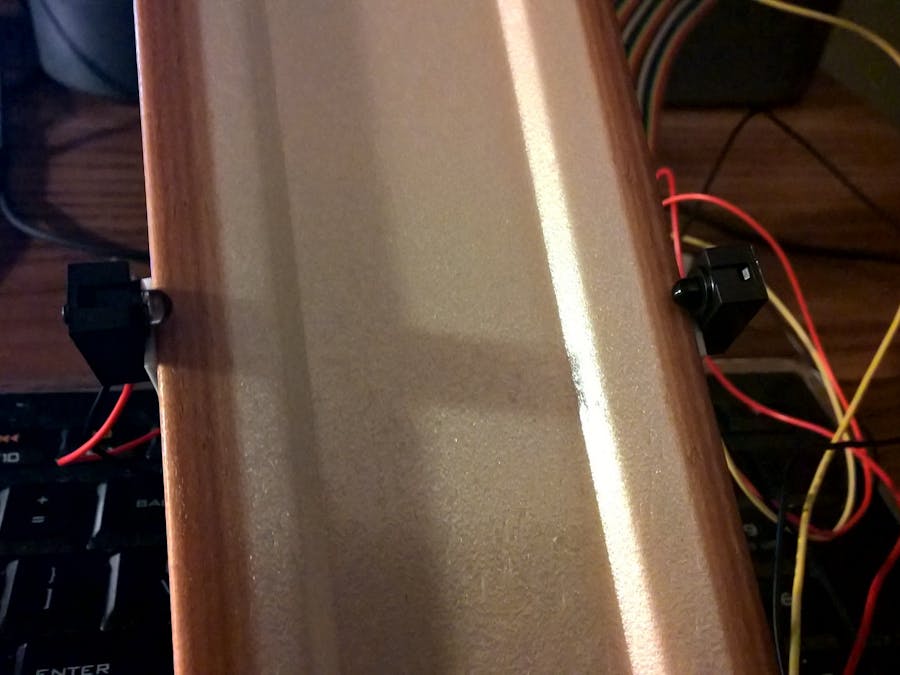
The track is setup using two IR (infrared) break beam sensors. One that initiates the timer, and one that stops the timer and calculates the car speed based on the distance traveled. IR Break beam sensors come in two parts, the transceiver and the receiver. They need to be directly across from one another on opposite sides of the track so that when cars are run down the track, the beam is broken as they pass by.
You will need to run the wires for the finish line IR sensor up the length of the track to the breadboard. I adhered the sensors and the length of wire using foam tape to the sides of the track.
Software
The software involves creating a UI that will display the speed of the car once it has travelled down the track. Racing can start at any time, there is a Ready Set Go button and a Cancel button that will reset the timer.
Create a new blank Universal Application, I’ve named mine HotWheelsSpeedTrack. After the project has been created, add a reference to the Windows IoT Extensions for UWP. Define the UI by adding the following markup to the Grid element in MainWindow.xaml.
        <StackPanel Orientation="Vertical">
            <TextBlock FontSize="48" Margin="5,25,0,0" Foreground="#FFD308B7">Hot Wheels Speed Track</TextBlock>
            <Button x:Name="btnGo" Background="#FF11DA07" Margin="5,25,0,0" FontSize="24" Click="btnGo_Click">Ready, Set, Go!</Button>
            <Button x:Name="btnCancel" FontSize="24" Margin="5,25,0,0" Background="#FFDE2929" Click="btnCancel_Click">Cancel (something went wrong)</Button>
            <TextBlock x:Name="txtStatus" Margin="5,25,0,0">Status</TextBlock>
            <TextBlock x:Name="txtResults" Margin="5,25,0,0" Foreground="#FF1E27E8" FontSize="64">Results</TextBlock>
        </StackPanel>
Now we will implement the functionality. Replace the code listing in MainWindow.xaml.cs with the following:
using System;
using System.Diagnostics;
using Windows.Devices.Gpio;
using Windows.UI.Core;
using Windows.UI.Xaml;
using Windows.UI.Xaml.Controls;

namespace HotWheelsSpeedTrack
{
    public sealed partial class MainPage : Page
    {
        private int _startSensorPin = 18;
        private int _finishSensorPin = 23;
        private GpioPin _startSensor;
        private GpioPin _finishSensor;
        private double _trackLength = 74; //in inches
        private Stopwatch _timer;
        private string _beginMessage = "When you are ready to start, \"Click Ready, Set Go!\"";

        public MainPage()
        {
            this.InitializeComponent();

            _timer = new Stopwatch();

            //initialize sensors with internal microcontroller pull up
            GpioController controller = GpioController.GetDefault();
            _startSensor = controller.OpenPin(_startSensorPin);
            _startSensor.SetDriveMode(GpioPinDriveMode.InputPullUp); //use the internal pull up resistor
            _startSensor.ValueChanged += _startSensor_ValueChanged;
            _finishSensor = controller.OpenPin(_finishSensorPin);
            _finishSensor.SetDriveMode(GpioPinDriveMode.InputPullUp); //use internal pull up resistor
            _finishSensor.ValueChanged += _finishSensor_ValueChanged;

            txtStatus.Text = _beginMessage;
        }

        private void btnGo_Click(object sender, RoutedEventArgs e)
        {
            Reset();
        }

        private void btnCancel_Click(object sender, RoutedEventArgs e)
        {
            Reset();
        }

        private async void _startSensor_ValueChanged(GpioPin sender, GpioPinValueChangedEventArgs args)
        {
            if (!_timer.IsRunning)
            {

                _timer.Start();
                await Dispatcher.RunAsync(CoreDispatcherPriority.Normal,() => {
                    txtStatus.Text = "Timer Started....";
                    txtResults.Text = "";
                });

            }

        }

        private async void _finishSensor_ValueChanged(GpioPin sender, GpioPinValueChangedEventArgs args)
        {
            if (_timer.IsRunning)
            {
                _timer.Stop();

                await Dispatcher.RunAsync(CoreDispatcherPriority.Normal, () => {
                    txtStatus.Text = "Timer Stopped....";

                });

                CalculateSpeed();

            }
        }

        private void Reset()
        {
            _timer.Reset();
            txtStatus.Text = "";
            txtResults.Text = "Ready to begin";
        }

        private async void CalculateSpeed()
        {
            double elapsedTime = _timer.Elapsed.TotalMilliseconds;
            if(elapsedTime > 0)
            {
                double milesConversion = _trackLength / 63360; //convert inches to miles
                double timeConversion = elapsedTime / 3600000; //convert milliseconds to hours
                double result = milesConversion / timeConversion; //calculate MPH
                double displayResult = Math.Round(result, 4);
                _timer.Reset();

                await Dispatcher.RunAsync(CoreDispatcherPriority.Normal, () => {
                    txtStatus.Text = "The results are in!";
                    txtResults.Text = String.Format("Your Speed Was: \n{0} M.P.H", displayResult);
                });

            }
        }
    }
}
In this code, you can see that the IR break beam sensors operate on digital pins. In the initialization code, an event handler is added to react to the ValueChanged event on both the start line and finish line sensors. When the starting line IR sensor is tripped, it starts the timer, and when the finish line IR sensor is tripped, it stops the timer. The speed of the car is then calculated by the number of milliseconds elapsed on the timer (from the start line to the finish line) and the distance between the start and finish line (in inches). The result is then displayed on the screen in MPH.
This is a quick and easy project that is perfect for helping kids learn about electronics.


Comments
Please log in or sign up to comment.