A practiced hand thing presumably you interested in the development in the field of robotics, and create a better life for the future of humanity lofty ideals (nonsense is essential) entry is essential contact smart car.However, a full set of ready-made smart car down to a thousand oceans. So I feel that I can be one such god hands DIY car out of a practiced hand to meet my needs, and secondly, I will make the experience of using the universal expansion board Arduino board for everyone to share. Of course, in the DIY process will encounter various difficulties, but in the course of eleven DIY these difficulties and obstacles to get rid of and lessons learned is the most enjoyable, rewarding.
My slogan: Dream it! Build it! Love DIY, love robots.
I put the car intelligent car named iTesla, because he is very fond of, like the United States have a Tesla Motors ( Tesla Motor ) as intelligent environmentally friendly cars, and adore the famous American electronics engineer " Nikola Tesla "Mr. electronics business for outstanding contributions made.
iTesla car is an Arduino-based platform for research and development from the smart car. That why I praise my iTesla intelligence of? It has what skills? Currently, iTesla is a versatile remote control smart car: There are automatic Obstacle avoiding , infrared control , iPhone control , computer control , voice control , there is exciting, I just developed a gesture control .There are some other features such as: iPhone / Andriod remote Internet video control, iTesla automatic tracking mobile and solar charging technology is still under development and so much more. . .
Oaks from little acorns. In general, I will be divided into circuit design, embedded control and artificial intelligence referee three parts. And for me, the most difficult is that artificial intelligence referee function (write a lot of programming code ~ 0 ~), primarily as arbitration and guidance for self driving car, equivalent to car drivers. Used here a lot of programming languages such as Arduino, Processing, Arduino programming actually fairly personal feeling is simplest. Assembly language for beginner students will be very helpful, oh.
Well, ado. Let us into the theme of it!
---------------- This is a lovely dividers ----------------
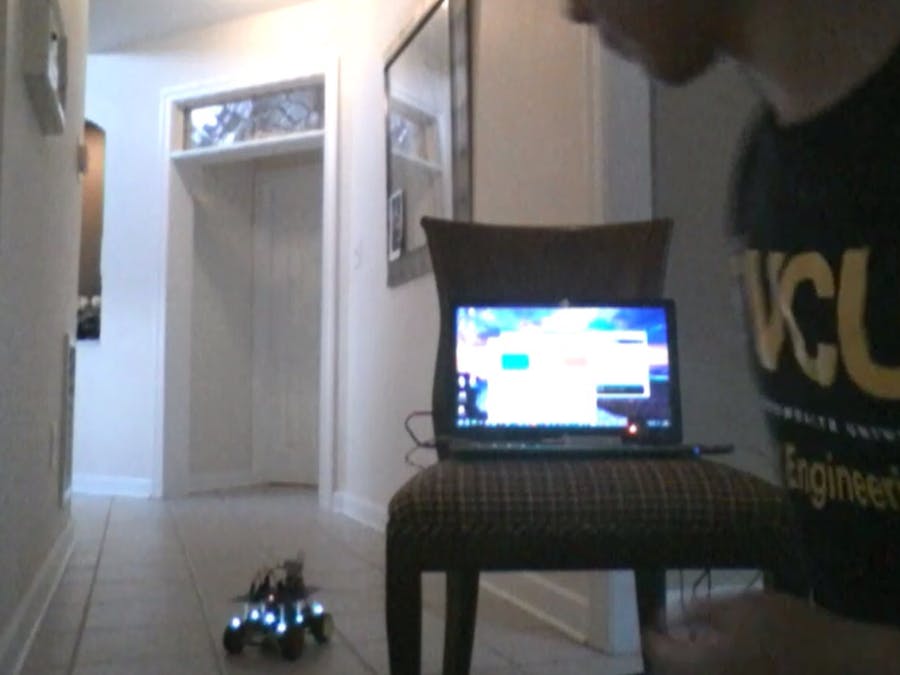
Watch iTesla in motion: https://www.youtube.com/watch?v=76s_FpcsXcY
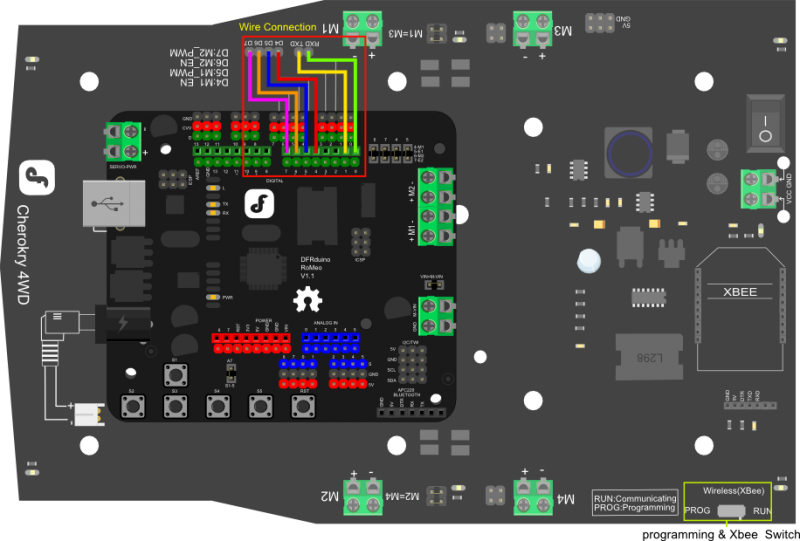
2. Materials and toolsiTesla Main Body:DFrobot Cherokey 4WD Mobile Robot
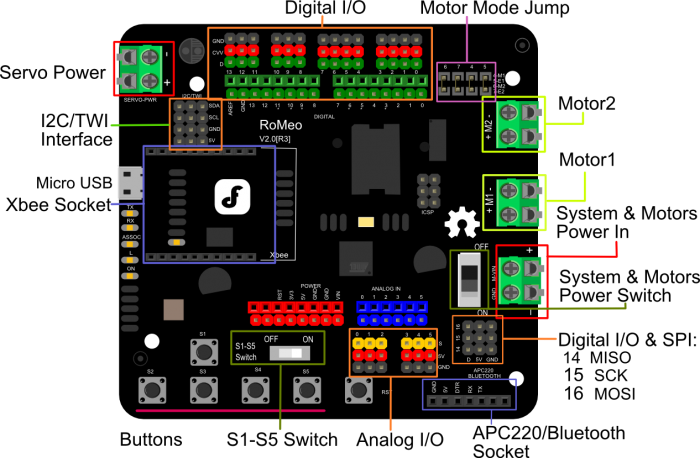
iTesla Main Microcontroller:DFrobot Romeo V2-All in one Controller (This guys is super Multi-function, Love it! )
Infrared:LinkSprite Infrared Shield for Arduino
Voice control Material:
DFRobot I/O Expansion Board for Arduino v7 (For Xbee communication)
Obstacle avoiding material:
IR Distance Detection: Sharp GP2Y0A02YK0F IR Range Sensor – 20 cm to 150cm
ultrasonic modules: Ultrasonic sensor
XBee 1mW Wire Antenna – Series 1 X2
SERVO X1
iPhone Control:
TouchOSC (can be downloaded to the Apple Store) also need a computer version ofTouchOSC designed steering wheel, oh. (Annex I have been a good design of Layout available for download)
Gesture Control:
3. iTesla to achieving Obstacle avoiding functioniTesla using a car steering motor control in general, there are two ways: The first is a four wheels forward, this shift is the most common way is deflected by steering motor to achieve, and can not realize walking around in circles, Make way one; second is the line before the wheels on one side, the side of the wheel backwards, this way because there are four motors so it can be executed without the help of the steering gear, and goes on to achieve, set mode II.
As shown below:
Avoid obstacles in the process, you need to spin around, so by way of the left and right sides of the steering wheel two inconsistent achieve spin. However, in order to improve the spin speed, I used motor (Mortor): Second time that way, the car left and right turn, left turn steering accordingly, this can increase the spin speed, both one way and manner II advantages.
4. Research and analysis iTesla automatic Obstacle avoiding functionOn the basis of the realization of the basic functions of the car, the automatic obstacle avoidance implementations follow a basic idea, that is: sensors (ultrasonic or infrared detection module) detects an obstacle, passing the detected information to the microcontroller (Arduino) for processing , Arduino based algorithm to control the car, such as motor and steering gear, allowing the car to avoid the obstacle position.
In order to realize the smart car automatic obstacle avoidance features, I installed the car in front of an infrared sensor and ultrasonic module equipped with the opportunistic, whether the car is used to detect obstacles in three directions. Because of the smart car is not a maze obstacle avoidance, but simply to avoid obstacles (such as in front of a box, etc.), so do not need to design complex algorithms. Algorithm is as follows: If the car in front and to the left and right side of the obstacle has no obstructions, the car turn right 90; If the car in front and to the right and the left have no obstructions obstructions, the car turn left; If there is an obstacle in front of the car matter, and the car left and right are no obstructions, the car stopped, the judge about two sides of that investigation from the past, it would go the distance point turn, control the steering of the time (with a delay () function), so that the car rotated about 90 degrees, then the car stopped.If no obstructions in front of the car, and left or right obstructions, so the car forward until the car wings are no obstacles so far. This algorithm looks very simple, but it can get out of a simple maze and avoiding obstacles in general.
Here are just obstacles in front of the car and left and right to make the car without obstacles avoidance diagram:
Most car start walking direction as shown
Detects an obstacle in front of the car, turn left
This car successfully avoiding obstacles.
5. infrared remote controlFirst, we give add IRremote Arduino library “#include <IRemote.h>”. By Arduino’s Serial Monitor your infrared remote control and then decoded. (I use the TV’s IR remote control) solution of the infrared code after the code that you define. Can be achieved on iTesla infrared control.
The following code is an example to me to be a demonstration of infrared:
#define UP 0xC26BF044 //My remote UP KEY 我的遥控器UP键
#define DOWN 0xC4FFB646 //My remote DOWN KEY 我的遥控器DOWN键
#define LEFT 0x758C9D82 //My remote LEFT KEY 我的遥控器LEFT键
#define RIGHT 0x53801EE8 //My remote RIGHT KEY 我的遥控器RIGHT键
#define STOP 0x8AF13528 //My remote STOP KEY 我的遥控器STOP键
Note: Different infrared remote control is not the same as the corresponding code. Want to use an infrared remote control, please decoding own infrared remote.
6. iPhone ControlTo control first need to download the iPhone TouchOSC application and on the computer to the smart car steering wheel design. I designed the layout is two sliders. The left slider controls the revolver, the right slider controls the right wheel. When both sides of the slide are pulled up when iTesla forward; up when the left and right when the left turn down iTesla; retreat and turn right empathy. Put the two sides want to stop the slide together parked in the middle. Is not very simple ah? ? Ha ha.
After designing the steering wheel, it said Arduino is how it communicates with the iPhone. Turn on your computer version of TouchOSC, then open I have designed layout (or you can also try to design your own one). Open finished, click on the “SYNC” button to sync. Now open your already downloaded iPhone TouchOSC app. Select the layout inside the designed layout. Click on the top right corner of “Done”. Is not seen a good layout design, and finally fill Host IP address of your computer on the Connections of the OSC.
There is one final step is to open and run I’ve written a good iTesla_OSC_Processing of proceessing programming code. Now try to pull the two sliders, iTesla it moved.
7. PC controlWant to be controlled from a computer to iTesla would need to use two Xbee, and a plug on the PC side another link to the microcontroller Arduino.
As shown:
I was in control of a “robot assistant serial version V2″ This software, in addition to its basic iTesla move outside can also be “Ultrasonic Query” and “long-distance wireless video surveillance” (on iTesla need to install a USB wireless camera )
Interested friends can download here: www.faweiz.com/download/robot_assistant serial_version_.zip
Thank Aosong robot engineers developed this intelligent robot software.
8. Voice Control systemBecause DFrobot only developed in Chinese-based speech recognition module, so this is chosen DFrobot ASR Board speech recognition control panel for voice recognition operations on iTesla.
The product is ideally suited for smart home, remote voice VOD system, remote voice robot control.
When I say move forward toward the voice recognition module (qian jin), it will immediately hear the instruction and execute. Want in it there is the remote voice control, and it would need to use the above mentioned oh Xbee ! In fact, the same as the PC port control mode.
Here to talk about iTesla_Voice.ino code it:
This code is the definition of the word recognition “in the speech recognition module Pinyin “Content is the meaning of the array 80 can only enter a maximum of 80 characters
char sRecog [sum] [80] =
{“qian Jin”, “hou tui”, “zuo zhuan”, “you zhuan”, “zhua low”, “Fang blue”, “ting zhi”};
Then we define the flag variable character commands sent up crew
char flag;
Then write a function to void finally named here, in this function in accordance with the word of the array element number, execute the corresponding command
void finally (unsigned char n)
{
switch(n)
{
case 0:
flag=’a';//小车前进
Serial.print(flag);
Serial.print(” qian jin “);
break;
case 1:
flag=’b'; //小车后退
Serial.print(flag);
Serial.print(” hou tui “);
break;
etc....
}
}
Thus the push. . .
Which Serial.print (flag) is through the COM port your input to the output of the Xbee iTesla Flag on! ! !
9. Lead Motion Gesture ControlAre you still thinking only in order to see the magic in telekinesis scene. However, in this era of advanced high-tech 21st century is full of wonders. Now we have Lead Motion developed Leap motion Controller to magic becomes possible. This controller supports the use of palm and finger movements for input, but without hand contact or touch.
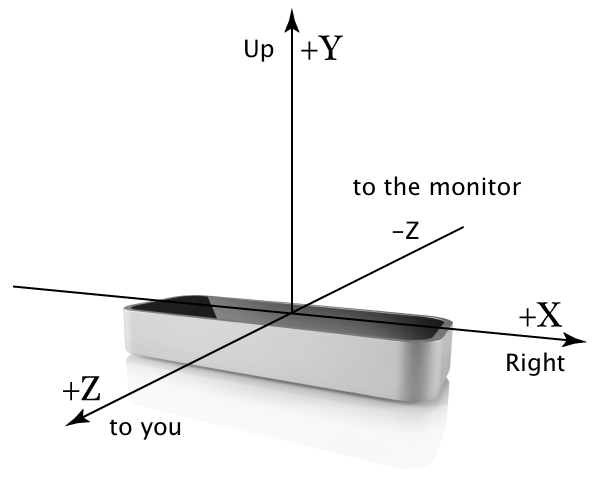
If you wanted to use leap motion and processing to control iTesla (Arduino),first of all you need to add leap motion for processing library for processing
In the process of gesture control iTesla I only use the Leap motion of the X and Y axes.
All right, in order to let you understanding the principle of processing programming code (in leap motion in iTesla_Leapmotion_Processing.pde ) let's talk about how it work.
Good help everyone to understand. Haha.
In the void draw () function I wrote:
void Draw () {
background (255); / / white background
The following is a specific area made for 'forward' / 'backward' / 'left' / 'right' box length and width are 266 X 166
//UP Orange Color
rect(533,166,266,166);
fill(255, 128, 0);
//DOWN Green Color
rect(266,0,266,166);
fill(0,250,0);
//LEFT Blue Color
rect(266,332,266,166);
fill(0, 0, 255);
//RIGHT Red Color
rect(0,166,266,166);
fill(255, 0, 0);
This following is from a leap motion that detects the position of the hand and then use hand.getPosition (). X parameter to find the X-axis of coordinates, empathy with hand.getPosition (). y and hand.getPosition (). z Y and Z were found axis.
for (Hand hand : leap.getHands()) {
hand.draw();
PVector hand_position = hand.getPosition();
print(“X: ” + hand.getPosition().x);
print(” y: ” + hand.getPosition().y);
print(” z: ” + hand.getPosition().z);
println();
The next step is to find the X / Y / Z coordinates of the location. And outputs it to serial.port up. Remember serial .port To change your COM port Oh! My serial.port statement is myPort = new Serial (this, “COM14″, 19200);
// Determine movement(go/back,left/right,stop) according to mapped hand x/y/z position
//Forward/Backward
checkGoBack = (int) map(hand.getPosition().y,0,500,0,500);
//Left/Right
checkLeftRight = (int) map(hand.getPosition().x,0,800,0,800);
//Stop movement
checkStop = (int) map(hand.getPosition().z,-50,100,-50,100);
// Forward / Backward
if (GoBack = checkGoBack!) // here goback is to detect X-axis coordinate
{
assignGoback ();
}
// Forward / Backward
else if (! leftright = checkLeftRight) // here leftright is detected Y-axis coordinates
{
assignLeftRight ();
}
// Stop
else if (stop = checkStop!)
{
assignStop ();
}
}//End for loop
}//End draw()
In this case the description assign. . . . () This function is intended to:
void assignGoback(){
goback = checkGoBack;
myPort.write(goback);
println(“GoBack: “+goback);
}
As above, first of all, it will goback assigned to checkGoBack then () in output value goback in myPort.Write to your COM port.
Well! Check out the rest of the coding iTesla_Leapmotion_Processing.ped it!
After writing code, press RUN is not seen a window of a white background. Take a look at the leap motion.There is little point in moving, this is the position of your hand! Is not it a little telekinesis feeling! ! ! ! Ha ha ha ha. . . . .
As for how to write code on arduino, will not say more.
I wrote the code yourself to see it! iTesla_Voice_Infrared_iPhone_OSC_LeapMotion_9_16_2014.ino
For more information about Leap motion articles, please click here to view!
10. iTesla codeObstacle avoiding function :( due to since obstacle avoiding function can't be use along with remote control functions, so we need to separate it to write an individual code)
Note: This is code for Obstacle avoiding function, if you want to learn more about using ultrasonic waves. Please read my other article ultrasonic radar .
iTesla_AvoidanceiPhone OSC : need to download TouchOSC
iTesla_OSCVoice control :( need Voice.h library file)
iTesla_VoiceLibrary file :
LibraryGesture Control :
iTesla_Leapmotion_ProcessingThe main controller (Arduino) Code:
iTsla_Main_Arduino_codeDownload package :
iTesla.zip11. SummaryThrough this research I learned a lot of knowledge of C / C ++ gained a deeper understanding. Especially learned on how the micro-controller works, how to write program code and upload it to Arduino. This DIY project definitely is a very helpful skill for me on later learning of assembly language.Although these features are developed all by myself, but still I learned a lot. Due to limited personal resources, but learning is infinite. Again: Dream it! Build it!爱DIY, 爱机器人! I am an electronic engineer! I love electronics! Type in a caption
Any questions are welcome!
Github: https://github.com/faweiz
Portfolium: https://portfolium.com/faweiz
Linkedin: https://www.linkedin.com/in/faweiz


_ztBMuBhMHo.jpg?auto=compress%2Cformat&w=48&h=48&fit=fill&bg=ffffff)


_3u05Tpwasz.png?auto=compress%2Cformat&w=40&h=40&fit=fillmax&bg=fff&dpr=2)


Comments
Please log in or sign up to comment.