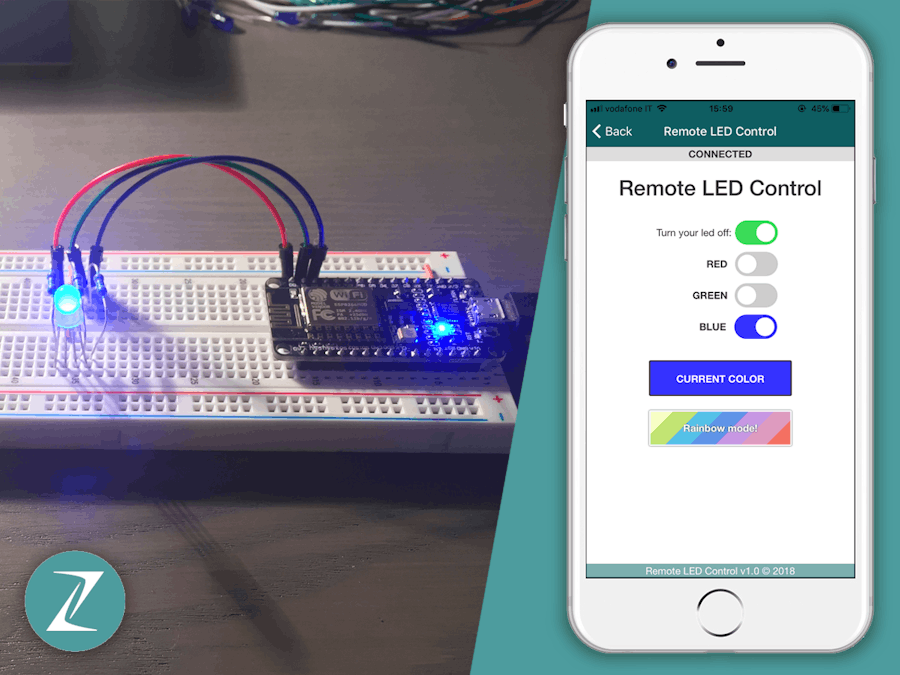
This project is a quick demonstration of the Zerynth ecosystem. You'll be able to control the colors of an RGB LED using only your smartphone!
This is possible thanks to the Zerynth Virtual Machine installed into the NodeMCU v2 (a great microcontroller provided with Wi-Fi functionalities thanks to the ESP8266 chip) programmed only with Python and the Zerynth App, which uses an HTML/JavaScript interface to communicate with the Zerynth Virtual Machine. Let's get started!
1. RequirementsThis is what you need in order to replicate this project.
Hardware: NodeMCU v2; a micro-USB cable; a breadboard; jumper wires; three 220 Ohm resistors and an RGB LED.
Software: Zerynth Studio (available for Windows, macOS and Linux) and Zerynth App (available for iOS and Android). Download and install it here: https://www.zerynth.com/
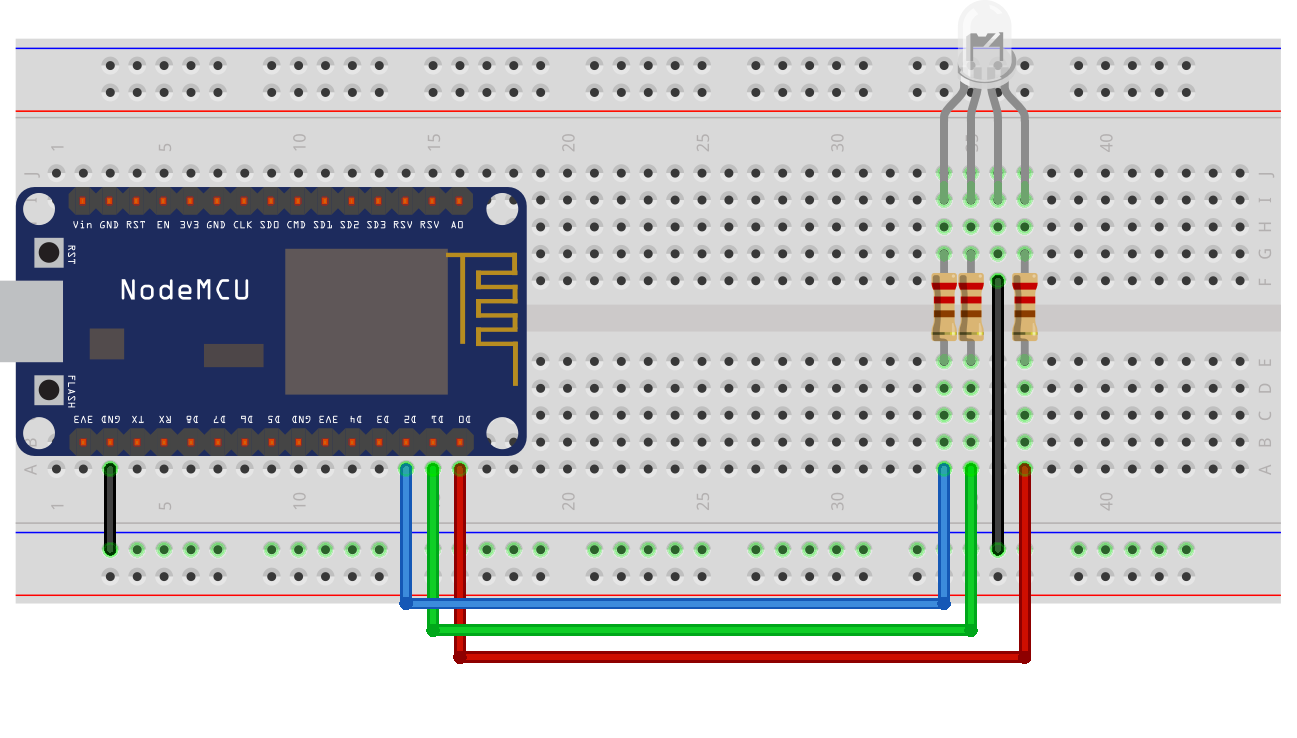
2. AssemblingPlace the NodeMCU v2 into the breadboard and connect the RGB LED to the pins D0, D1 and D2 (for the red, green and blue respectively) and the longest lead to ground. Place a 220 ohm resistor in each of the three connection between the pin and the LED.
Check the circuit below for further details!
3. ProgrammingNow that everything is set, connect the NodeMCU v2 with the micro-USB cable to the computer and launch Zerynth. Remember to install the NodeMCU v2 drivers here, which are required for Windows and Mac platforms!
- Create a Zerynth account and login.
- Select the NodeMCU v2 as device from the dropdown menu.
- Register and virtualize it using the buttons near the dropdown menu. You're ready to program the NodeMCU!
- Download the repository and create a new project copying the files of the repository.
- Go to the ADM panel on the left and create a new device with UID and token device. Remember also to create and set the template by clicking on the plus button near "Template:" and choosing the template inside the "template" folder of the repository.
- Make sure to set your Wi-Fi credentials, your UID and token device inside the "main.py" file.
- Compile and uplink. Make sure it says "Uplink done!"
- Download Zerynth App on your smartphone and login with your Zerynth account.
- Run the Zerynth App and enjoy!
With the interface on your phone you can set the colors and start a rainbow mode, which cycles the six available colors. It's also possible to run the HTML/JavaScript interface in your browser: go to the ADM panel on the left and, on the list of connected devices, click the eye icon next the name of your device!
What's next?Since the support of the PWM (pulse with modulation) functions with the NodeMCU is still in development, I decided to use the digitalWrite for choosing colors. This means that it's not possible to set the light intensity for the red, green or blue color, but only 0% or 100% (on or off). Once the development is completed and the bugs are fixed, I plan to release a version where it will be possible to choose colors from the complete RGB spectrum. Stay tuned!
Useful linksLike, comment and share if you enjoyed this quick demo! Thank you so much!


_xIl5PcEdnz.png?auto=compress%2Cformat&w=40&h=40&fit=fillmax&bg=fff&dpr=2)
Comments
Please log in or sign up to comment.