


Hardware components | ||||||
_ztBMuBhMHo.jpg?auto=compress%2Cformat&w=48&h=48&fit=fill&bg=ffffff) |
| × | 1 | |||
| × | 1 | ||||
| × | 1 | ||||
Software apps and online services | ||||||
 |
| |||||
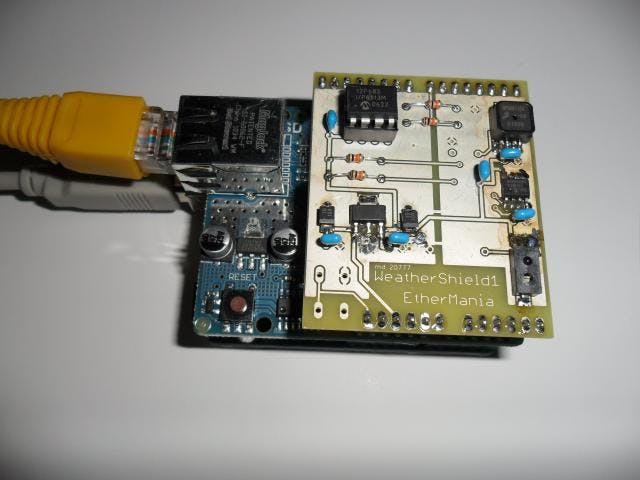
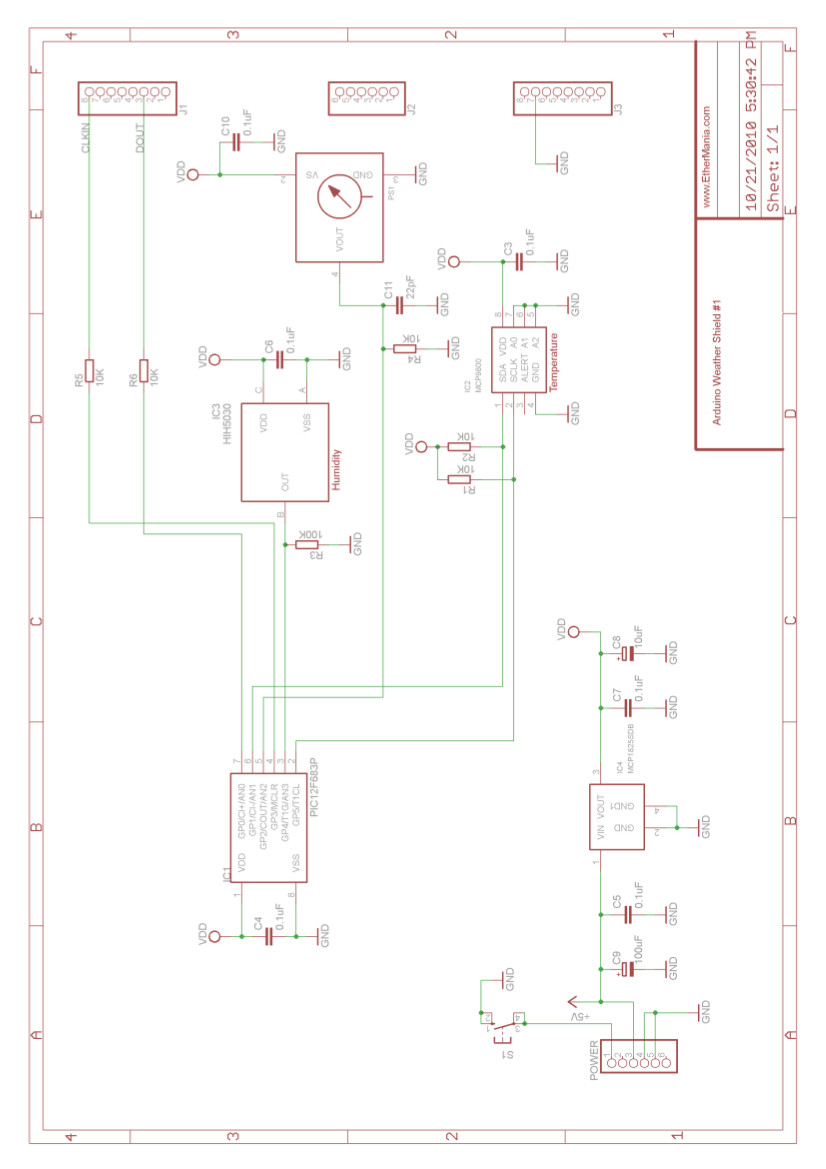
The WeatherShield by Ethermania.com is a shield that makes Arduino able to read Pressure, Temperature and Relative Humidity. The shield is equipped with three sensors and a PIC12F683 microcontroller programmed with a specific firmware that interfaces with Arduino through a two line bidirectional synchronous serial connection. The microcontroller is responsible for sampling and averaging the last 8 humidity, pressure and temperature values, providing it to the Arduino in an ASCII readable format expressed in Celsius, hPa and relative % units.
The proposed solution uses an ethernet shield to connect Arduino to your LAN. On Arduino you must upload the included sketch to interact with the WeatherShield to retrieve sensors values and shows them as a string with ":" char as delimiter. Also you must add to your Arduino IDE the WeatherShield lib (included into PLUGIN_ROOT/resources/WeatherShield/WeatherShieldLibrary).The default address is 192.168.0.150 on port 80. If you desire to change it you must edit the sketch, recompile and upload to Arduino. To verify if it works open your browser and digit the board address "http://192.168.0.150". You would see a string reporting the sensors values.
You can download the last available version Commander 5.6 RC2 from here. Java JRE 7+ required. Unzip the package and start it with freedomotic.exe (Windows) or freedomotic.sh (Linux). Also you can start from command line with java -jar freedomotic.jar.
Install ArduinoWeatherShield pluginYou can install it from Freedomotic frontend using the menu Plugins -> Install from Marketplace. Select Arduino category and the the plugin. Take a look at our marketplace plugin page.
How to read values from an objectWith this board you can read the temperature of any thermometer device in your environment.
For this example we use a thermometer.
Go to Objects list (press F6), select a Thermometer, right click on it and add to the map. Right click on the thermometer object in the environment to show its configuration panel. Change the property "protocol" to "ArduinoWeatherShield". Change the property "address" to a string composed of HTTP_BOARD_ADDRESS:HTTP_PORT. For example "192.168.0.150:80:T" identifies the board listening on 192.168.0.150:80 for temperature values (use "P" for pressure and "H" for humidity). Under "temperature" (in Data Source Configuration) select the trigger called "Arduino WeatherShield reads temperature change".
The plugin is also able to read any humidity and pressure change.
From Freedomotic 5.6 version it uses autodiscovering feature so 3 new things (thermometer, barometer and hygrometer) are added to the map and configured automatically.


Comments
Please log in or sign up to comment.