


Hardware components | ||||||
_ztBMuBhMHo.jpg?auto=compress%2Cformat&w=48&h=48&fit=fill&bg=ffffff) |
| × | 1 | |||
 |
| × | 1 | |||
| × | 1 | ||||
Software apps and online services | ||||||
| ||||||
This is a short tutorial on how to interface the Arduino with the Bolt Wi-Fi module to read data from Arduino or control actuators connected to the Arduino.
I will be demonstrating this by controlling the status of the Arduino's inbuilt LED on pin 13 via Bolt.
1. First, compile and upload the Arduino sketch, provided with this post, to the Arduino.
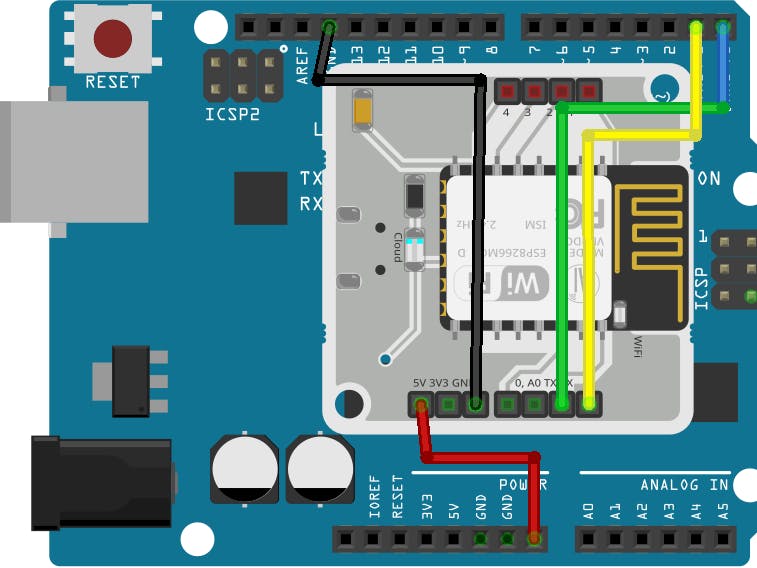
2. Connect the Tx pin of the Bolt to the Rx pin of the Arduino. Connect the Rx pin of the Arduino to the Tx pin of the Bolt. Connect the ground pins of the Bolt and Arduino
Note: You will not be able to upload the sketch to the Arduino if the Tx and Rx pins are connected. You can optionally power the Arduino using the 5V pin of the Bolt as shown.
3. Run the python script provided with this post.
4. When the console asks for an input, typing ON or OFF will toggle the mode of the LED on the Arduino
The code for the Arduino sketch and the python script both are pretty self explanatory. It is fairly easy to adapt this code for other purposes.
Note: The parameter for the serialRead for the Bolt is the ASCII equivalent of the last character of the data that is being received (of the data you want to receive). It might be a good idea to set this as 10 which is the ASCII equivalent for the newline character, as most of the values received end with a newline character.
Additional resources:


Comments
Please log in or sign up to comment.