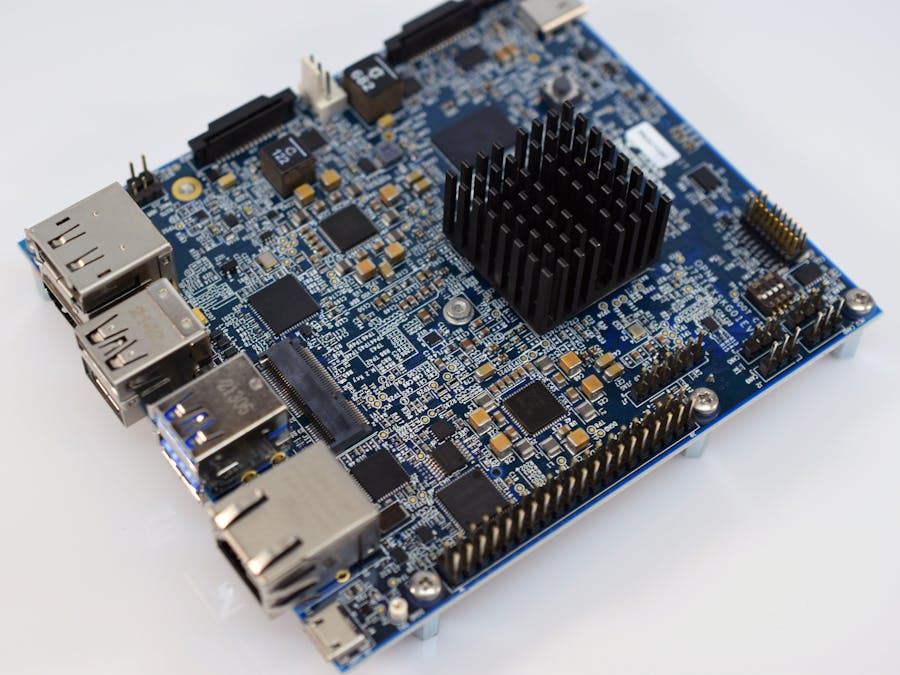
AI at the edge allows embedded devices to capture data and then make decisions about it without the need for an external connection to a server. And as the amount of data increases, so does the need for more powerful processors and models. The TDA4VM from Texas Instruments contains a dual Arm Cortex-A72 CPU, DSP, deep learning, vision, and multimedia accelerators, and ample external connectivity for attaching cameras, networking, and displays.
With all of these features in such an efficient package, the potential for edge AI applications is nearly limitless.
The SK-TDA4VM starter kit is a quick way to start building prototypes due to its variety of camera connectors, M.2 E-key connector for WiFi/Bluetooth cards, 4GB of LPDDR4 memory, plenty of USB ports, a DisplayPort connector with up to 4K resolution, and an HDMI port with support for 1080p output. The underside of the board houses a Micro SD card slot, M.2 M-key connector for adding PCIe x 4 devices, and a 40-pin Semtec camera connector. In addition to the board itself, a Micro SD card and Micro USB cable were included for quickly getting started. Here is a link to Texas Instruments' unboxing video of the kit.
To begin, Ethernet, HDMI, Micro USB, and USB camera cables were all plugged into the evaluation kit. Due to the power input requirements of 5-20VDC and a maximum output current of 5000mA, a 65W USB C power supply with USB Power Delivery (PD) capabilities was used.
Flashing an operating systemBefore an OS can be booted on the TDA4VM, it first needs to be loaded onto a storage device. In this case, a Micro SD card is used, which requires setting the Processor Boot Mode Setting DIP Switch (SW1) to the 'off' position for each switch.
Next, the latest OS image should be downloaded from this link and written to an SD card using a utility such as Balena Etcher. Version 1.7.2 appears to have a known issue, but 1.7.0 has been verified to work correctly.
The image is meant for 16GB SD cards, but the root filesystem can be expanded with the following steps on a Linux PC:
#find the SD card device entry using lsblk (Eg: /dev/sdc)
#use the following commands to expand the filesystem
#Make sure you have write permission to SD card or run the commands as root

#Unmount the BOOT and rootfs partition before using parted tool
umount /dev/sdX1
umount /dev/sdX2

#Use parted tool to resize the rootfs partition to use
#the entire remaining space on the SD card
#You might require sudo permissions to execute these steps
parted -s /dev/sdX resizepart 2 '100%'
e2fsck -f /dev/sdX2
resize2fs /dev/sdX2

#replace /dev/sdX in above commands with SD card device entryWith the Micro SD card now inserted and the associated boot mode correctly selected without the power supply being connected, power can now be applied. It should take less than 20 seconds to boot and display a wallpaper. Refer to the SK board connections and the wallpaper displayed on the screen upon boot below:
Boot logs can be viewed on a connected host machine via the Micro USB cable over 115200bps UART. Once booted and viewing the login prompt, simply login as the root user and no password.
As with other single board Linux computers, the SK-TDA4VM supports SSH out of the box which makes developing applications far easier compared to the UART terminal. Texas Instruments recommends using VS Code along with the "Remote development extension pack" that can be installed according to these directions. Once the extension has been added, just add the host IP address as displayed on the screen and set the user to root.
Now that everything is up and running, the last step is to actually run a model on some data and see the results. Conveniently, the previously flashed OS image already contains a sample demonstration program written in both Python and C++, as well as images and videos for data inputs located under /opt/edge_ai_apps/data. All of these files can be found under /opt/edge_ai_apps, with the Python example being located in the apps_python directory. To start the demo, simply execute the following command inside the /opt/edge_ai_apps/apps_python directory:
root@tda4vm-sk:/opt/edge_ai_apps/apps_python# ./app_edgeai.py ../configs/image_classification.yamlNote how ../configs/image_classification.yaml is passed to the program as the first argument. This file contains the configuration for how the demo should run, including the input(s), output(s), model(s), and the flow(s) which details the manner in which the previous elements are combined. By default, the flow will take input0 (the webcam on /dev/video2), pass it to a MobileNetV2 model, and then display the resulting frames via the HDMI port, but other inputs, models, and outputs can also be used instead.
Feel free to experiment by changing the yaml configuration file by adding new inputs, swapping out the current models with other ones found in /opt/model_zoo, and even downloading new models with the Model Downloader Tool by running the following command:
root@tda4vm-sk:/opt/edge_ai_apps# ./download_models.shMore information about the configuration file can be found here while the SK-TDA4VM product page can be seen here on Texas Instruments' website.


Comments
Please log in or sign up to comment.