Building upon my previous project, the Pix-A-Sketch, I created a way to play a game of connect four using a 64 x 64 LED matrix. It emulates an 8x6 grid in which two people can place yellow and red chips by rotating a pair of a rotary encoders and pressing a button.
DemonstrationDesigning and Fabricating the Enclosure
I began by using Fusion 360 to model each component, such as the matrix and rotary encoders. Then they were placed onto a virtual plywood board and had a plastic frame built around it. Each piece was 3D printed in PLA, and then the bottom wooden board was cut with a CNC router.
Below is a render of the final iteration.
You have probably heard it a thousand times by now, so just go view a guide on how to set up your Raspberry Pi here.
After connecting it to a WiFi router, install the rgb-matrix library by following the instructions below:
Just run
curl https://raw.githubusercontent.com/adafruit/Raspberry-Pi-Installer-Scripts/master/rgb-matrix.sh >rgb-matrix.sh
sudo bash rgb-matrix.sh
Then press y to continue and choose option 2 to select the Adafruit Matrix HAT.
Then choose number 2 to free up pin 18 so that sound can still be output over the audio jack.
To test it go into the examples-api-use directory and run
sudo ./demo -D0 --led-rows=64 --led-cols=64 --hardware-mapping=adafruit-hatYou should see the demo running. Just hit ctrl-c to exit it.
You will also need to install the mpu6050 library with
pip3 install mpu6050-raspberrypiand then add the user root to the i2c and gpio groups.
Connect Four EngineAs with most games that I create, I always try to build an underlying engine first and then build the graphical display layer on top of it. Written in Python, the game begins by creating a grid of the chosen size. Next, a player is selected at random to start. At each turn, the current player is able to select a column and "drop" their chip into it. Then, a win-checking function is called that tests if a four-in-a-row of a certain chip color has been achieved. If there is a winner or a tie, the game ends, otherwise, the game continues by selected the other player to go.
There is a Python class called MatrixDisplay that allows the current game's state to interface with the RGB matrix. When the game begins, the current player is displayed and the initial blank board is drawn.
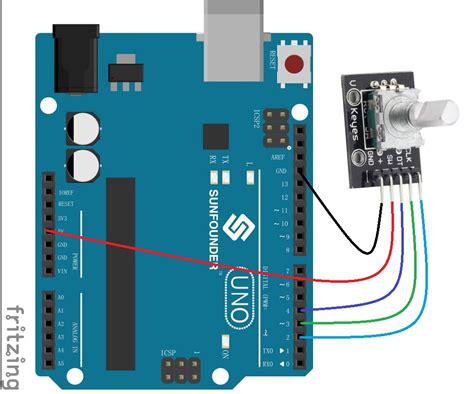
When the time comes for a player to select a column for their chip, an onboard rotary encoder's value is read and the chip moves accordingly. Pressing the center button selects the column and drops the chip.
To render the board with the chips, the current game's two-dimensional array is passed to the update function, which iterates through each chip and displays it. If there is a win, the game will call a display winner function and then ask if either player wants to play again.
The keystone of the game system is the PixelConnectFour class which acts like the glue by running the underlying game engine and then transferring the relevant data to the display layer. Additionally, the game's flow and states are handled by this class, which means resetting, value reading, and exiting are all included. So to run the game, all one has to do is create an instance of PixelConnectFour and and call its run function.
Since the code I created wraps up the entire game into a single class that can be started by calling its run() function, I plan on creating a menu system that allows for a user to select a game and play it.


_t9PF3orMPd.png?auto=compress%2Cformat&w=40&h=40&fit=fillmax&bg=fff&dpr=2)


Comments
Please log in or sign up to comment.