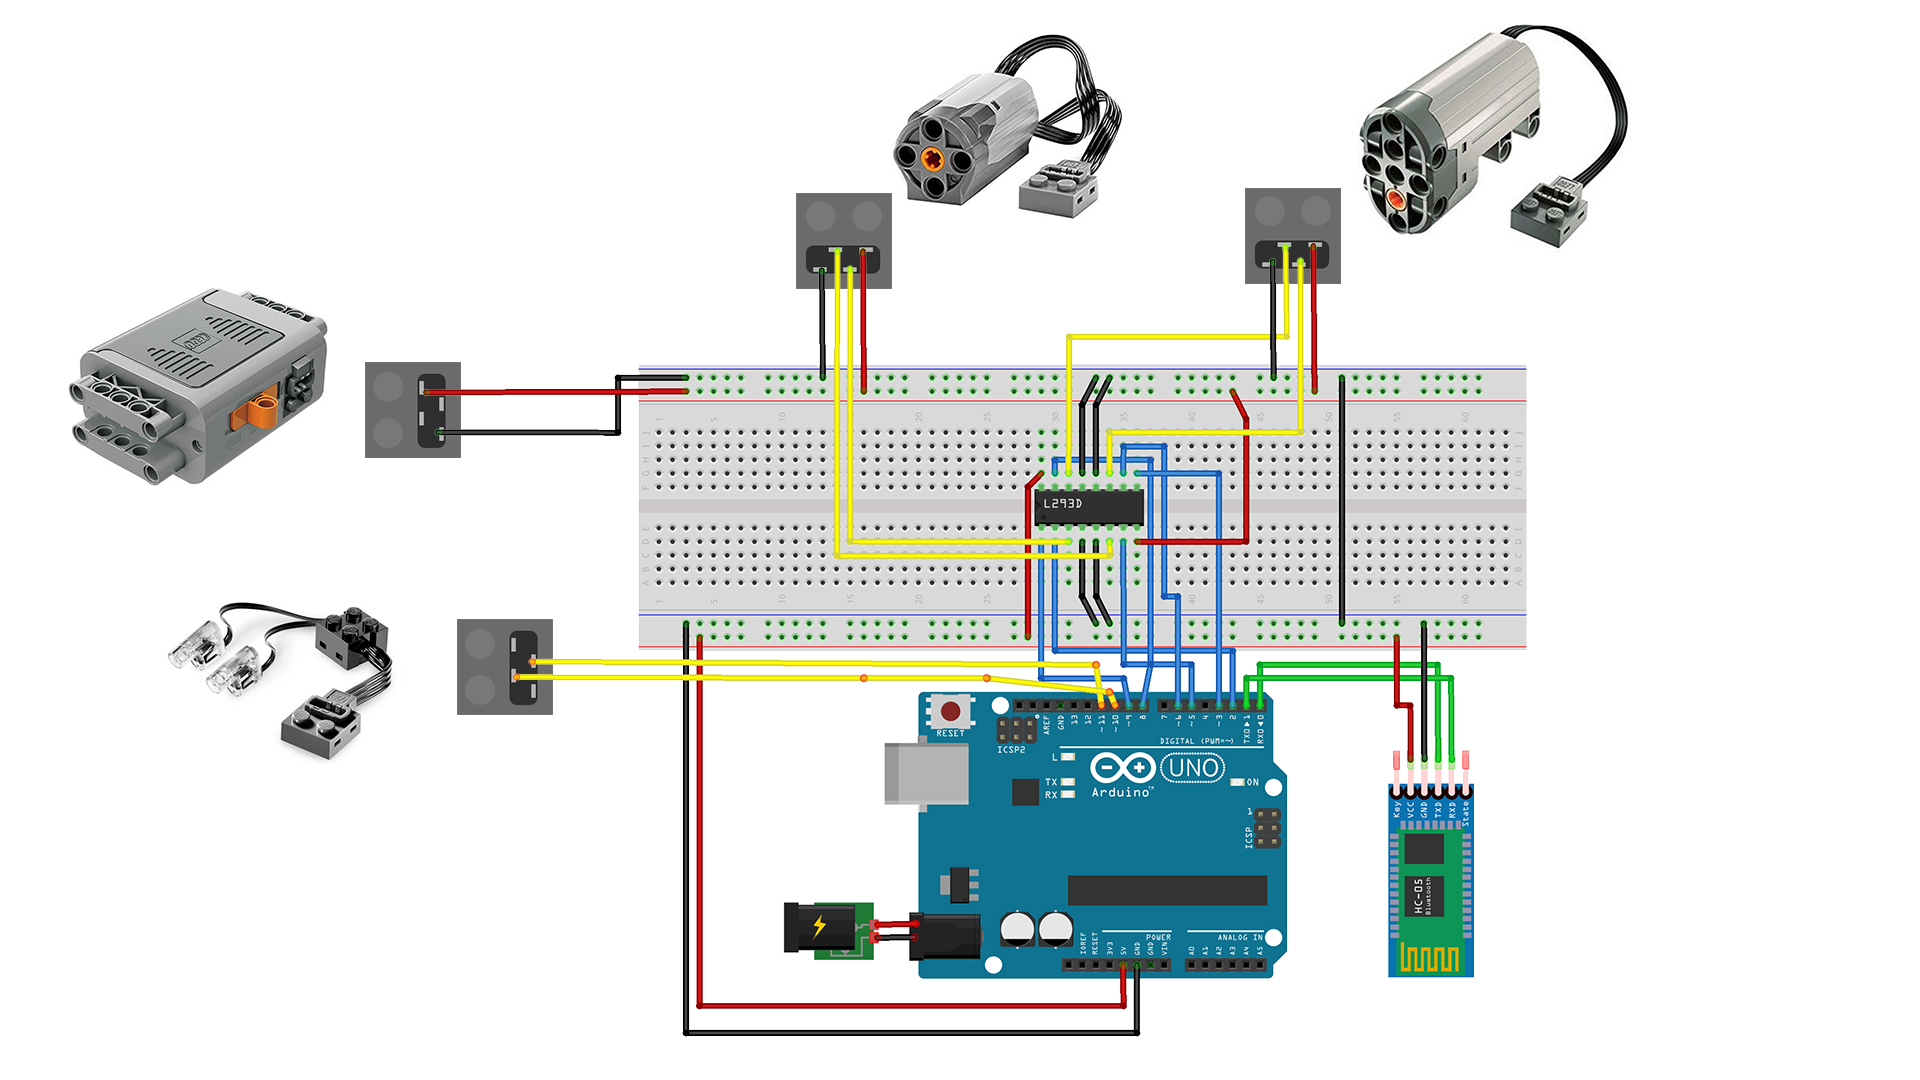
The goal of our project is to learn how to control Lego motors, servos and lighting without using program code using with help the "Ready Maker" free editor.
Little about the Power Functions plugs:Here is the wiring illustration:
GND stands for Ground which is the negative terminal (-) of the battery pack (anode). C1 and C2 can switch polarity to make the motors and servos switch direction.
You can connect the connectors with a soldering iron. Or use a simpler method that does not break the connecting parts of the components:
This connection will be strong and reliable!
The “Power Functions” components:
POWER (9V)
SERVO MOTOR
M - MOTOR
LIGHTS
Create Car:Create a new model using the "Technic" kit.
Consider in advance the place to install the Servo, M - Motor, Power and Lighting.
Create the Connection Scheme:Connect all the components of the "Power Functions" to the breadboard and Arduino.
Play the scene and test the all “LEGO Power Functions” components:
Connect the bluetooth module:Connect the "HC-06" bluetooth module or some other to your project. Use the "57600 baud" speed for him.
Connect the Power(9V).
Run the project on your mobile device and make a bluetooth connection.
The project is finished, now we can test it ! :-)


_ztBMuBhMHo.jpg?auto=compress%2Cformat&w=48&h=48&fit=fill&bg=ffffff)


Comments
Please log in or sign up to comment.