


Hardware components | ||||||
| × | 15 | ||||
| × | 1 | ||||
| × | 1 | ||||
Hand tools and fabrication machines | ||||||
 |
| |||||
 |
| |||||
| ||||||
I was invited to run workshops at the Stockholm Mini Maker Faire 2016. Super exciting! We decided to create a collaborative project, with many small, easily-buildable components that would work together to create a cool experience. How about... piezo contact mics and an awesome amp! Check out the whole workshop here.
This uses parts from a couple of previous projects:
• My first-ever project at a hackerspace was an adaptation of Make's Crackerbox Amp. It's been hauled around for 7 years, and was getting pretty weathered.
• I attended a carbon fiber guitar-building workshop at TechShop years ago, but didn't manage to finish it before Blaine (the instructor) moved on in life.
And some new stuff:
We laser-cut a top for it at Stockholm Makerspace, with space for 20 audio inputs to join together in glorious cacophony. (Thanks to Erik, the laser genius!)
The other parts needed: 15-20 audio input jacks (3.5mm aka 1/8"; we used stereo jacks, though that isn't necessary since a piezo is mono). Hot glue. Speaker wire.
Making the Laser FilesI took pictures of each part of the guitar in my hotel room, against the white bedsheet as a backdrop, and imported those into the GIMP image editor. I figured I'd be okay with that, since it can create paths – but I'd really recommend using something like Inkscape from the start, so you don't need to do as much exporting.
I traced vectors around each part, including places where the laser-cut pieces could slot into the body, so it would fit together well. Those paths were saved individually. The neck piece included 20 holes for the audio inputs and such.
Once that was done, I added circle and oval paths with a sort of organic/space theme. These would be etched, and each piece's etching paths were saved as a single layer.
AssemblyFirst, I soldered all the audio jacks to the back of the neck-piece, and hot-glued them in place, also from the back. (Caroline Dahl jumped in with a drill to get the holes big enough: always measure twice!)
I had transferred my Crackerbox Amp circuit to a new protoboard, with more beautiful wiring. I hooked up the audio-in and ground to one set of buses – the long lines of connected holes, which run down each side and are usually used for power and ground. Then, I could simply solder each piece of speaker wire from an input to a row on the bus. I measured them all first, because they needed to be different lengths in order to reach the holes without creating a huge mass of extra wire. I put the volume knob in one of the "extra" holes (I'd left a few empty, since we didn't need them all for the workshop).
I also extended the power switch and 9V connector up through the neck, to the top. The neck was glued in place, then the head-piece, with generous amounts of hot glue.
There were a few pieces left over from cutting the hole out of the main guitar top. I glued these in place on the head, as well, since the fit wasn't perfect and they add a little embellishment.
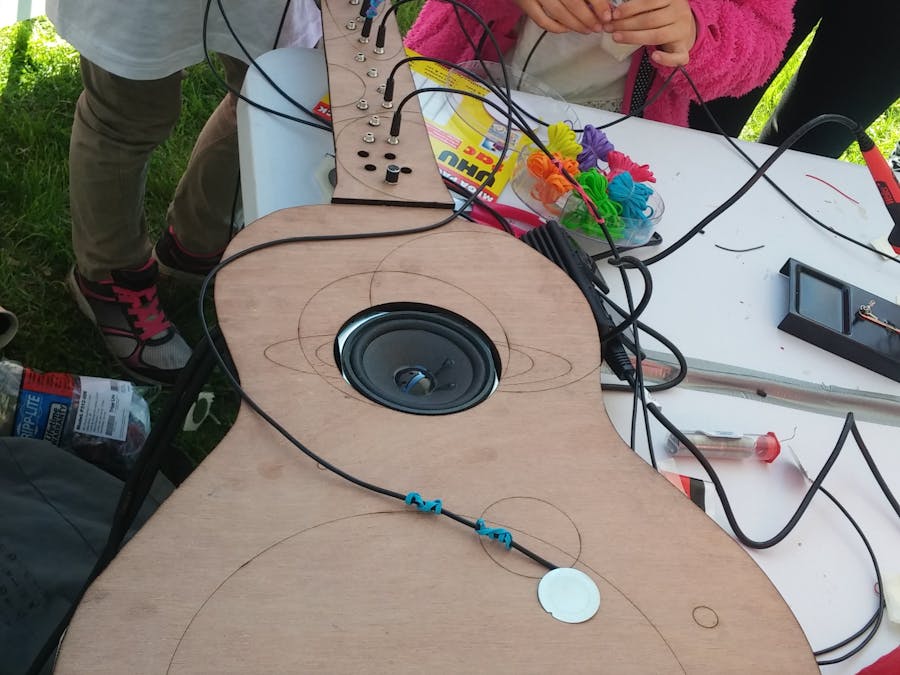
Finally, I hot-glued the speaker in place on the back of the guitar top.
The guitar top is not fixed in place, so that I can show people the insides and how it works. They're very confused by this thing that looks like a guitar, but has no strings and an array of weird shiny things on the neck. They tend to think they're buttons or something. The top does slide underneath the neck, which holds it in place somewhat.
The Carbon Fiber BodyLike I said, this was made as part of a class at TechShop, years ago. You can see my classmate Seth's beautiful art guitar, with a full tutorial, on Make.
NotesThe main weird thing about this amp is that it's waaaaayyyyyyyy quieter than it used to be. I'm guessing it's because I replaced the speaker with one that takes higher wattage, since the old one was all torn up. (They're both 8 ohms, though.) I plan to swap it out with a lower-powered one.
Once it's up to snuff, I plan to use it as a freeform/collaborative percussion instrument! Can't wait. :)


Comments
Please log in or sign up to comment.