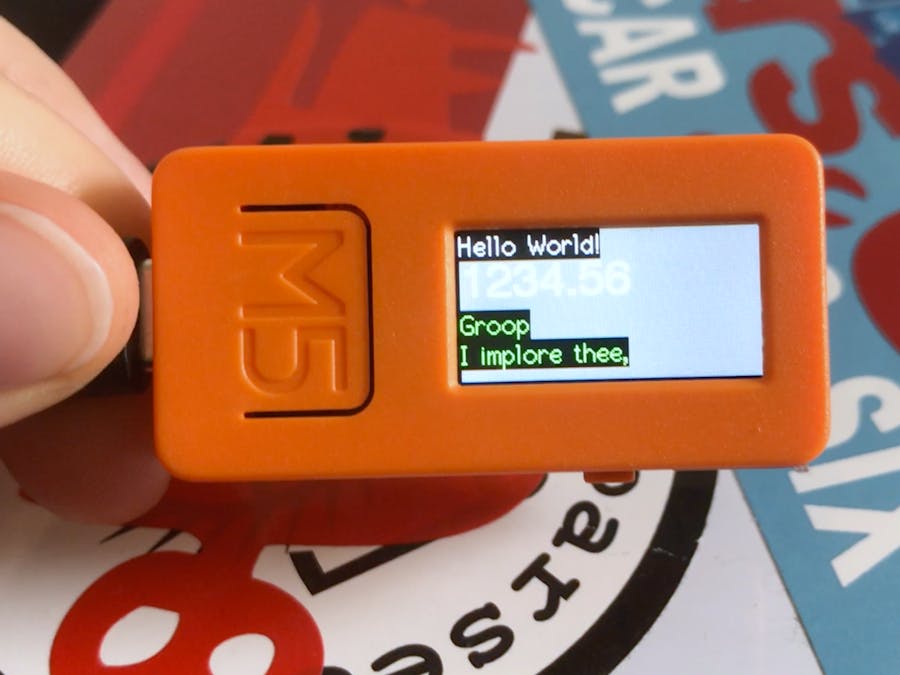
My friend Moheeb sent me this great little M5StickC board, and this thing is just ridiculous! It comes with a built-in rechargeable battery, USB-C connector, Seeed Grove port, two user-programmable buttons, TFT display screen, beautifully labeled breakout header, 6-axis IMU, infrared transmitter, microphone, and much more.
I've also had this pulse sensor for ages, but never actually put it in a project. I was eyeing the Micro:bit tutorial, but as cool as it is, it only shows a momentary indicator with each heartbeat. I want to see an actual heart rate number, and after puzzling over it for a while, hadn't come up with any great ways to do that on the Micro:bit's 5x5, single-color LED grid.
Software setup and hardware testI want to program this thing with Arduino code, since that's where most of the documentation is already, so I've loaded up the official M5StickC Arduino library in the Arduino IDE. Once you have the ESP32 Arduino boards installed in the Boards Manager, the device shows up under that heading as "M5Stick-C".
I started with the example for the M5Stick's TFT display (TFT_Print_Test), to test the upload process. I plugged in the module to my computer, saw the screen come on (blank white), and tried to upload the sketch. No dice – the screen started flashing grey, black, and white, and it said "Connecting........_____.....__", but it kept timing out with an error message:
A fatal error occurred: Failed to connect to ESP32: Timed out waiting for packet header
For the ESP32, people often recommended adding a capacitor, but I didn't want to pull apart the Stick and mess around with the soldering iron. So I looked further, and Google turned up an old forum post with some advice from the M5 team (the original page now 404s, but you can view the cached version at that link). This combo worked for me:
- setting the upload speed to 115200
- connecting GND to G0 before hitting Upload
Success! The sketch now was able to flash perfectly, and I saw the test text appear:
Next, I loaded up the mic test ("Micophone"), and that showed some really cool effects! Due to the sample rate, I was able to see an actual representation of the sound waves, up to a point. (I have questions about how accurate it is, but I'll save them for another day.) Fascinating!
Time to move on to an actual project! Stay tuned. :)


Comments
Please log in or sign up to comment.