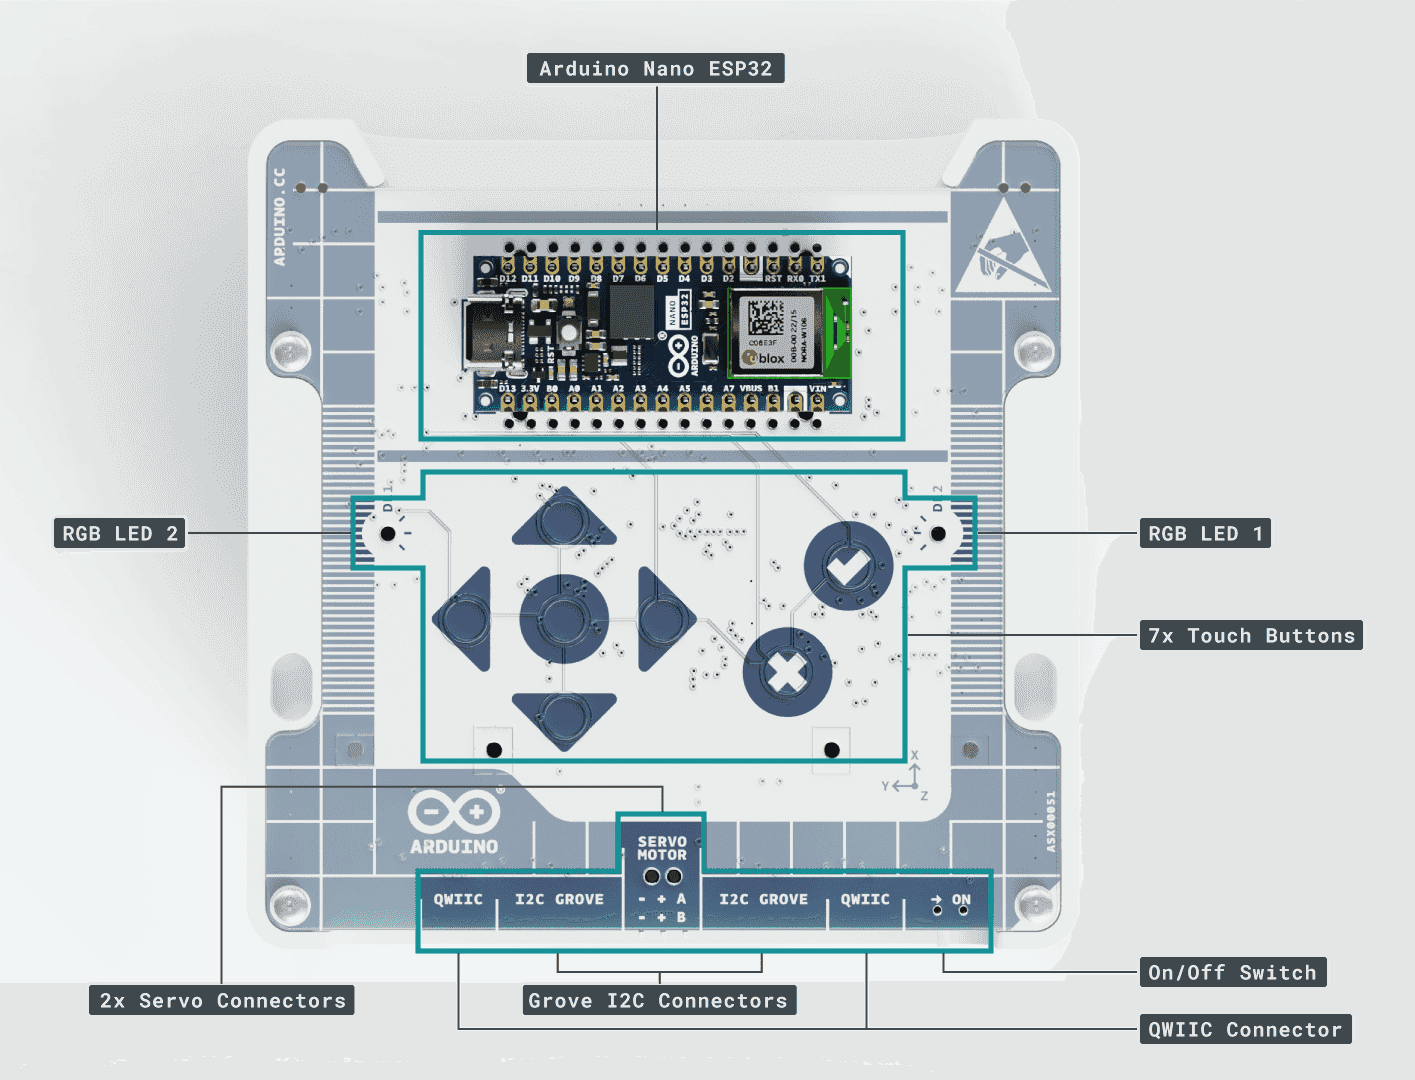
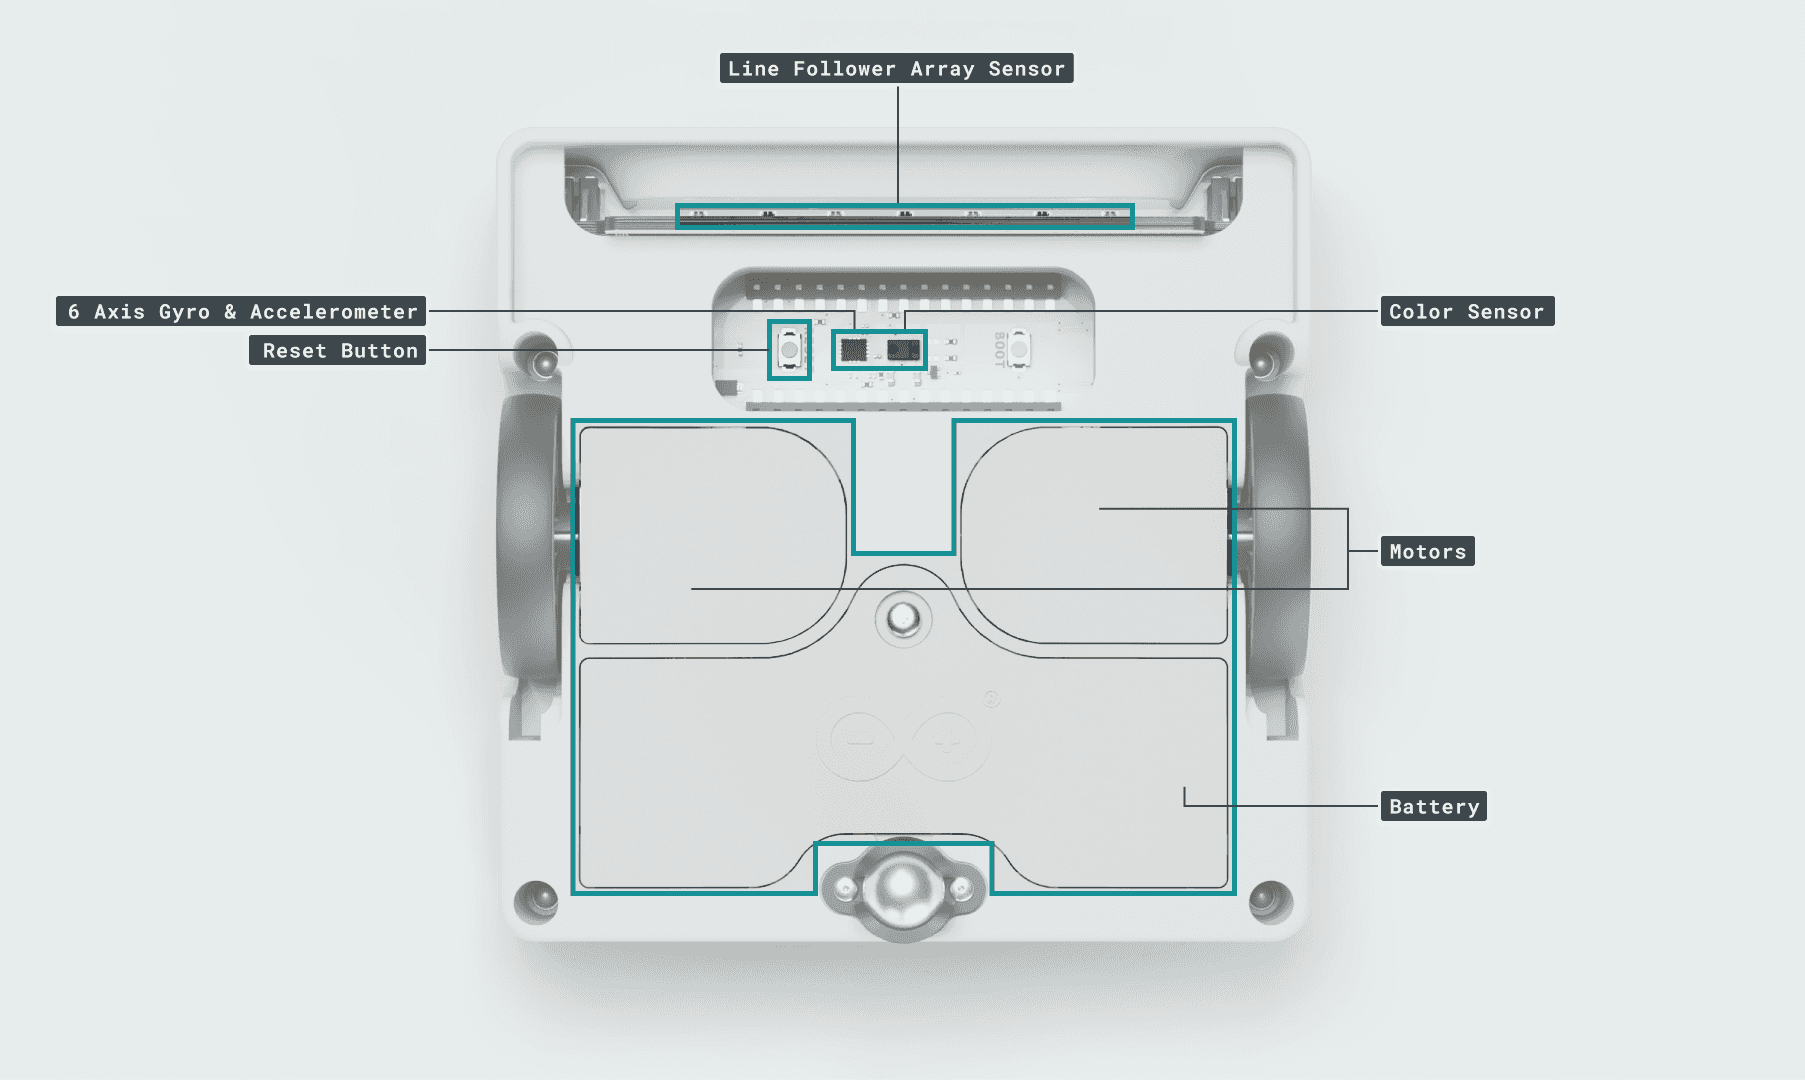
I've been digging into this new Alvik kit, which enables you to build Arduino robotics projects for beginners. It features two DC motor wheels, plus multiple RGB LEDs, ground-effect lighting (glowy!), and breakouts for two servo motors, two Seeed Grove modules, two SparkFun Qwiic-compatible modules (which *should* also work with Adafruit Stemma QT modules), and all the GPIO pins on the Arduino Nano ESP32. You'll also find powerful sensors for classic tasks like line following, color sensing, and proximity response, controlled by an STM32 coprocessor that communicates with the Nano over a user-friendly API.
Here's my unboxing, with more details on the kit:
And a useful exploded diagram from the documentation:
Find more useful diagrams in the Alvik User Manual!
Also, check out Gareth's deep dive article on Hackster News.
Approachable, yet powerfulAfter the unboxing, I dug into the documentation and discovered that several of the components are surprisingly sophisticated, with helpful API commands that enable you to use them to their fullest:
- The DC motors have encoders built in, for accurate positioning like a servo. This will help a lot with my upcoming companion bot project!
- The time-of-flight (ToF) distance sensor isn't just a single distance value; it gives five values for zones spanning left to right – along with vertical values for top, bottom, and center. That means my robot can turn to look at people or objects approaching from different directions!
- The two servo connectors are designated A and B in the API, and can easily be controlled together or separately without hard-coding any pin numbers.
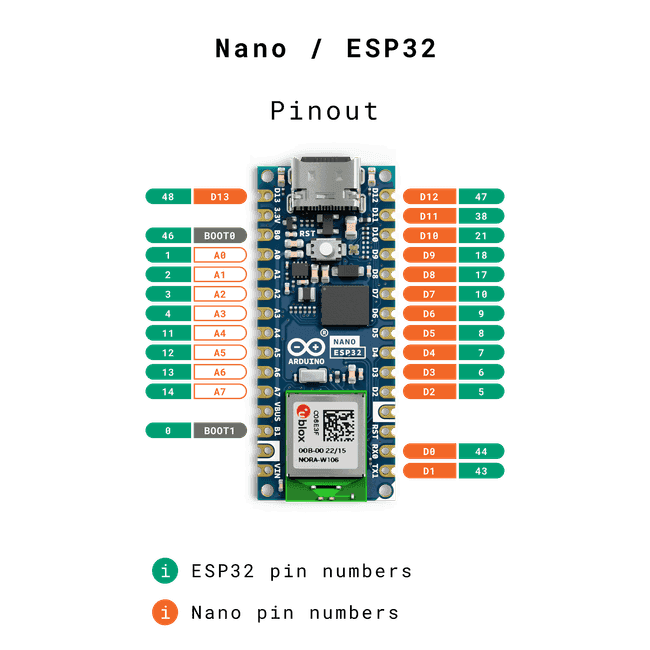
- The GPIO pins on the Arduino Nano ESP32 are unobtrusively broken out on both the bottom and top of the board. David pointed this out when I was thinking about how to connect NeoPixel-style RGB LED strips (since I don't want to be limited to form factors that are available with Qwiic connectors).
- The kit has holes to connect four M3 screws and two LEGO® Technic connectors on each side. You can find 3D-printable parts for each fastener type on websites like Thangs, Thingiverse, cults3d, Printables, GrabCAD, and more.
When you first unbox your Alvik, you'll want to run the demo app, which has three modes. First, charge the built-in battery (an 18650) all the way up via the Arduino Nano ESP32 microcontroller's USB-C port. While it's plugged in and charging, the Nano will blink its RGB LED in red; at full charge, it will stay solid green.
Then, turn the robot on, using the switch at the back. After a brief medley of flashing lights (during which the RGB LEDs embedded near the wheels will flash a few times), it'll be ready to go.
Looking at the robot from the front or back, use the up/down arrows and check-mark ("OK") button to select a demo:
- Blue (default) – line follower. This is designed to run on a surface with a 2-3cm dark track marked out on a light background.
- Green (up arrow) – distance follower. Hit OK once more, and the robot will drive forward until it senses something in front of it (the little face side). If you put your hand in front, you can make it drive backwards as well! Hit the X button to make it stop moving.
- Red (down arrow) – programmed route. Press a sequence of arrows, then OK; the robot will move in the directions you indicated, 10cm or 90º per action. (It uses tank steering, so for the turns, it should rotate in place.)
You can learn more about each of these on the official getting-started page. To switch modes, you'll need to reset the robot by turning it off and on again (while it's also unplugged from USB power).
Follow the official tutorial to install Arduino Lab for MicroPython app: https://docs.arduino.cc/tutorials/alvik/getting-started
Then, take a look at these documentation pages. Try combining a few of the example scripts, then expanding them with functions from the API:
- A big directory of MicroPython examples: https://github.com/arduino/arduino-alvik-mpy/tree/main/examples – This includes Alvik code examples for reading the color sensor, printing the IMU values, getting the wheels' position and speed, and more.
- Alvik API overview: https://docs.arduino.cc/tutorials/alvik/api-overview – This page is a goldmine of information about the different parts and capabilities of your robot. The API – basically a specialized library with custom, Alvik-centric commands – has a ton of useful functions defined. For example, you can pull many different values for distance from the time-of-flight sensor on the front. Plus, query the battery charge percentage,perform useful high-level calculations with a single command, and learn about the units the API uses.
- You can also set up the Alvik using the regular Arduino IDE.
Personally, I'm excited to build add-ons for the kit to give it some personality, so I'll be sharing some models that you can 3D print and attach via the tapped M3 holes. (Note that you should only use M3 screws of 10mm or shorter!)
You can also design your own PCB frontplate for the Alvik! The "swappable sensor module" – that cute little face with the line-following and time-of-flight sensors – can be replaced with another, using the two 6-pin connectors at either side of the board.
Once you've got something to share, publish your own project to the Arduino platform hub here on Hackster!


Comments
Please log in or sign up to comment.