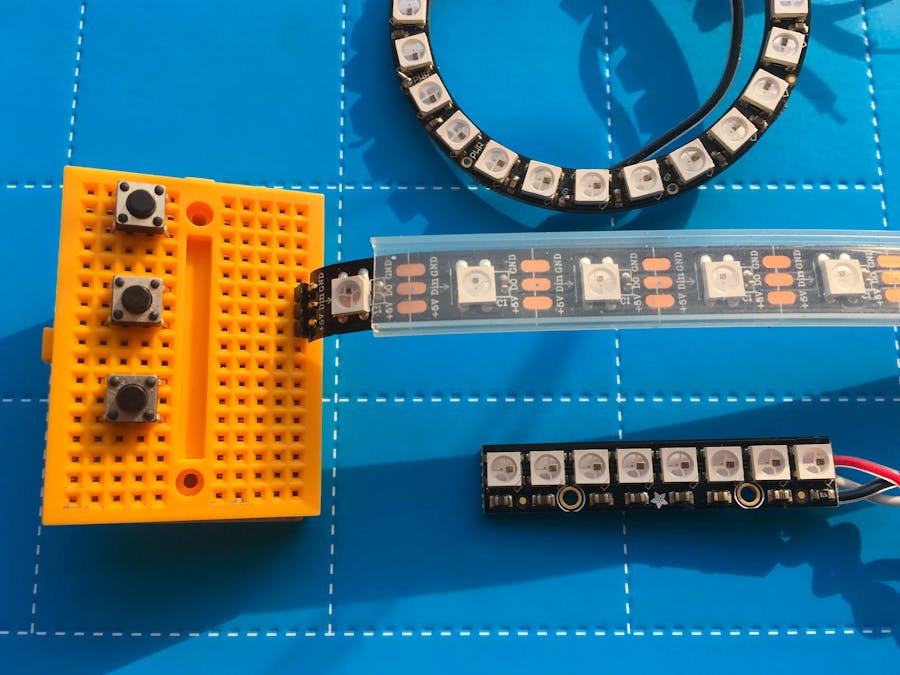
Media-center lighting, high-viz vehicles, text and image displays – NeoPixels are a beautiful and versatile way to add programmable RGB LEDs to your project. They come in rings, sticks, strips, matrices, and more.
Each pixel is made up of several separate colored diodes: RGB, or RGBW if there's a pure-white channel. And each RGB "pixel" has its own little controller chip. If you just hook up the power, nothing will happen – you have to send data over a PWM pin to make these live.
Here's a quick guide to setting them up with Arduino!
THE CIRCUITFor this tutorial, we'll assume that you're working with LED strips – the simplest way to light up your bike, bar, CPU tower, and so forth.
You can cut the strips to any length you like; to do so, make sure you cut across the center of the oblong copper pads. That leaves you with solderable pads on each end, which will allow you to chain them together after the fact.
Solder some male-male headers to the end, with the little arrows on the LED strip pointing away. The arrows should point away from your headers. Put your headers behind the arrows. (It helps to chant this in your head, if you're doing lots of them...)
Note: Depending on where you buy your "NeoPixels", you may end up with something that has the pins in a different arrangement. Pay attention to the labels, as well as the schematic :)
THE CODEGo download Adafruit's NeoPixel library to get started. You can just download the .zip file with the library, unzip it on your computer, and drag the contents into your Arduino libraries folder. (The "libraries" folder is usually created in the same "Arduino" folder where you save your sketches. If you don't have one yet, go ahead and create it.) Also, restart the Arduino IDE if you already had it open.
Once it's up again, you'll have some new example sketches. Let's take a look!
File > Examples > Adafruit NeoPixel > simple
This guy will light up your LEDs green, one at a time. How does it work? We're gonna use another for loop! (Here's our first intro to these.)
As we saw before, for loops are useful for nudging a number higher. We can use that to modify each LED in a sequence – or every other LED, or whatever you like.
- So, first, we tell the sketch to include Adafruit's library.
- Then, we define two variables: the data pin we're using (any PWM pin), and the number of pixels in the strip.
- In the next bit, we initialize the strip as a new object,
pixels. (You can call it whatever you want, of course.)
- Then, we set a delay value, which will be used later to pause after lighting up each LED.
There's a little bit of board-specific code in the setup code, and then we tell the NeoPixel library to start communicating with this strip.
Loop time!
We've got another for
loop, which is kicked off when the variable i
is equal to 0.
Note that this is actually where we're defining the variable, as well – so it starts as 0. You can tell because of the int
marker, and also because there's only a single =
sign. (One =
sets the first thing equivalent to the second, as in i = 0
; two ==
checks to see whether the two sides are equivalent.)
So, this for
loop says:
- If
iis0when you hit this block of code (and it is), then as long asiis less than the declared number of pixels, bump it up by 1...
- then, set the color of the first pixel in the
pixelsstrand to green...
- then, actually push that color to the pixel...
- then, wait 500ms (from the
delayvalsetting)...
- and repeat for each successive pixel, until you max out the strand.
It's a simple but fun animation. :)
Hit upload and deploy this code to your strand.
Next stepsRead through the Best Practices guide. If you want to hook up your Pixels to a beefy power source, remember to add a capacitor across the power leads!
Check out some of the other example code. The strandtest example sketch includes a bunch more animations, to help you get a feel for it.
Then, try coding your own! I'm working on a Matrix-style set of strips for my bike.
You can also fancy it up with a NeoPixel ring or matrix.
Adapt thisYou can transfer this to a smaller circuit (I recommend the ATtiny) to easily hide the controls.
Build an infinity mirror with some half-silvered acrylic or glass!
See the whole series of Hackster 101 tutorials on Hackster and YouTube


_baVEVgguW1.jpg?auto=compress%2Cformat&w=48&h=48&fit=fill&bg=ffffff)


Comments
Please log in or sign up to comment.