It makes sense, right? A hat sits on top of your head all day. It's easy to take off and leave in a bright spot. And it has a convenient shady spot underneath so your electronics don't overheat!
InspirationsKitty Yeung's solar-powered dress is pretty fantastic, and she used it to charge a battery for her phone at Maker Faire last year! I first played with solar by building this glow-in-the-dark, tilt-activated LEGO lamp from a solar flashlight, but this is my first time building the circuit itself.
Adafruit sells these fantastic solar skill badges for $2.95 each, but though there's a great workshop guide for classrooms, they don't give you much information straight-out. They do have a great Collin's Lab video on solar energy, which explains how solar cells work in the first place! Fascinating! I also found this sweet temperature-responsive LED project by The Custom Geek, which uses the badge. Jeremy was able to power an ATMEGA328, plus a bunch of other components, off a single badge. We happened to have 8 of these badges lying around from a long-ago hackathon tour, and it was time to give them life. (Adafruit also sells a ton of other cool solar components!)
The power output is to a Micro USB plug, which I can use to charge the ubiquitous blue 5V power banks that we have around the office (branded with Intel Edison and Microsoft Azure). I use these batteries to power my bike lights, so I'm excited to have the whole system be sustainable!
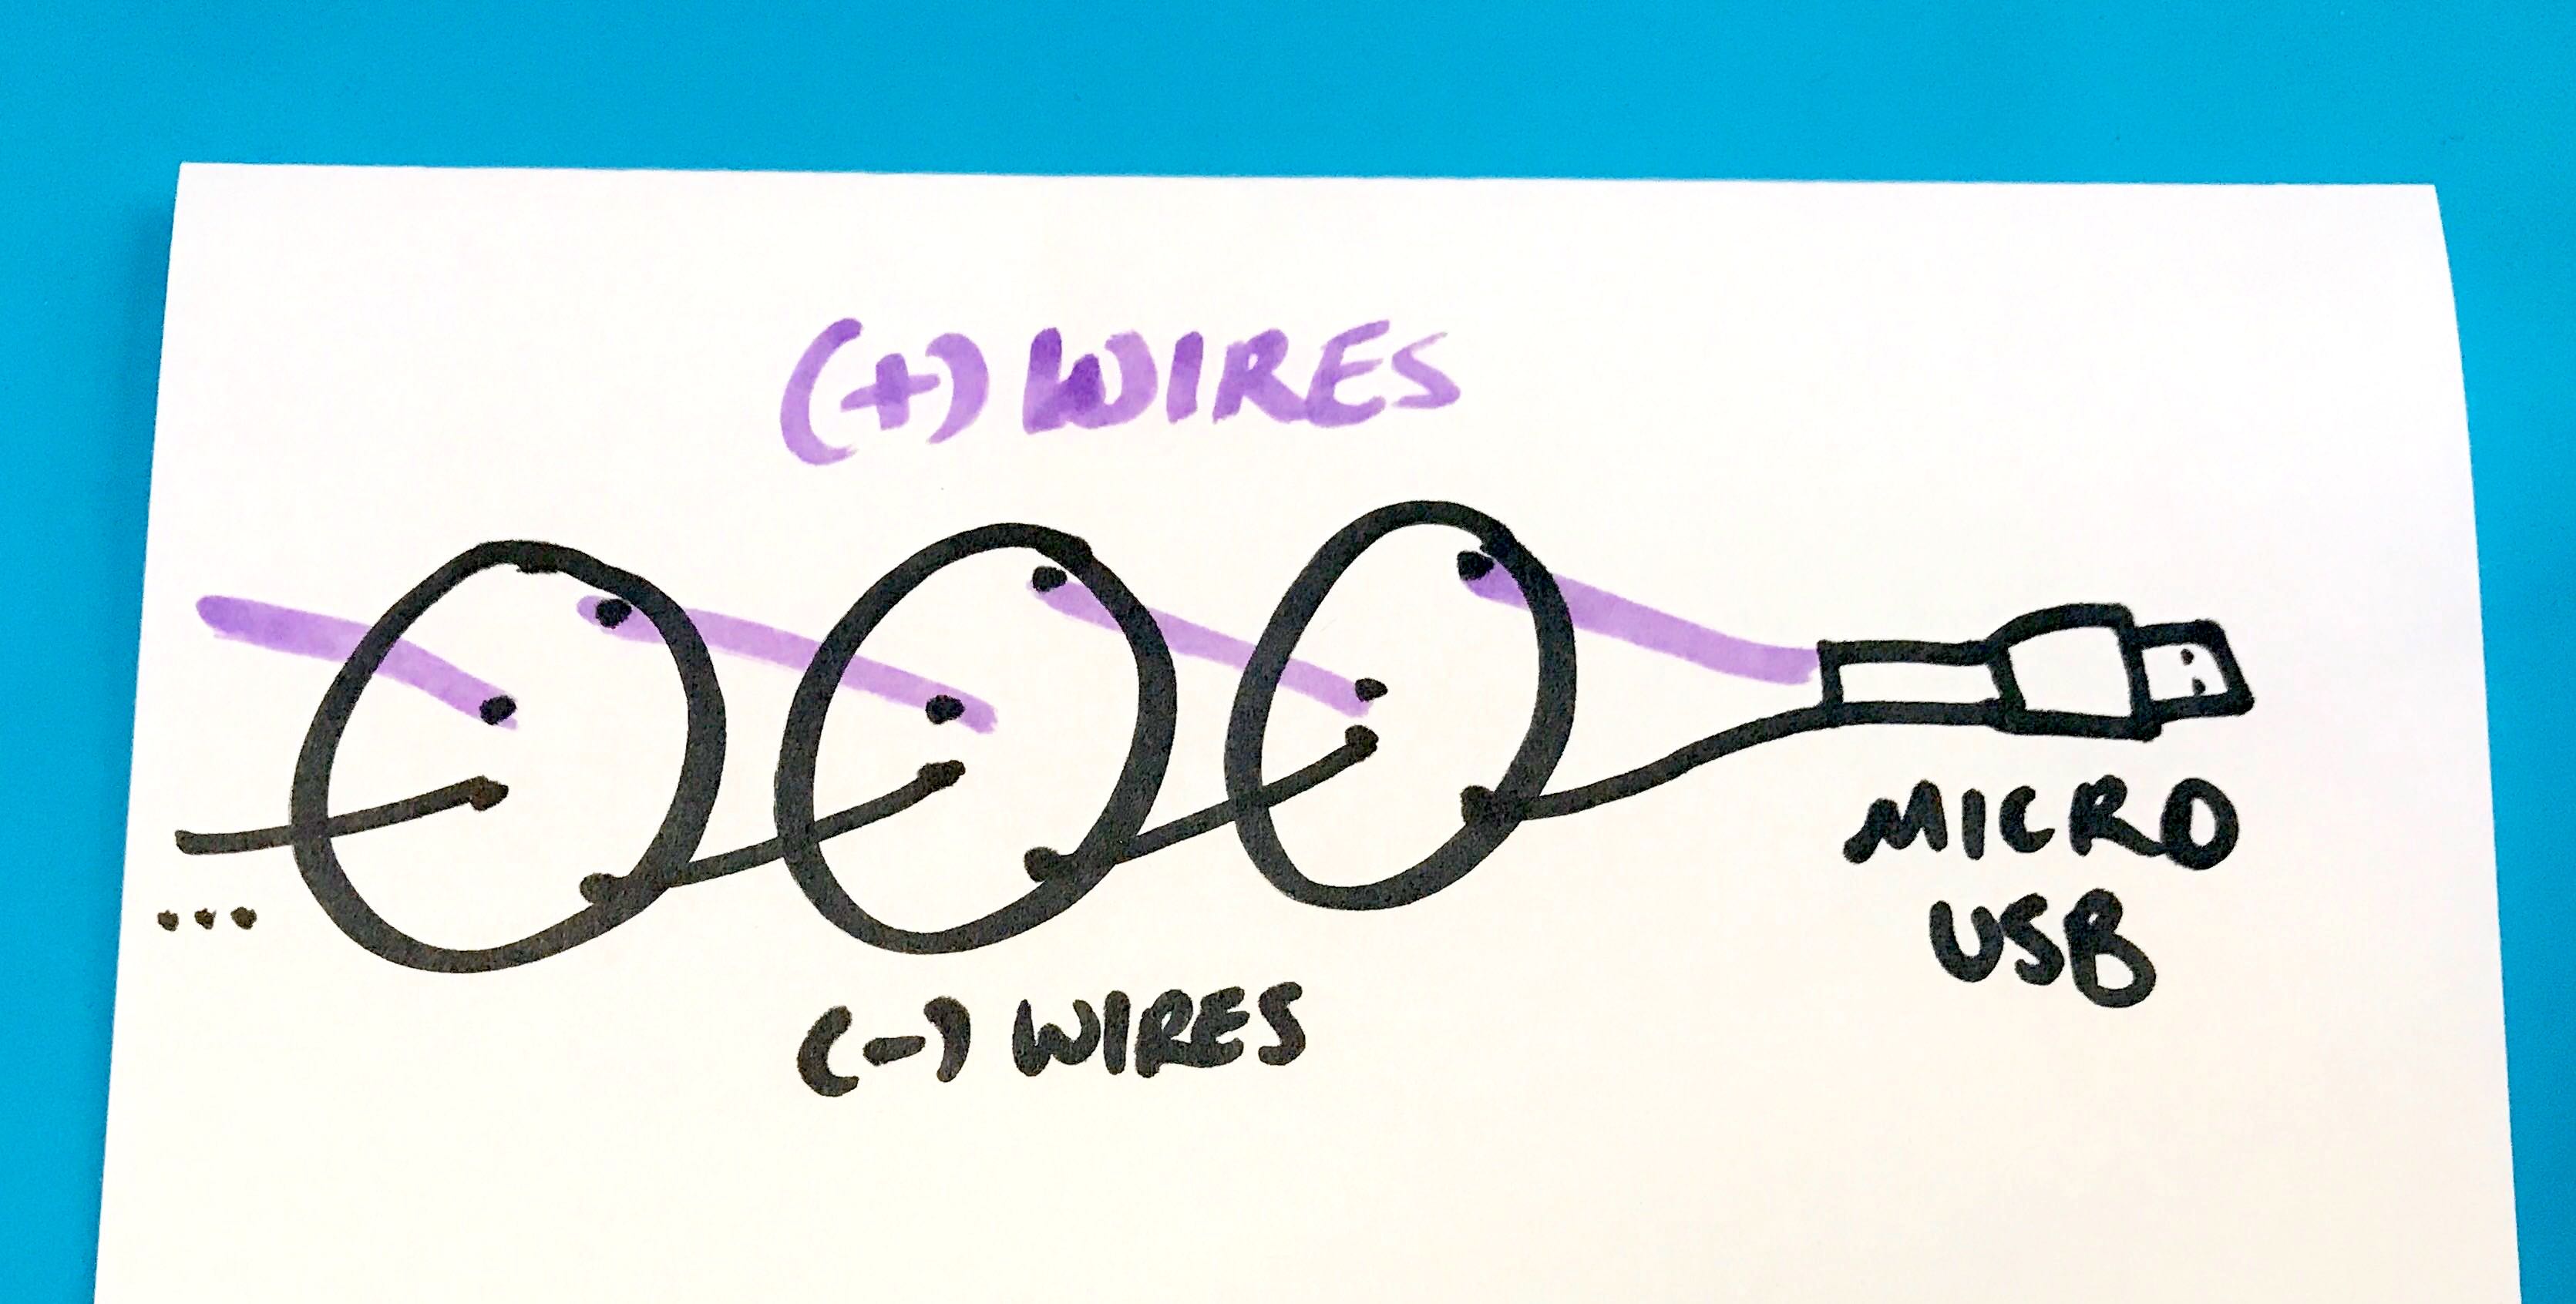
The buildThe Adafruit badge says it provides 5V at 40mA (at max efficiency). The batteries' input is also 5V, so I wired all the cells together in parallel: all the + terminals connected, and all the - terminals connected. This means that the voltage stays the same, but the current is added together, so I should get about 5V, 320mA total. I got pretty close to this (5.5V @ 309mA), so I'm super happy!
To make the connector, I stripped the black and red wires (ignoring green and white) on a half-cable I had lying around, since I murder USB cables for projects pretty frequently. I soldered a blue wire to the red one for +, and black to black, and heat-shrunk both connections. One more layer of heat-shrink tubing went over the entire joint. No shorts in my hair, please!
I threaded these two wires through a hole in the hat, where the brim meets the dome. Then, I soldered them to the + and - contacts on the first solar cell.
Each badge has two sets of contacts: a pair in the middle, and a pair on opposite sides near the edge. I decided to do a sort of fishtail pattern, or repeating V, which helps keep the connections clear. As with all projects – especially wearable ones – I'm expecting this to break, so it must be easy to fix. So, the middle contacts on one cell connect with the outer contacts on the next.
First, I soldered all the wires to the middle contacts of the badges. Then, I threaded all the wires through to the bottom of the hat, and folded the spare length underneath each cell. This allows me to tilt them up again, to re-solder connections or show how it works. I cut the slits through the cheap hat with an X-Acto knife.
On the bottom of the brim, the wires make a cool pattern (I think). There was an extra pair of wires where I'd expected another cell to be, since I thought I had 10 of them. These, I knotted underneath so they would hold the solar badge in place (and ideally look kinda cool). Then I stripped the ends of those two wires and looped them around, to make test points so I can easily connect the circuit to a multimeter and see what kind of power I'm getting.
First test:
After this test, I plugged in my power bank and left it in the sun for about 45 minutes. I came back and tested it with the Arduino Fenderino shield from abierto.cc .
DemoThings I learned about solar powerI did a bunch of research on commercially available solar charging panels, and how to use them. Here are some things I learned:
It's best to charge batteries, rather than charging devices directly. Some devices may stop charging if they detect a low current flow, and batteries seem to be more tolerant.
Direct sun is a must!!! The power goes WAY down in shadowy conditions, even if it still seems bright to you. The cells that were picking up ~2.25V at 12pm, were pumping out 5.5V in full sun at 5.
Keep your electronics cool. While the solar cells want to bask in those magnificent sun rays, batteries and phones can overheat. Tuck them under the hat (or behind whatever array you're building).
Here's a handy reference for wiring up solar panels.
Short link to this project: bit.ly/solarbowler


Comments
Please log in or sign up to comment.