


Hardware components | ||||||
 |
| × | 1 | |||
 |
| × | 1 | |||
 |
| × | 1 | |||
 |
| × | 1 | |||
Software apps and online services | ||||||
 |
| |||||
| ||||||
Imagine you are watching a movie on your laptop and you want to turn off the light of the room to get the feel of a movie hall. What if you can do the same by just one click while sitting on your bed. Sound's interesting!!
So in this project, we will learn how to write code to control the LED.
Step 1: Go to cloud.boltiot.com and create a new product. While creating the product, choose product type as Output Device and interface type as GPIO. After creating the product, select the recently created product and then click on configure icon.
Step 2: Move to the code tab and write the following code to control the LED.
Script to be included is given below:
<script type="text/javascript" src="https://cloud.boltiot.com/static/js/boltCommands.js"></script>
Now the next step is to set the API key and device name. Syntax for the same is given below:
<script type="text/javascript">setKey('{{ApiKey}}','{{Name}}');</script>
Now inside the <body> tag you have to place two buttons, one for turning the LED on and other to turn it off. The syntax for the same is given below:
<body><center> <button >ON</button> <button >OFF</button></center></body>
In the above code, we have place 2 buttons and put the text as 'ON' and 'OFF' respectively. You can change the text as per your choice
Now we have to make these 2 buttons clickable. To do so, we have to call a javascript function named as onclick() which you have already read in lesson 'Creating your functions in Javascript'. Inside the onclick function, we are calling a function named digitalWrite().
<button onclick="digitalWrite(0, 'HIGH');">ON</button>
<button onclick="digitalWrite(0, 'LOW');">OFF</button>
digitalWrite() function has two parameter. The first parameter is pin number and the second parameter state.
To turn the LED ON, the state would be HIGH and to turn it OFF state would be LOW.
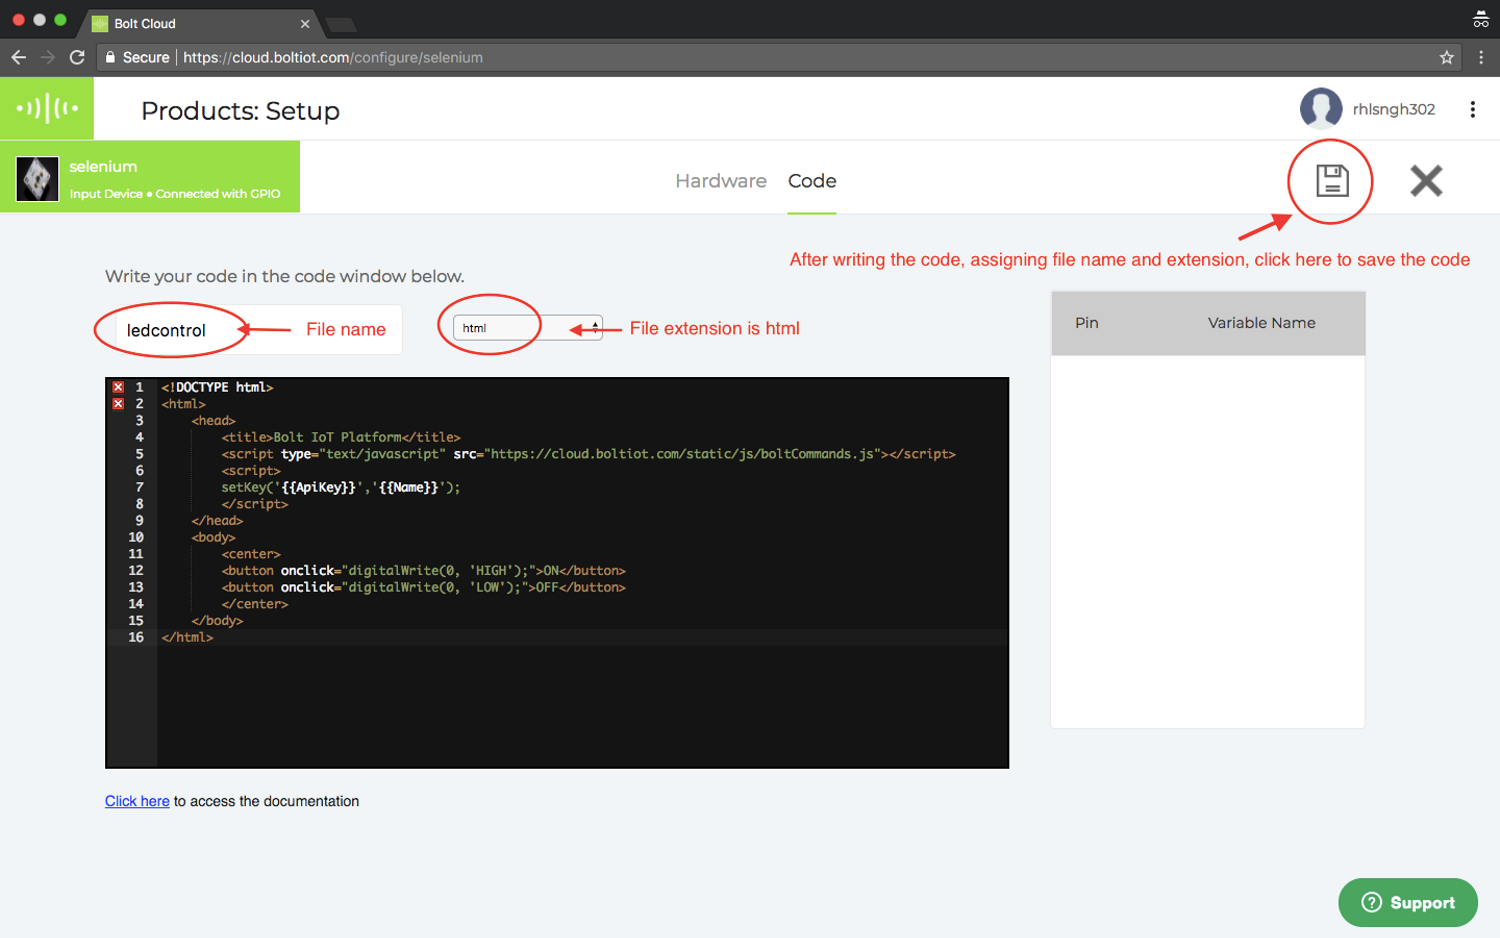
Step 3: Once you have written the complete code in the editor, give the file name as ledcontrol and in the drop-down select the file extension as html. Below is the screenshot how it looks after this step.
Step 4: Now click on save icon to save the code. Now go back to the dashboard by clicking on 'X' icon.
Step 5: In the products tab, select the product created and then click on the link icon. Select your Bolt device in the popup and then click the 'Done' button.
Step 6: Now click on view this device icon to view the page that you have designed. Below is the screenshot of the final output.


Comments
Please log in or sign up to comment.