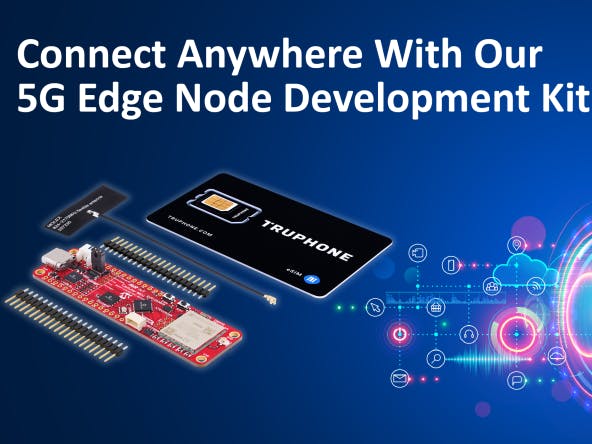
The AVR-IoT Cellular Mini Board is a great addition to your next Cellular IoT application, by providing all the basic building blocks to create secure IoT applications. It comes bundled with a 150MB 90-Day Sim Card from Truphone, providing coverage across many countries. For security a cryptographic IC is built into the board, providing security protocols and secure storage of private keys to securely manage and monitor your applications from long ranges. The board comes with complete Amazon Web Services (AWS) support and full Arduino support.
Initial SetupTo prepare the board before first use, complete the following steps:
1. Disconnect Power: Disconnect the board’s USB-to-C-type cable to ensure it is safe to insert the SIM card.
2. Insert the SIM: Insert the bundled Truphone SIM card in the slot on the backside of the board. The edge of the SIM card should go face down into the slot and the writing should face out.
3. Attach Antenna: Connect the external antenna at the end of the board. Place moderate pressure on it; it will click in place.
4. Reconnect Power: Reconnect the board to the computer with the USB cable, open the Curiosity drive on your PC and double click on the CLICKME.HTM file on the computer. This is a link to a website that will show the onboarding process updates. It will show a progress bar of each step that has been completed in the setup process.
Register and Activate Your SIM CardThe next steps involve setting up and registering the SIM card. The card needs to be activated to use it.
1. Verify you are in a region with LTE-M coverage from Truphone on the Truphone website.
2. Start the registration process.
3. Create an account and enter your SIM’s ICCID and PUK number.
- You will receive the verification email in your registered email inbox in approximately five minutes.
4. Activate the card on the Truphone IoT portal.
- Navigate to the Truphone IoT portal and select your SIM by clicking on the ICCID number.
- Scroll down to the Status Section. If the “SIM Card” status is not Active, click the green “Activate” button.
The board is pre-programmed with an onboarding/sandbox firmware that is designed to interact with a custom web page to get you up and running. This page contains a step-by-step process with live updates from the board. It will show when the Truphone SIM card is activated and when your board is connected to it. It has a progress meter that contains each of the on-boarding steps and shows when the process is complete. For the optimal experience, download the newest version of the firmware. After downloading the new firmware, drag and drop the .hex file to the Curiosity drive. The process is shown the.gif below. Find the latest firmware on the GitHub website.
After the SIM card has been activated, the board should automatically connect to the Microchip Sandbox.
Allow up to four minutes for the initial connection setup. Depending on the board’s location, the SIM attempts to find the frequency band of different cellular operators. Upon a successful connection, the band settings are saved. This connection process can take up to 15 minutes.
Once the SIM establishes the connection, the progress bar will advance. Check the LEDs on the board for their “board status.” The first connection to Truphone might take a while—up to 15 minutes.
Board Status:
- CELL: Blinks during connection attempts/band search, and if a connection to the cellular network has been established, the LED should be on.
- CONN: If the connection to the Microchip Sandbox has been established, the LED will be on.
- DATA: The LED will continuously turn off and on whenever data is sent to the Microchip Sandbox.
You can also use the Board Serial Output on the website to see debug messages from the board. The next section will discuss utilizing the Board Serial Output to debug these messages. These messages are read through the USB.
You can access the Microchip Sandbox anytime during the process.
The cellular board is now set up and you can use it for your next IoT project.
The sandbox detects a connection when it receives a heartbeat message from the board. This heartbeat is sent every minute. Click “SW0” on the board to force a heartbeat.
Onboarding PageThe Onboarding page will show a “Connection Established” button when the board’s connection is accepted. By clicking on the green button, you will go to a landing page that allows you to control the LEDs and stream sensor data. The stream sensor data settings include changing the duration (minutes) and the frequency (ms). The board serial output on the bottom of the page allows you to connect to the board to see debug messages as you work with the board. We also have a guide, available on GitHub, that you can refer to as you become more comfortable and desire to switch over to your own Amazon Web Services (AWS) account.
The onboarding page contains a next-step section that can take you to documentations to start your own program for your application. This site includes various tools that will help you navigate the Cellular IoT board, as well as a link to documentation for the Arduino® library.
This is taken from an updated informational start-up guide that is located in schematics.


Comments
Please log in or sign up to comment.