Temperature sensor technology is in a lot of applications.For example, a smart refrigerator or cooler will notify you when its internal temperature is above a certain temperature if left open for too long. Each fridge has a form of temperature control to maintain a certain temperature value. In this experiment we do a deep analysis of the technology behind the temperature sensor. The possibilities are endless when it comes to manipulating code to trigger an output. One output could be opening and closing door or notifying you via text message. For our experiment we use LED lights to notify us when the temperature is above a certain limit.
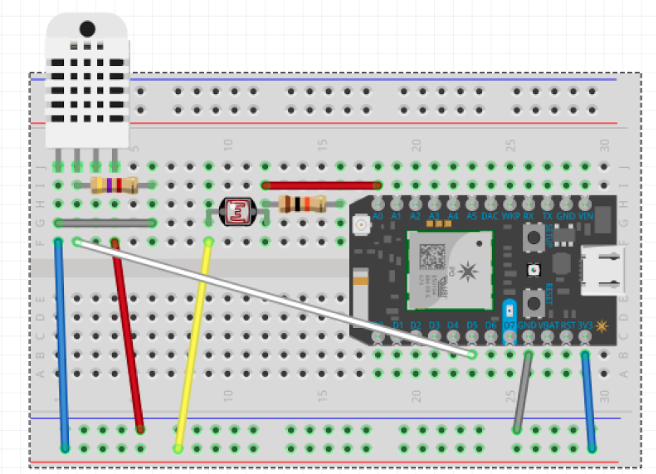
How it works:The first step of this project was to build a circuit with the DHT22 temperature/humidity and a photo resistor. The DHT22 sensor detects the temperature and humidity and sends the values to the photon by uploading code to the photons firmware. The photo resistor is connected to the A0 pin on the photon and measures the amount of light in the room based off of the resistance in the photo resistor.
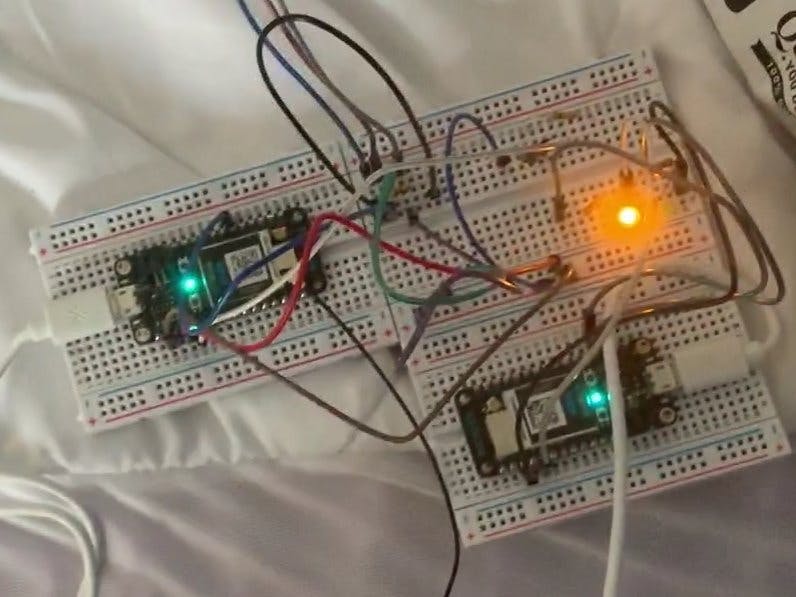
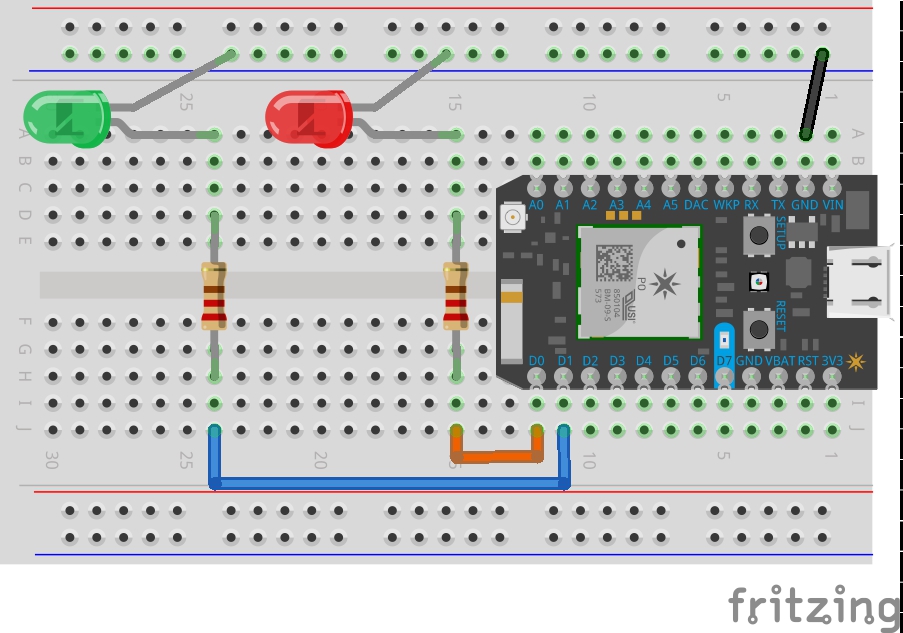
The next step of this project was to build a circuit with another photon to be in communication with the photon connected to the temperature sensor. The purpose of this photon is to receive and read the temperature values provided from the first photon. It then used this data to control green and yellow LEDs based off of the readings from the temperature sensor. It was then time to build the code for the first photon (shown below) to receive the data from the temperature sensor to be published in the particle console. Then, code for the second photon was created to receive the temperature data and create two if/elseif statements to turn off and on the green and yellow LEDs.
Finally, it was time to set up IFTTT to send the data being published to google sheets where it was then graphed by three graphs; temperature, humidity, and light vs. time (shown below).
Analysis:From the graphs, it is easily seen that sometimes the temperature sensor received a bad reading and ultimately gave us a 0 for the temperature which was obviously not true. This is typical, however, as the temperature sensor is not the best and most accurate of temperature sensors, but is sufficient enough to determine the actual temperature as the bad readings can be ignored. The data was taken as the temperature sensor was being heated up and this trend can be seen from the graphs.


Comments
Please log in or sign up to comment.