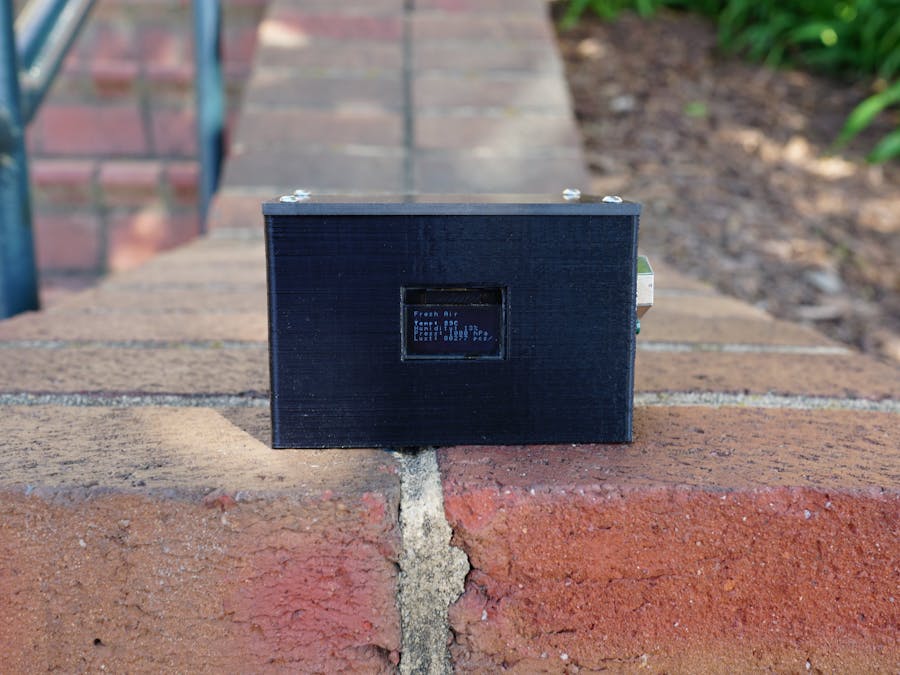
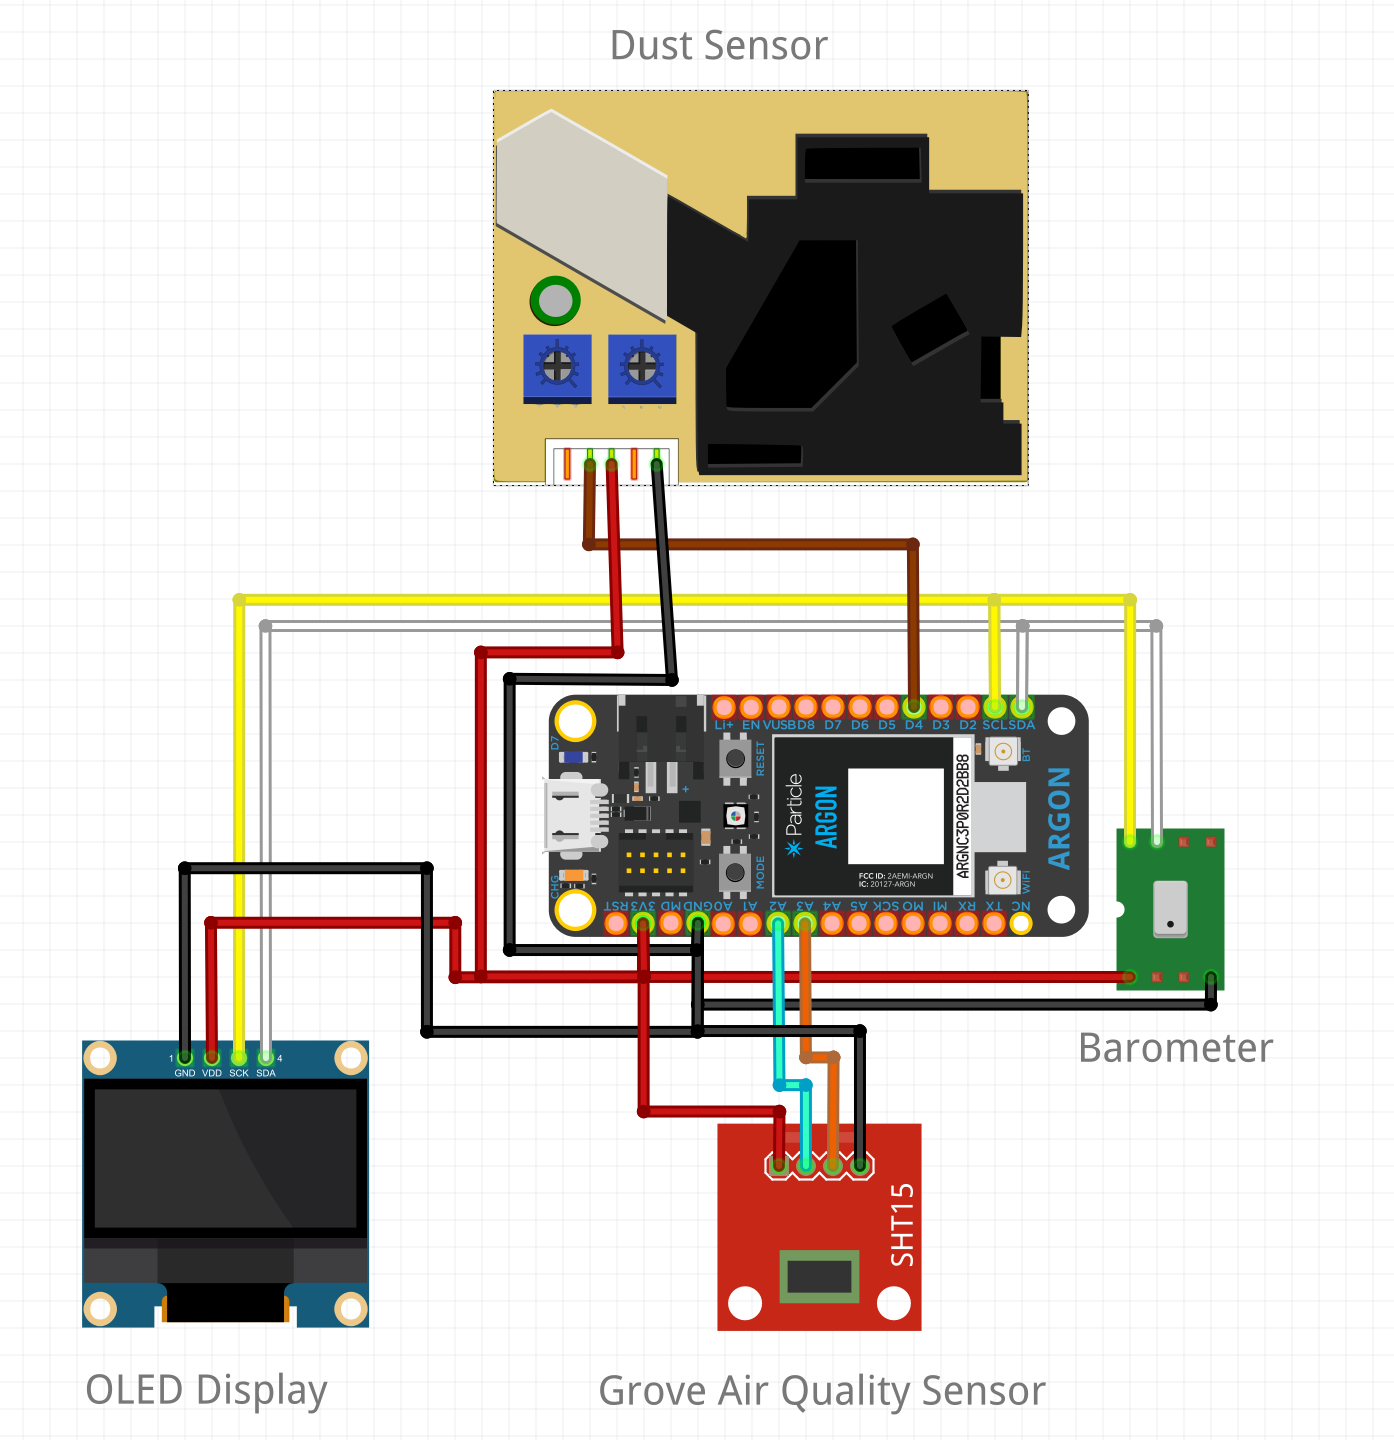
The basis for this project was to utilize a collection of Particle Argons to gather, publish, and chart data pertaining to environmental conditions. The purpose of this data is to aid in the monitoring of a room or space remotely over the internet, as opposed to requiring a physical connection. This allows for separate spaces to be observed from anywhere with internet access. The way this works is through the utilization of the Particle.publish and Particle.subscribe functions provided by the Particle API. These functions send and receive messages from other devices in your network. Our project utilizes two independent air monitor modules that communicate with a central data handling hub. This third Argon transmits data to ThingSpeak and Discord, and also communicates back to the air monitors to ensure their proper function as well as meet project requirements. Additionally, the monitors communicate with each other by sending conditional acknowledgements back and forth, with accompanying LED visual confirmations using the onboard RGB LED. These LEDs work much like a Useless Machine, with each one repetitively triggering an event that assigns an updated value to a variable, which subsequently triggers the other argon back to the original value, repeating the process indefinitely.
A case was designed to house the components for the project. The main part of the case was 3D printed and the lid was CNC machined from carbon fiber for aesthetics. Files can be found on Thingiverse.
Particle Air Monitor Enclosure - Thingiverse
A flow chart was generated to aid in the overall e
The data is graphed on ThingSpeak for a powerful visual aid in interpreting data. The Channel is publicly available at the following link:
An example image of this data can be seen below.
In addition to sending data to ThingSpeak, the data is also sent to a Discord channel for simple and convenient updates. Fast, mobile communication is what sets our project apart. Our project is fully integrated with our Discord server that delivers nearly instant and insightful updates. This is done through Webhooks (Explained in more depth in the "Code Specifics" section), yielding the output below.
Because the Air Monitor units needed to communicate with each other, as well as output data simultaneously to ThingSpeak, there are two very slight variations of the Air Monitor Code.
The differences fall on:
Line 31:
Change:
const String key = "YOUR_KEY_HERE"; //thingspeak Write KeyTo: The key you can find on your personal ThingSpeak Page.
Line 85:
Change:
Particle.subscribe(“ack_from_luke”, ack received);To:
Particle.subscribe(“ack_from_gus”, ack received);Line 112:
Change:
int ack_from_gus = 0;To:
int ack_from_luke = 0;Line 116:
Change:
int ack_from_gus = 1;To:
int ack_from_luke = 1;Line 120:
Change:
Particle.publish("ack_outbound_gus", String(ack_from_gus), PRIVATE);To:
Particle.publish("ack_outbound_luke", String(ack_from_luke), PRIVATE);Line 124:
Change:
int ack_from_gus = 0;To:
int ack_from_luke = 0;Line 128:
Change:
Particle.publish("ack_outbound_gus", String(ack_from_gus), PRIVATE);To:
Particle.publish("ack_outbound_luke", String(ack_from_luke), PRIVATE);Line 245:
Change:
String discord_data = String::format "**__Gus's House…To:
String discord_data = String::format "**__Luke's House…The change here is made to correctly display the data as originating from Luke’s Air monitor when reporting to Discord. A webhook handles the publishing of data by simply sending the JSON data below, which is managed by Discord’s native Webhook integrations. The data recorded from the sensors is all contained in the {{{PARTICLE_EVENT_VALUE}}} field.
{
"event": "{{{PARTICLE_EVENT_NAME}}}",
"data": "{{{PARTICLE_EVENT_VALUE}}}",
"coreid": "{{{PARTICLE_DEVICE_ID}}}",
"published_at": "{{{PARTICLE_PUBLISHED_AT}}}",
"content": "{{{PARTICLE_EVENT_VALUE}}}"
}
Line 262-5:
Change:
Particle.publish("thingspeak", +
"{ \"1\": \"" + String(temp) + "\","
"\"2\": \"" + String(humidity) + "\"," +
"\"3\": \"" + String(pressure) + "\"," +
"\"4\": \"" + String(concentration) + "\"," +…
To:
Particle.publish("thingspeak", +
"{ \"5\": \"" + String(temp) + "\","
"\"6\": \"" + String(humidity) + "\"," +
"\"7\": \"" + String(pressure) + "\"," +
"\"8\": \"" + String(concentration) + "\"," +…
The changes made on Lines 262-265 direct the second air monitor to give values to fields 5-8 of the Webhook handling the publication of data to ThingSpeak. The Webhook in the Particle Console sends the data to ThingSpeak by completing the provided template, yielding the code below:
{
"event": "{{{PARTICLE_EVENT_NAME}}}",
"data": "{{{PARTICLE_EVENT_VALUE}}}",
"coreid": "{{{PARTICLE_DEVICE_ID}}}",
"published_at": "{{{PARTICLE_PUBLISHED_AT}}}",
"api_key": "{{k}}",
"field1": "{{1}}",
"field2": "{{2}}",
"field3": "{{3}}",
"field4": "{{4}}",
"field5": "{{5}}",
"field6": "{{6}}",
"field7": "{{7}}",
"field8": "{{8}}"
}
Fields 1-4 are from Gus’s Argon, while Fields 5-8 are from Luke’s house. The changes are done in this way to condense the data into a single ThingSpeak channel while reporting from two separate locations.
Resources:Original Inspiration from Particle
The code for this project was at first in large measure imitated from the link above. Since then, it has been vastly modified to improve connectivity, meet more demanding requirements, and increase function.
Particle Publish/Subscribe Resources
General Particle Documentation. A living document, it should be your first point of reference for any project you wish to complete.
The above link proved an excellent resource for setting up the Webhooks used in this project.
Incredibly valuable tool for debugging and troubleshooting. Someone has had your issue before, and someone else has answered the question.


_zhWsCcSEcl.jpg?auto=compress%2Cformat&w=48&h=48&fit=fill&bg=ffffff)


Comments
Please log in or sign up to comment.