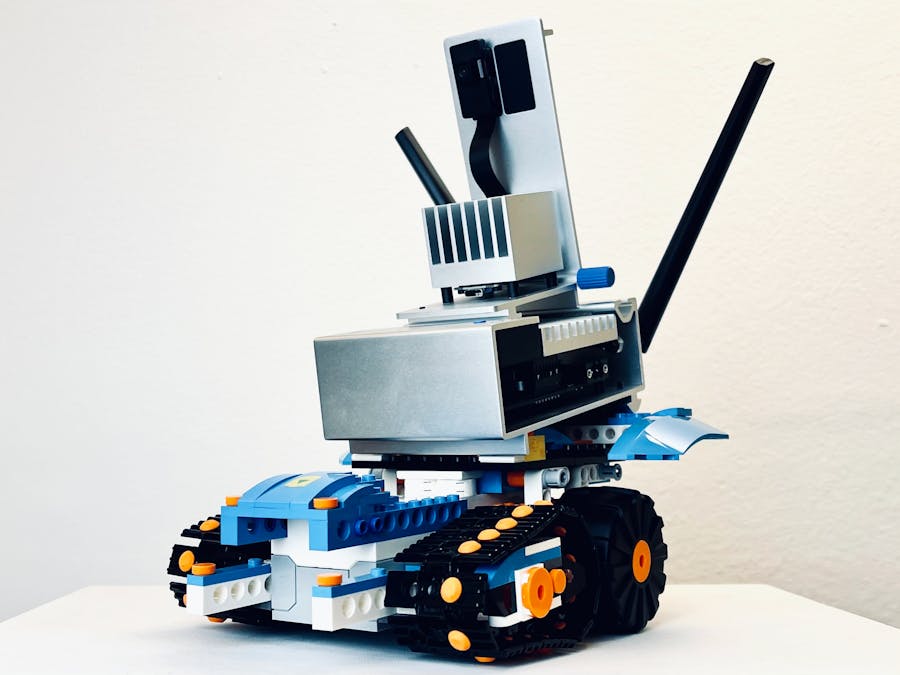
Azure Percept is a platform of hardware and services that simplifies use of Azure AI technologies on the edge. I decided to give a try at building simple obstacle avoidance car over the weekend, I was happy with the result, so here is a story about it.
The car base is built with LEGO Boost and it is slightly modified M.T.R. 4 model, and instructions for the model come in the standard LEGO Boost package.
On top of this base I placed Azure Percept with camera Azure Percept Vision. Since input to Azure Percept is 40V I have not tried to make some battery that will power the car, if you decide to do so you'll probably need to extend the car base further.
Training the modelAzure Percept works out of the box with Azure services such as Cognitive Services, Machine Learning, Live Video Analytics. LEGO Boost package has 3 cones in it, so I took 100 pictures of the cones and trained the model with Azure Custom Vision.
All pictures used in training are available in GitHub repository, also if you need trained models feel free to download them.
Once the model is trained you can easily deploy it to your Azure Percept device via service Azure Percept Studio in Azure Portal.
You can also immediately view the live feed from the device and test how your model works. If needed you can take additional pictures through the interface and retrain your model for higher accuracy.
Getting the dataWhen you run a model on Azure Percept it will do detection and send data to the cloud. You can access the data in different way, for this project I used NodeJS, and Microsoft already has great quick start example ready for this purpose: "Send telemetry from a device to an IoT hub and read it with a back-end application".
Example will need some values about endpoint and key of your IoT hub, you can get those through the Azure Portal interface or with Azure CLI and following commands:
az iot hub show --query properties.eventHubEndpoints.events.endpoint --name {YourIoTHubName}

az iot hub show --query properties.eventHubEndpoints.events.path --name {YourIoTHubName}

az iot hub policy show --name service --query primaryKey --hub-name {YourIoTHubName}
You can enter values in the code and run it with node and you'll see messages from your device quickly appearing:
Telemetry received:
[{"width":"102","height":"91","position_x":"363","position_y":"214","label":"cone","confidence":"0.514648","timestamp":"1619706241105940526"}]I decided to upgrade node example a bit in a way for it to be able to serve data on the localhost, and I installed express.
npm install expressModified code introduced a simple string variable coneVisible which tracks if there is a cone detected with accuracy higher than 50%.
var coneVisible = "no";

var printMessages = function (messages) {
    coneVisible = "no";
    for (const message of messages) {
        console.log(JSON.stringify(message.body));
        if (message.body.length > 0) {
            for (detection of message.body) {
                if (detection.label == "cone" && detection.confidence > 0.40) {
                    coneVisible = "yes";
                }
            }
        }
    }
};
With express this variable is available on the localhost on post 3333. You can use other ports also, but keep in mind 3000 is used for the frontend application.
const app = express();

app.use(function(req, res, next) {
    res.header('Access-Control-Allow-Origin', '*');
    res.header('Access-Control-Allow-Headers', 'Origin, X-Requested-With, Content-Type, Accept');
    next();
});

app.get("/", function(req, res) {
    res.send(coneVisible);
});

let port = process.env.PORT;
if(port == null || port == "") {
    port = 3333;
}

app.listen(port, function() {
    console.log("Success");
});
If you want to extend this further, instead of string variable you could use JSON.
Frontend applicationLEGOs are great, but if you ever tried to "hack" some LEGO bricks you probably know it is almost a nightmare. Huge thanks goes out to people who have put time and effort in creating different libraries to make communication with LEGO smart bricks easier.
"LEGO Boost in Browser" is a great React application for controlling LEGO Boost from the browser via Web Bluetooth API. With it you can easily connect to LEGO Boost, and the application gives you a nice interface where you are not only able to control motors and other sensors, but also to write different commands and write programming logic around it.
When you run the application, and connect to the LEGO Boost you can write code in the "Code Editor". Following example shows you how to make a HTTP request to the backend on localhost and based on the response turn boost lights into red or green.
var request = new XMLHttpRequest();

request.open('GET', 'http://localhost:3333', false);
request.send()

var data = request.response;

if (request.status >= 200 && request.status < 400) {
    if (data === 'yes') {
        boost.led('red');
    } else {
        boost.led('green');
    }
}
In the same way, instead of turning on light red you can turn LEGO Boost by a certain amount of degrees or you can drive it forward if the result is "no" which means there is no cone detected in the way.
Demo videoI prepared a short demo video to show you how it works. You can see the car moving forward until it detects the cone, and also a small test with object detection and LEGO Boost lights.
SummaryThis small weekend project was a lot of fun, and I really enjoyed putting it all together. Azure Percept is an awesome device, and it is super easy to use.
So, why did I call it Perceptmobile? Because Batmobile is old school, my friend LEGO Batman said he would rather drive this car. 😉


Comments
Please log in or sign up to comment.