


Hardware components | ||||||
 |
| × | 1 | |||
| × | 1 | ||||
Software apps and online services | ||||||
 |
| |||||
Hand tools and fabrication machines | ||||||
 |
| |||||
 |
| |||||
I
n this tutorial, we will how to use Nokia LCD 5110, get NTP data from Internet and display it on LCD at specific coordinates. Let's have a short introduction to NTP.
Network Time Protocol (NTP) is a protocol used to synchronize computer clock times in a network.It belongs to and is one of the oldest parts of the TCP/IP protocol suite. Theterm NTP applies to both the protocol and the client-server programs that runon computers.
NTP, which was developed by David Mills at the University of Delaware in 1981, is designed to be highly fault-tolerant and scalable.
How does NTP work?The NTP client initiates a time-request exchange with theNTP server. As a result of this exchange, the client is able to calculate thelink delay and its local offset, and adjust its local clock to match the clockat the server's computer. As a rule, six exchanges over a period of about fiveto 10 minutes are required to initially set the clock.
Once synchronized, the client updates the clock about once every 10 minutes, usually requiring only a single message exchange. In addition to client-server synchronization. This transaction occurs via the User Datagram Protocol on port 123. NTP also supports broadcast synchronization of peer computer clocks.
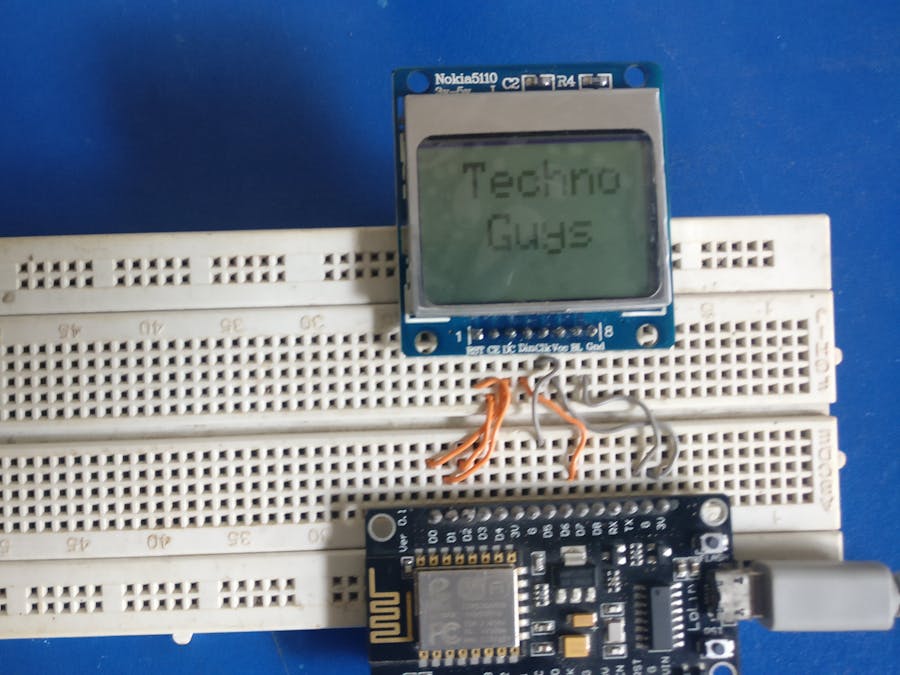
Procedure:We are going to display time and data to Nokia 5110 LCD, first you need to get familiar with Nokia 5110 LCD, you can use any other output method by making some changes in code.
Nokia 5110 LCD:
he Nokia 5110 is a basic graphic LCD screen for lots of applications. It was originally intended for as a cell phone screen. This one is mounted on an easy to solder PCB. It uses the PCD8544 controller, which isthe same used in the Nokia 3310 LCD. The PCD8544 is a low power CMOS LCD controller/driver, designed to drive a graphic display of 48 rows and 84 columns. All necessary functions for the display are provided in a single chip, including on-chip generation of LCD supply and bias voltages, resulting in aminimum of external components and low power consumption. The PCD8544 interfaces to micro-controllers through a serial bus interface.
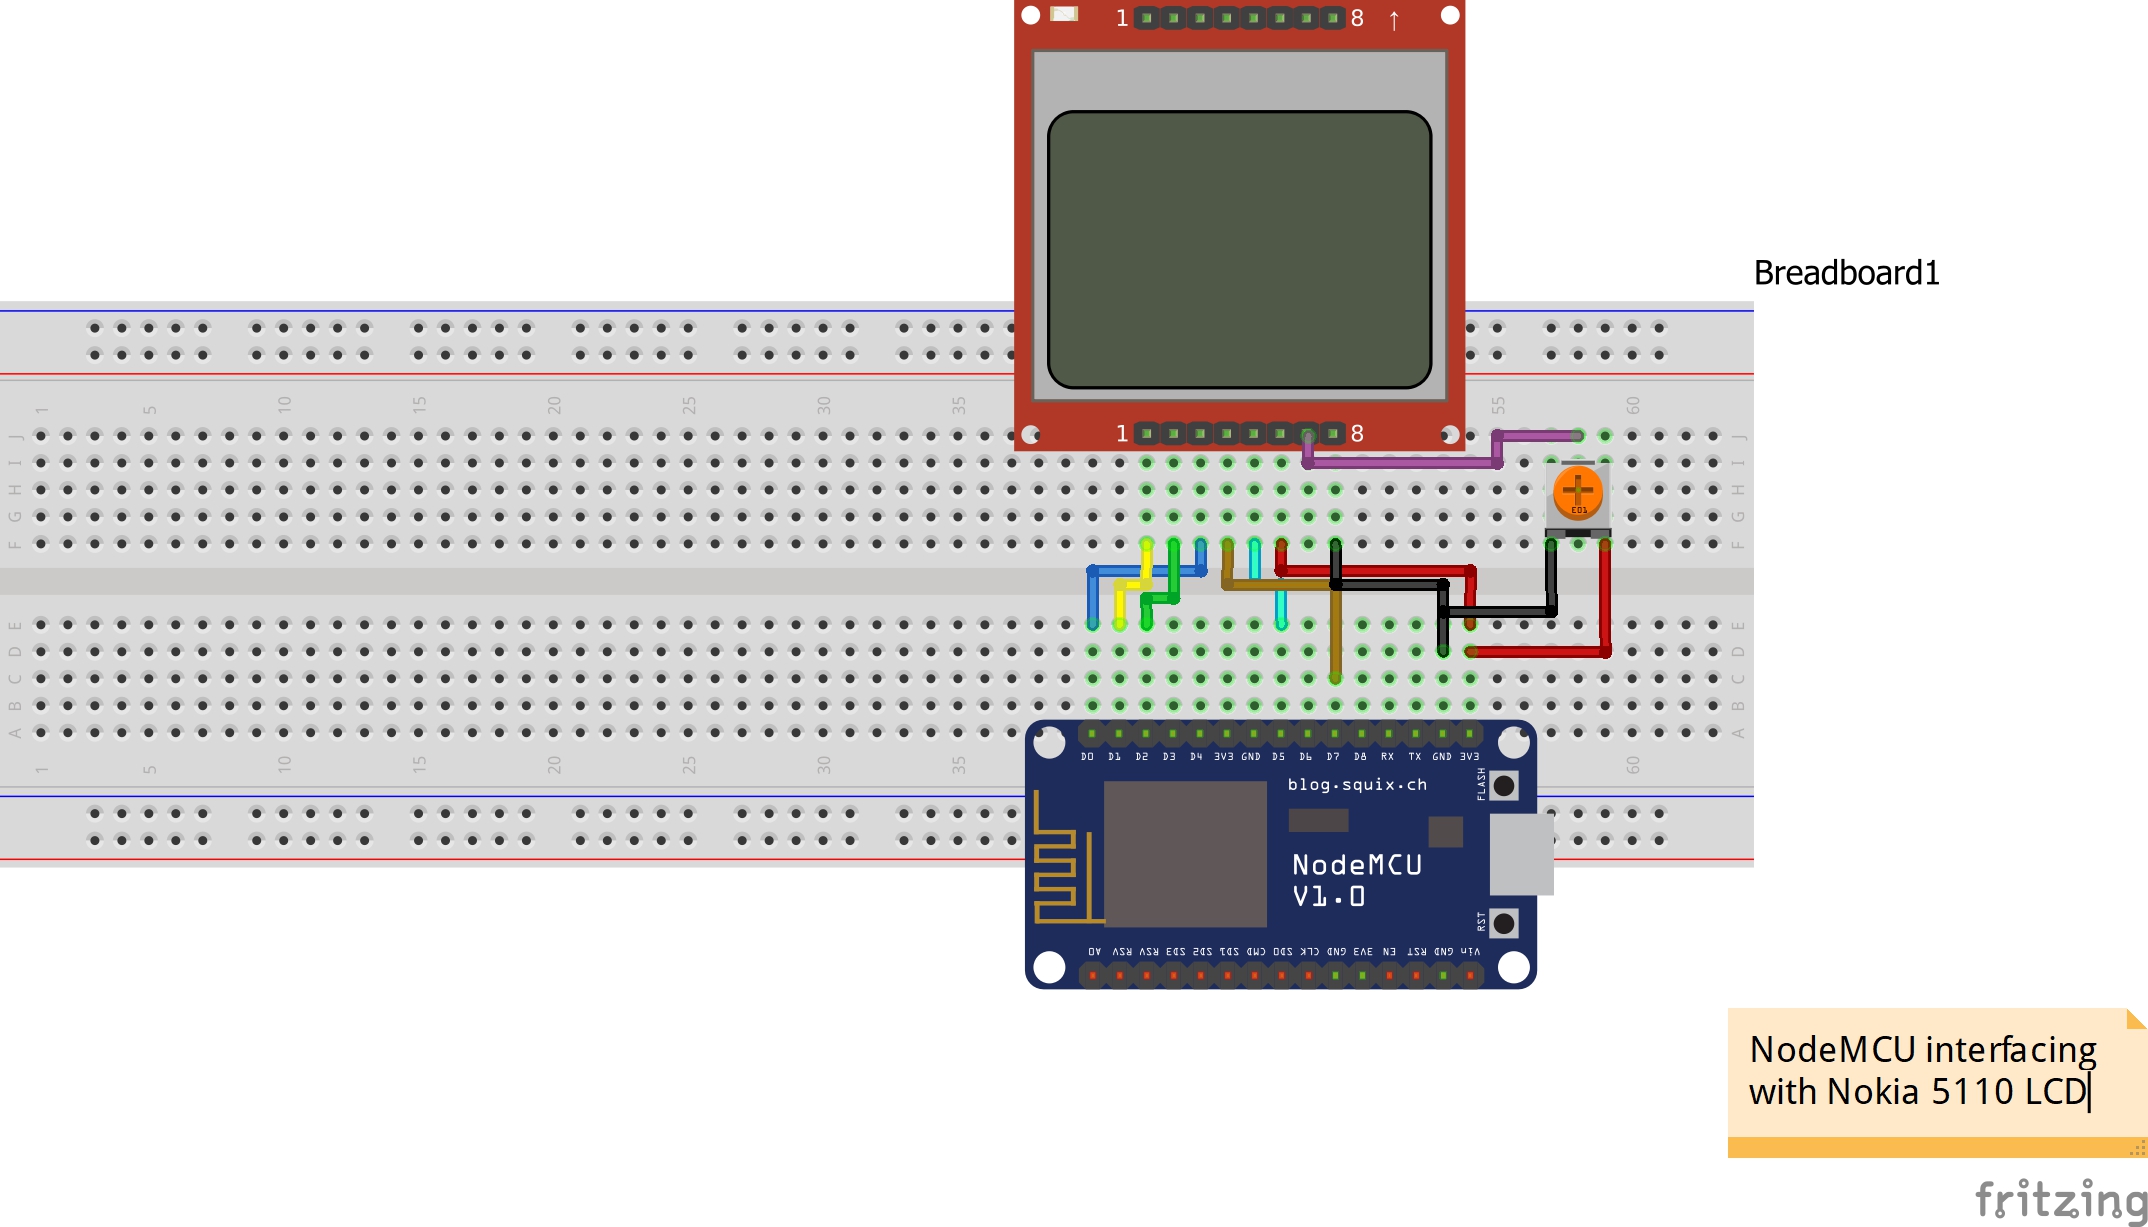
Pinout:Use the following fritzing diagram to make connections:
Nokia LCD pins NodeMCUpins
RST................................ D1
CE..................................D2
DC................................ D0
Din................................D7
CLK...............................D5
VCC..............................3V pin of NodeMCU or use external 3.3v supply
BL.................................Common it with VCC pin to turn ON backlight (you can add a
variable resistor to adjust backlight)
GND.............................GND
Program your NodeMCU:Make sure you have esp8266 boards in your Arduino IDE
Then Set your local wifi SSID & Password and GMT according to your area in code, then upload it in your controller. Initially it will show wrong data until it established connection to internet, wait for few seconds for updated time and date, check the attached video with this tutorial.
Regard:
Please share and subscribe our youtube channel to give us motivation.Thank You
To show some support: paypal.me/nextlifetech


Comments
Please log in or sign up to comment.