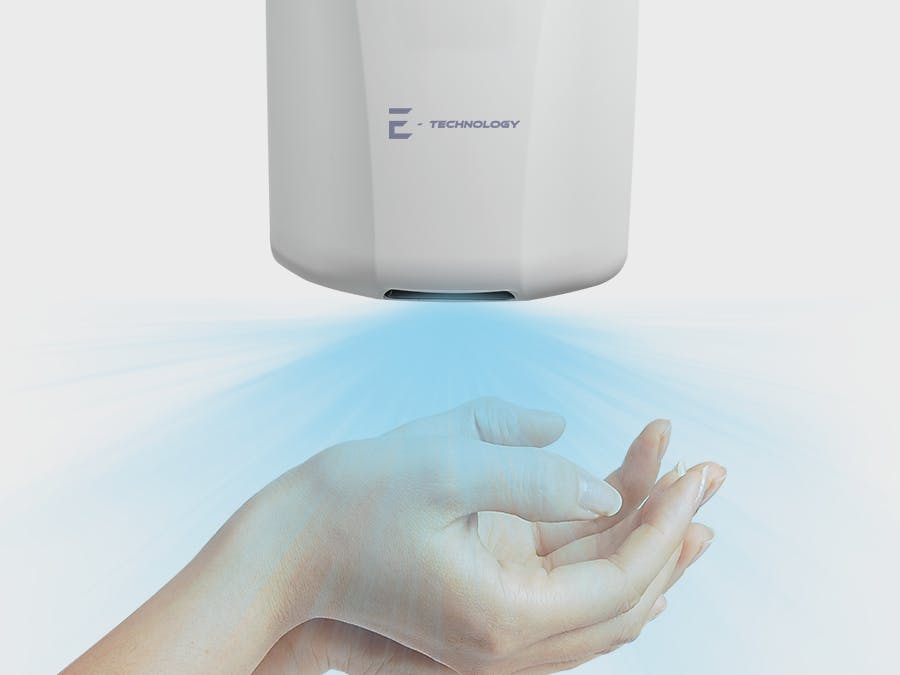
- In order to reduce people's contact with objects in public places, I maked a model that will make hand disinfection easier.
- In public places, disinfection spray are used to disinfect the hands, which each person takes in your hand and disinfects himself. This is a problem because if someone is infected with the COVID-19 virus, they don't know it and use a disinfection spray, thus endangering all persons who use the disinfection spray afterwards.
The device I made will be used in public places such as:
- entrance infirmary and hospital,
- bank entrance,
- entrance to market (food center),
- entrance to public transportation and etc.
Using a distance sensor, it reads when someone moved their hands toward the device. When the hands are close enough, the sensor detects a proximity below 10-20cm and on this basis if it is below 10-20cm distance from the sensor then a sprayer is fired which ejects the disinfectant and thus disinfects the hands for 5 seconds. Then the device shuts itself off and waits for the next person who wants to disinfect their hands.
The prototype model of the device is made of cardboard, to test the functionality. After checking all the features, we go to the realization of the model using a 3D printer.
I would point out that I don't have a 3D printer. If anyone wants to help with a 3D printer, please let me know in a message on hackster.
1. Model and dimensionsThe appearance (design) of the device is not final and is subject to aesthetic changes.
The model for this project was made in dwg format. There are two parts, base part and cover. The models is in attached (.stl format for 3D printer).
I did some screenshots to show parts pictures from the program. These are shown below.
On cover we see that there are four holes, two on top and two on front. These holes are used to close device. This is to prevent the inside of the device from being preserved. (right part)
The horizontal barrier serves to separate the part containing the disinfection fluid (above) and the electronics used in this device (below). (left part)
The hole in the right corner of this horizontal barrier is used to pass the hoses through which the fluid will flow to the outlet of the device. and this is one of the holes in the sloping lower part. (left part)
The second hole in the oblique section at the bottom serves to set up the distance sensor. (left part)
The final product should look like next model on photo bellow.
In this picture, the holes in the bottom that serve to spray the disinfectant and to position the sensor are better seen. The dimensions of these two holes at the bottom are 28mm x 10mm = 2, 8cm x 1cm. The dimensions of the model are shown below.
At the back of the model is a 20mmx20mm hole that serves to power the electronics.
It needs another part that works with a 3D printer. This part is used to connect it to the hose through which the disinfectant fluid goes. He favors liquid spraying so that his hands can be disinfected as soon as possible.
This models can be made using a 3D printer or using polycarbonate panels (or plexiglass panels), by assembly.
2. Components- The Arduino Nano is a small, complete, and breadboard-friendly board based on the ATmega328 (Arduino Nano 3.x). It has more or less the same functionality of the Arduino Duemilanove, but in a different package. It lacks only a DC power jack, and works with a Mini-B USB cable instead of a standard one. Source: https://store.arduino.cc/arduino-nanoThe Arduino Nano is used as the heart of the system, which reads sensor data and controls the relay and LED used in the device.
- The relay module is used to control the power of the water pump. With it, the sprayer that disinfects the hands is switched off at a given moment.
- Water pump is used to pump the disinfectant fluid and discharge it to a sprayer that disinfects the hands when needed (ie when the hands are moved to the device). If a bottle is used as part of the device in the picture, then smaller amounts of disinfectant can fit into the device <2liters, then a pump with a power supply of up to 5V may be used. If a larger capacity bottle is used and is located outside the unit (somewhere on the side) of 10 liters or more, then a stronger 12V powered pump should be used. With this model, only the hose would fit into the device and its dimensions would be smaller for the top of the fluid bottle.
- Distance sensor SHARP (GP2Y0A21YK0F) is used to read the distance from the device. This determines whether or not the fluid will be released.e.g. if the distance is less than 20cm, then the Arduino will read the value below 20cm from this sensor and automatically start the water pump, via the relay.
There is also an LED diode that lights up when the liquid goes out to the sprayer. It goes out as soon as the fluid stops flowing.
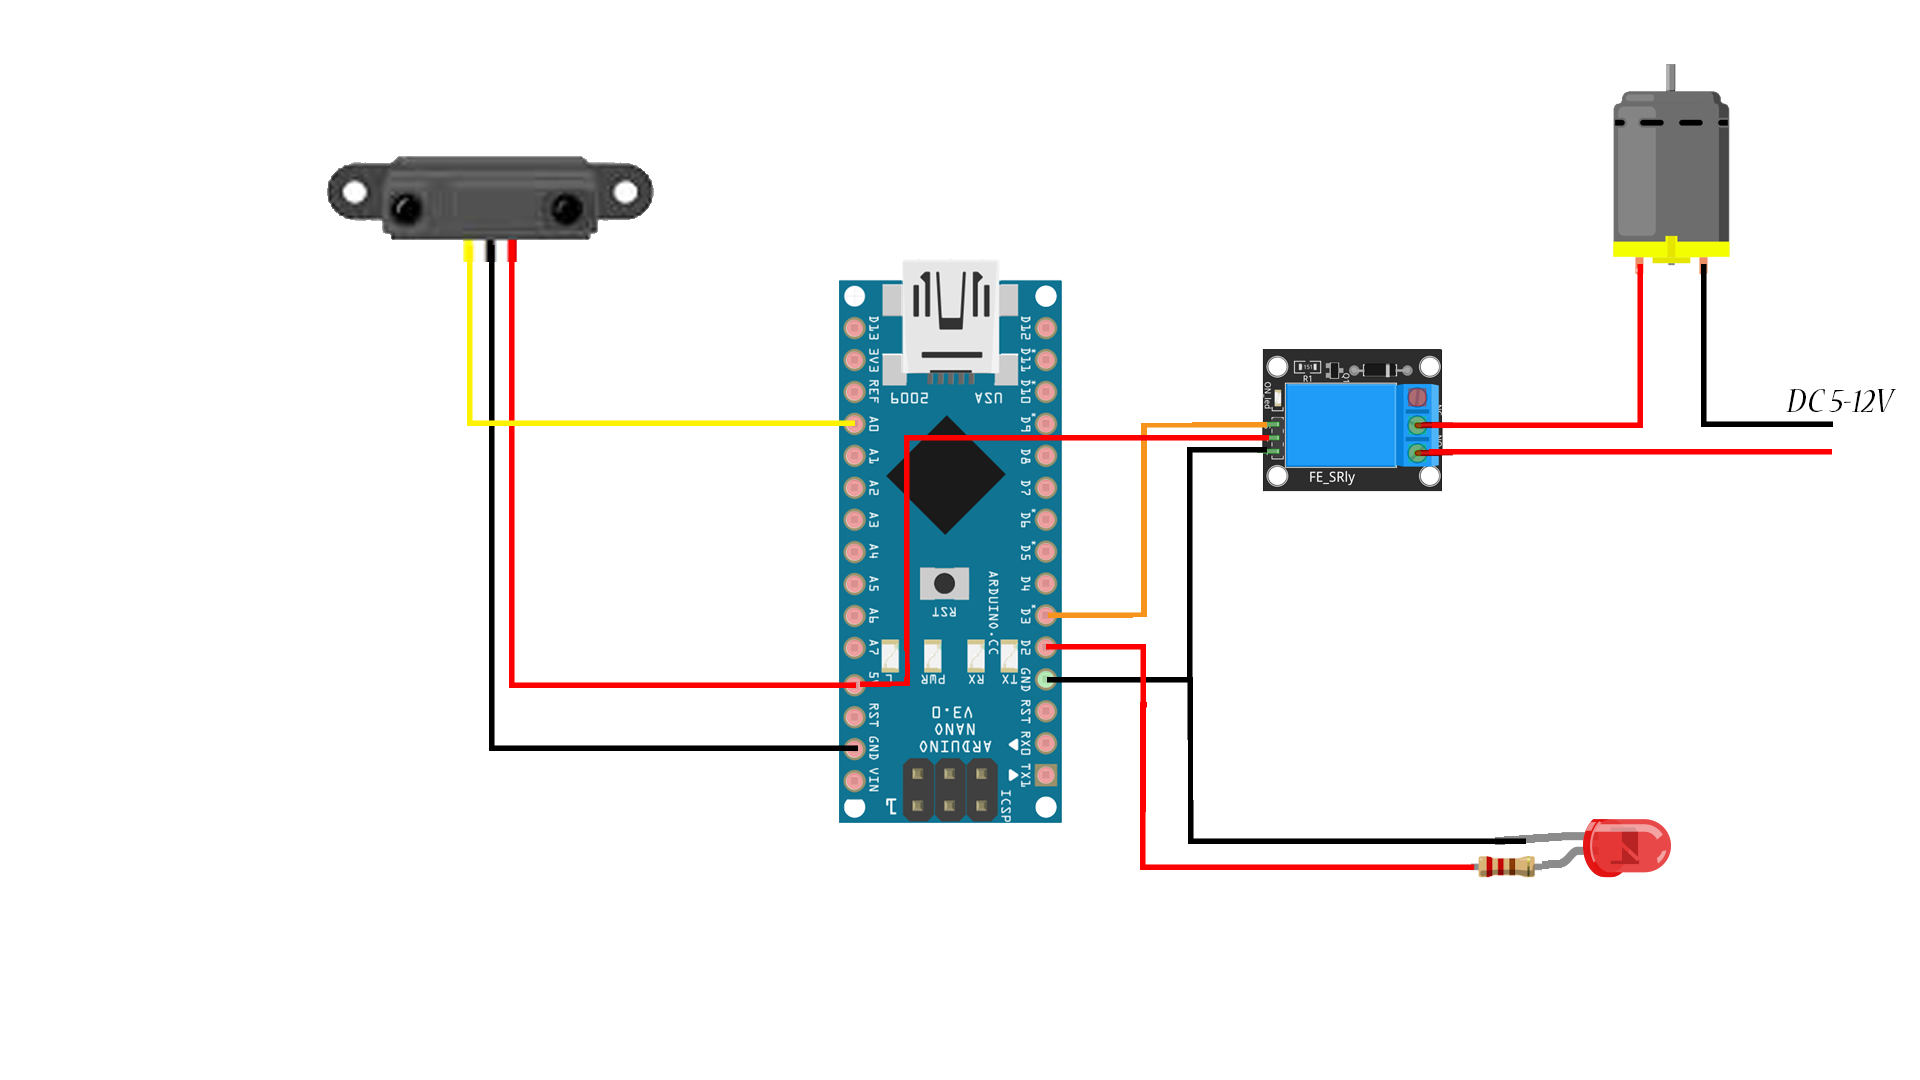
3. Schematic and Arduino IDE CodeBelow is a schematic of connecting the components we mentioned earlier. The components are connected in such a way that all pins are already predefined by the code. A schema was created based on code and the connection was made.
Below, we will comment on the code and explain how the distance value is obtained.
At the beginning of the code, we assign names to pins and define the pins that will be used in this code.
int ir_sensor = A0;
int led = 2;
int relay = 3;
Then for pins we say whether there will be inputs or outputs. We assign this in setup function.
pinMode(ir_sensor, INPUT);
pinMode(led, OUTPUT);
pinMode(relay, OUTPUT);
An analog reading of the value from the distance sensor (SHARP) is performed using the analogRead () function. The value obtained is proportional to the voltage achieved at the sensor signal pin.
analogRead() - Reads the value from the specified analog pin. Arduino boards contain a multichannel, 10-bit analog to digital converter. This means that it will map input voltages between 0 and the operating voltage(5V or 3.3V) into integer values between 0 and 1023. On an Arduino UNO/Nano, for example, this yields a resolution between readings of: 5 volts / 1024 units or,0.0049 volts (4.9 mV) per unit. See the table below for the usable pins, operating voltage and maximum resolution for some Arduino boards.
Source: https://www.arduino.cc/reference/en/language/functions/analog-io/analogread/
int sensor_value = analogRead(ir_sensor);Since the read value ranges from 0 to 1024, it is now necessary to convert this value to centimeters, this is achieved by applying a formula that is precisely defined for this type of sensor.
int distance_cm = pow(3027.4/sensor_value, 1.2134);When the value in centimeters is obtained we can now set the conditions:
- If the distance <10cm turn on the LED and water pump. Leave it turning for 5 seconds, then turn off and check the distance again.
- If the distance >10cm, keep the LED and pump off then check the distance again.
if (distance_cm < 10) {
    digitalWrite(led, HIGH);
    digitalWrite(relay, LOW);
    delay(5000);
    digitalWrite(led, LOW);
    digitalWrite(relay, HIGH);
    }
  else {
    digitalWrite(led, LOW);
    digitalWrite(relay, HIGH);
}As we have stated this device is made as a prototype of cardboard. Pictures of the cardboard device are shown below, the video has already been featured earlier.
The appearance (design) of the device is not final and is subject to aesthetic changes. It's application is wide, and it would be great to get a product like this in the real world.
The device model can also be made using a plastic injection molding machine. This would achieve the production of more devices in a shorter period of time. It would save both time and money, this kind of investment is expensive, for a beginner with a small budget like me, but with the support of leading companies and firms, I think it would get good results in sales and application on the market.


Comments
Please log in or sign up to comment.