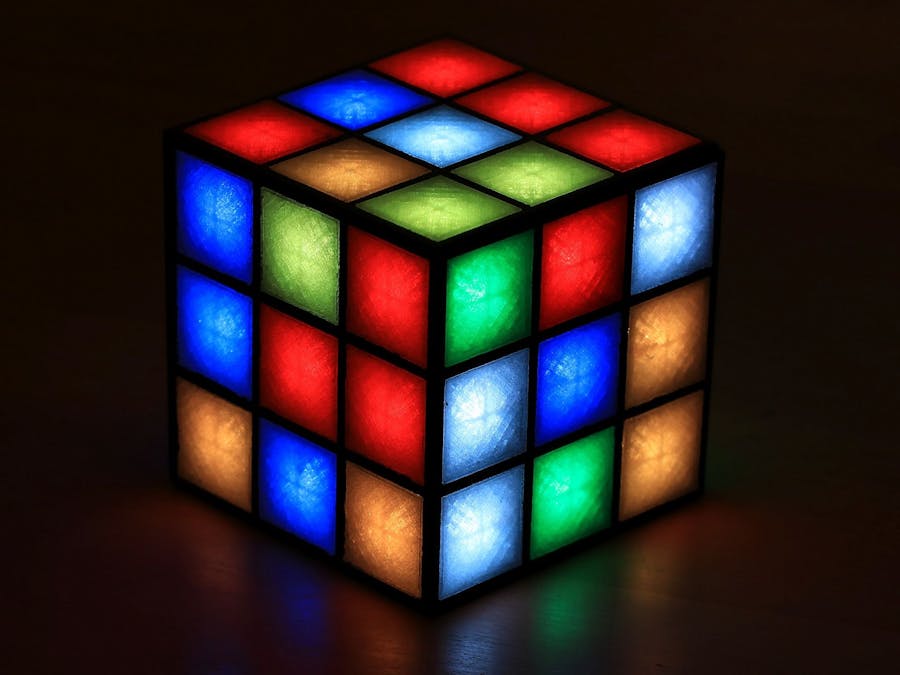
Most of you might have been still babies when Rubik's Cube was an amazing more than just a toy in the 1980s, and it's still popular, so for sure you might have seen the mechanical cube already somewhere. But now it's time to make a digital version of it! Touch and Light!
Infineon + Cypress have great small microcontrollers, PSoC4, that allows each pin to be configured as touch input. Their CapSense(r) is really easy to use and allows a self-calibration or auto-tuning. So I did first some experiments to find the right way for designing transparent 3D-components that enables to implement a touch-electrode.
Finally I decided to have for each cube side a PCB, having 9 LEDs, and 9 Touch-fields mounted inside a 3D-printed matrix.
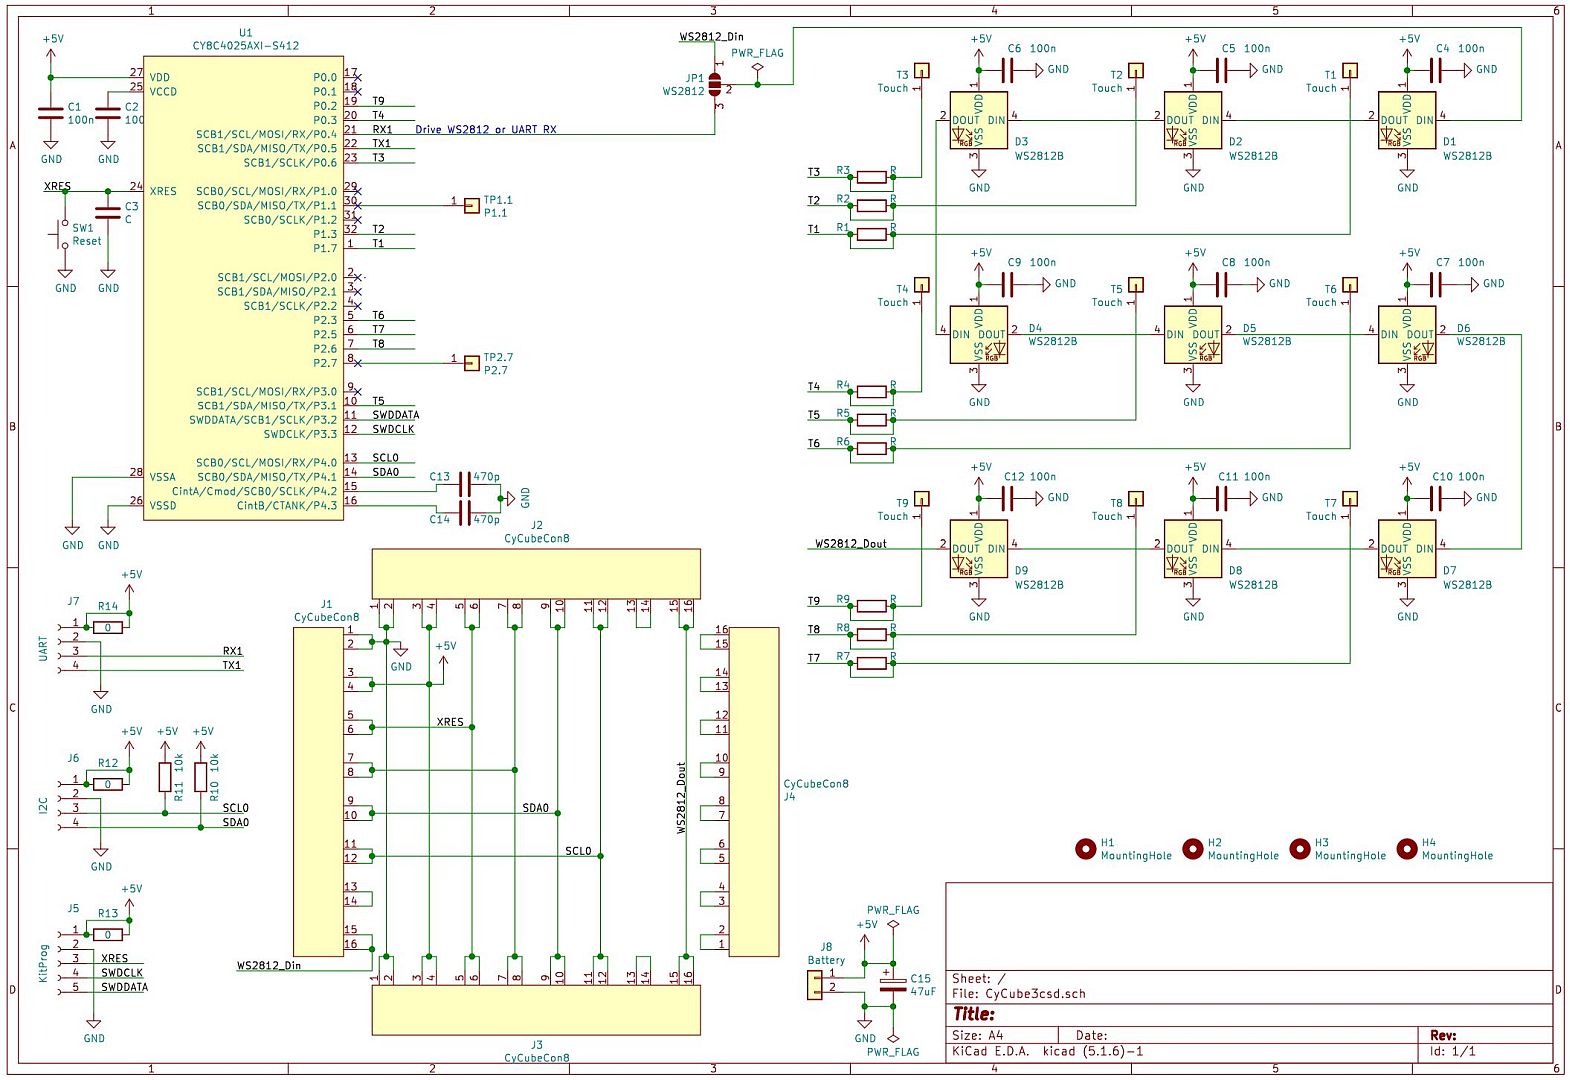
The blockdiagram gives a rough overview about the system. All PCBs are same and also mainly identically assembled with just one difference, because one PCB act as master, while the 5 others are working as slaves.
The only task of the slaves is getting the touch information of its nine touch fields and keep it available by a I2C slave register.
The master PCB senses its own 9 touch fields and reads via I2C all touch fields from the other sides. Having the status of all 6x9=54 touch fields it 'calculates' which movement the user requested. See chapter Software for details. A chain of 54 LEDs (WS2812B type) is driven by the Serial-Communication-Block (SCB) and visualize by its color similar to the original Rubik's Cube.
Hence, each cube side, each touch field and each LED has got its dedicated number as shown here:
The numbered arrows indicate the data flow from one PCB to the next when driving the concatinated serial LEDs of type WS2812B.
The red arrow indicate the 18 (9x2) possible movements.
All six sides are connected by the pin headers J1 to J4 to route the signals (power, I2C, and WS2812_in/out) and to fix each side mechanically.
The system is powered by 4x 1.5V (AA type batteries) with one diode voltage drop (not shown in the schematic).
Two projects are developed within Cypress' PSoC Creator.
The slave-application is pretty simple:
- CapSense component to get the status of the nine buttons
- I2C slave component to provide the touch information to the master
Obviously, that this software needs to be compiled using different I2C-slave adress (0x21.. 0x25) for each side.
The master-application is very similar to the slaves,
- CapSense component to get the status of its nine buttons
- I2C master component to get the touch information from the slaves
- Serial-Communication-Block (SCB, SPI) to drive the WS2812B
- Timer25ms defines the refresh rate for touch evaluation and LED update
Further, the master evaluates all 54 touch field in order to detect any of the 18 possible movements. For this, each touch field has its own little state machine, to detect first touch and two subsequent touches within a defined TOUCHTIME. The given example shows starting from corner 00 where two movements can be started in direction to 01 or 05.
switch (enTouchState00)
{
  case TOUCH_IDLE: // Start with 00 corner allows 2 directions -> 01 or -> 05

  if (
  (
   ((u32aCubeTouch[5] & 0x000)==0x000) && ((u32aCubeTouch[4] & 0x10C)==0x000)
&& ((u32aCubeTouch[3] & 0x007)==0x000) && ((u32aCubeTouch[2] & 0x1FF)==0x000)
&& ((u32aCubeTouch[1] & 0x10C)==0x000) && ((u32aCubeTouch[0] & 0x007)==0x001)
  ) // Start with 00

     ||

  (
   ((u32aCubeTouch[5] & 0x007)==0x000) && ((u32aCubeTouch[4] & 0x1FF)==0x000)
&& ((u32aCubeTouch[3] & 0x10C)==0x000) && ((u32aCubeTouch[2] & 0x1C0)==0x000)
&& ((u32aCubeTouch[1] & 0x000)==0x000) && ((u32aCubeTouch[0] & 0x061)==0x001)
  ) // Start with 00
    )
    {
       u32Timer25ms_Delay00 = TOUCHTIME;
       enTouchState00 = TOUCH_001;
    }
    break;

    case TOUCH_001: // Waiting for 2nd touch -> 01 or 05

      if ( (0 == (u32aCubeTouch[0] & TOUCH0)) && (u32aCubeTouch[0] & TOUCH1) )
      {
        enTouchState00 = TOUCH_001_002;
        u32Timer25ms_Delay00 = TOUCHTIME;
      }

      if ( (0 == (u32aCubeTouch[0] & TOUCH0)) && (u32aCubeTouch[0] & TOUCH5) )
      {
         enTouchState00 = TOUCH_001_020;
         u32Timer25ms_Delay00 = TOUCHTIME;
      }
      break;

   case TOUCH_001_002: // Waiting for 3rd touch -> 02

     if (u32aCubeTouch[0] & TOUCH2)
     {
        enTouchState00 = TOUCH_IDLE;
        enCubeMove = CUBEMOVE_00_01;
        u32CubeMoveSteps = 3;
     }
     break;

   case TOUCH_001_020: // Waiting for 3rd touch -> 06

     if (u32aCubeTouch[0] & TOUCH6)
     {
        enTouchState00 = TOUCH_IDLE;
        enCubeMove = CUBEMOVE_00_05;
        u32CubeMoveSteps = 3;
     }
     break;

} // switch (enTouchState00)
Within the statemachine the move ensures that no movement is done in a direction where other fields in the related row or column are touched, similar to the 'mechanical' protection of the Rubik Cube.
As no movement can be started from a center field, these field are used for special features:
- 2 clicks start the brightness controlEight brightness values are selectable and the complete cube can also be switched off.
- 3 click enters the level menuNine levels allow to mix the cube for beginners and experts.
- 5 click will reset the software
The complete project is attached.
MechanicsAll 3D-printed parts are available here or on https://www.thingiverse.com/thing:4752207
DemonstrationA video to show CyCubeTouch in action is available on YouTube.
Open issuesThe current hardware does not allow to switch on the cube by touch. The WS2812B require a current of approx. 1mA while switched off, what means a total current of more than 50mA, what is definitively too high as stand-by current. That's the reason why also no low-power modes have been implemented yet for the PSoC. In case of a PCB redesign the LEDs must be switched off by usage of a MOSFET for its power supply.Further, the standard pin headers are cheap and keep the cube fix, but the assembly of all 6 sides makes it easy, especially for the closing top, as pins and sockets can nearly not been seen anymore to get it connected correctly. So also the mechanical setup could be improved for next version.
SummaryCyCubeTouch is the modern electronic version of the famous Rubik's cube. While the first idea was to get some experience on Cypress CapSense component in combination with 3D-printed and trasparent material it ended up in a nice electronic toy and illumination gadget.
Have fun & Stay safe!
Holger


Comments
Please log in or sign up to comment.