


Hardware components | ||||||
| × | 1 | ||||
 |
| × | 1 | |||
_ztBMuBhMHo.jpg?auto=compress%2Cformat&w=48&h=48&fit=fill&bg=ffffff) |
| × | 1 | |||
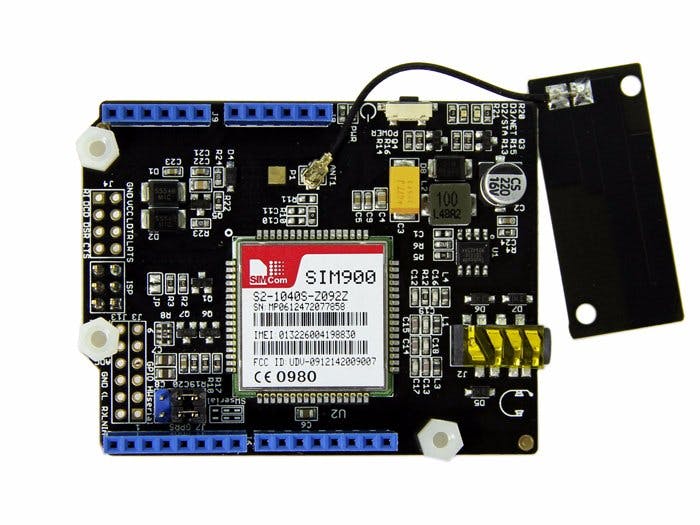
This tutorial will walk through connecting an Arduino Uno to the Hologram cellular network using the Seeed Studio GPRS shield.
Before starting, make sure you have the following components available:
- USB A to B cable
- 12V 1A power adapter
- Hologram SIM card
- Arduino-compatible computer with USB (Windows, Mac, Linux – make sure you can run the Arduino Software)
Activate your SIM on the Hologram dashboard.
Punch out the Hologram SIM and slide it into the slot on the back of the GPRS shield. To open the slot, you may need to slide the case slightly horizontal, in the direction of the “OPEN” arrow.
Insert the SIM so that the metal connectors will touch when you close the case. After shutting the case, make sure to lock it by sliding it slightly horizontal in the direction of the “LOCK” arrow.
Stack and connect the GPRS shield on top of the Arduino
A green light should illuminate on top of the GPRS shield. You may also want to plug in the power adapter at this time.
Power on the GPRS shield using the small button on the side. Hold the button down for 2 seconds, then release. A red light will illuminate to tell you that the shield is on.
A green light will start flashing next to the red light, about once every second – this flash rate tells us that the device is attempting to connect to the cell network.
After about 5-10 seconds, the green light should slow down to a flash rate of about once every 3 seconds – this tells us that the device has connected to a cell network.
Uploading the demo sketchNext, boot up the Arduino Software. For help getting the Arduino software up and running with your device, detailed step-by-step installation instructions are in the Arduino Guide.
Copy and paste the demo sketch provided below. This is a modified sketch of the Seeed Studio GPRS source code example found here (reference this for another example of how to send an SMS). This modified sketch has just filled in the Hologram APN and test URL for you.
For an example of modem debugging with AT commands, use the sketch here to manually enter troubleshooting commands found here.
Upload the sketch, found at the bottom of this project, to the Arduino and open the serial monitor.
Configure the baud rate to 19200, with a carriage return appended to the end of each command:
Enter ‘h’ into the terminal at the top of the serial monitor to run the test-HTTP script.
Watch your Arduino request our test http page over cellular connectivity!
Final output should look something like this:
AT+CSQ
+CSQ: 10,0
OK
AT+CGATT?
+CGATT: 1
OK
AT+SAPBR=3,1,"CONTYPE","GPRS"
OK
AT+SAPBR=3,1,"APN","hologram"
OK
AT+SAPBR=1,1
OK
AT+HTTPINIT
OK
AT+HTTPPARA="URL","hologram/test.html"
OK
AT+HTTPPARA="CID",1
OK
AT+HTTPACTION=0
OK
+HTTPACTION:0,200,79
AT+HTTPREAD
+HTTPREAD:79
<html><head><title>It works</titleAT+HTTPTERM
OK


Comments
Please log in or sign up to comment.