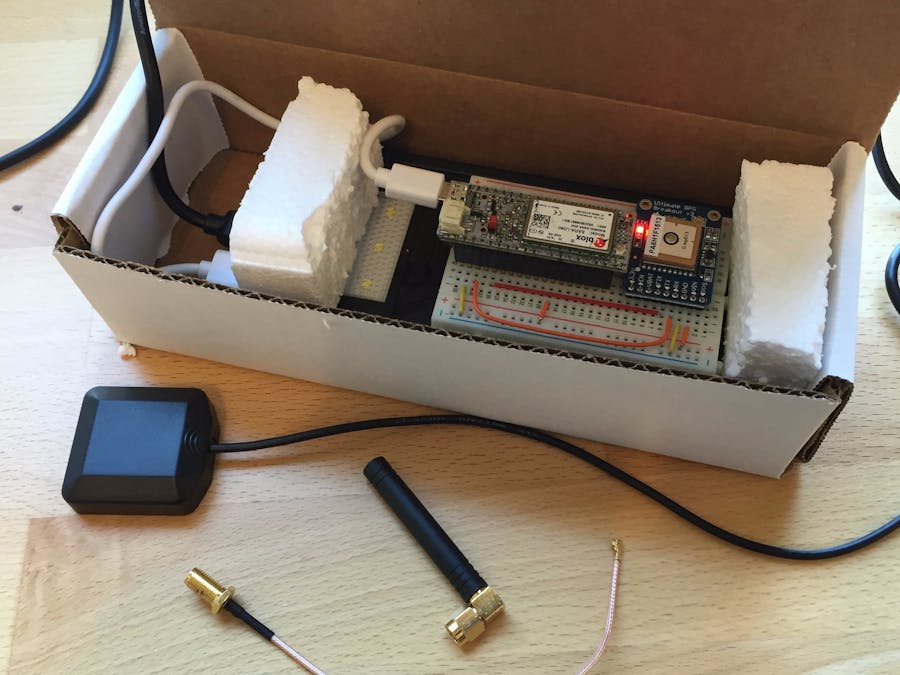
I always thought one of the coolest super hero gadgets was the tracking devices used to track down escaping baddies. With Hologram.io this gadget easily became a reality.
Track me as I travel around: tracker.benstr.com
This project consists of two parts, the tracker (Hardware) and the real-time map (Website). All code is available on GitHub.
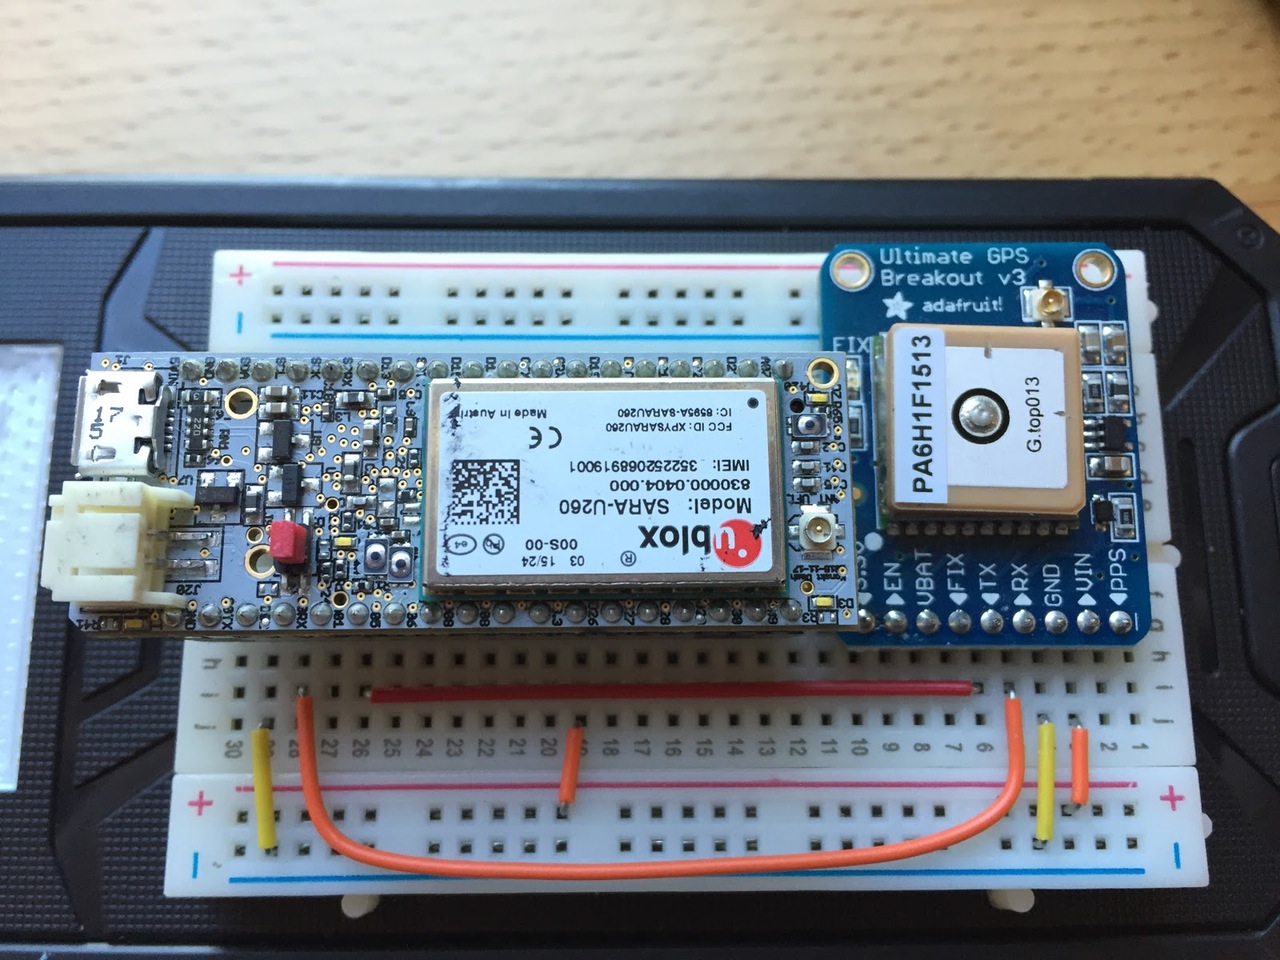
HardwareThe hardware is pretty simple, get GPS coordinates every 10 seconds and send them to the cloud through Hologram's 3G network. The build consists of only two boards.
- Hologram Dash v1
- Adafruit Ultimate GPS Breakout v3
I used an existing USB external 15,000 mAh battery with a 5v 2A output. This much capacity will power the tracker for about 36 hours. Below is a photo journal of the experience.
Wiring is pretty darn simple
- (28) Dash TX → (5) GPS RX
- (26) Dash RX → (6) GPS TX
- (19) Dash 3.3v → (3) GPS VIN
Uploaded a modified version of Hologram's GPS tutorial. Used Arduino IDE for initial uploading.
Lastly for the hardware I needed to activate the Hologram SIM through their online dashboard.
Once the SIM was activated and the Dash was powered, data started to be logged in Hologram's online Data Logger.
So we have near real-time coordinates going to the Hologram Cloud. Good. Next I want to send that data to a real-time web app. I want to plot the coordinates on a map and watch the bad-guys run away after I defeat them!
I'm going to use MeteorJS platform for the webapp (NodeJS, MongoDB, React). For the map I decided to use MapBox and their mapbox-gl NPM package.
NOTE: All code snippets are JavaScript (ECMAScript 2015)
Track me as I travel around: tracker.benstr.com
So what is this app doing?
Every 10 seconds it hits the Hologram REST API and asks for the latest coordinates. Then takes the data, modifies it a bit and creates a new MongoDB document/record.
// simplified server-side database population
Meteor.setInterval(() => {
let rawResult;
try {
 rawResult = HTTP.call("GET",
   `https://dashboard.konekt.io/api/1/csr/rdm/?apikey=${Meteor.settings.hologram_api}&tagname=${Meteor.settings.hologram_device_tag}&limit=1`
 );
} catch (e) {
 console.log(e);
 throw new Meteor.Error("hologram-get-failed", "Error calling Hologram");
}
if(rawResult.data.data){
 rawResult.data.data.forEach( d => {
   let payload = JSON.parse(d.data);
   let coords = new Buffer(payload.data, "base64" );
   let lonLat;
   try {
     lonLat = JSON.parse(coords.toString());
   } catch (e) {
     console.log(e);
   }
   if(lonLat) {
     let newDoc = {
       logged: new Date(d.logged),
       hologramId: d.id,
       hologramRecordId: d.record_id,
       coords: lonLat.coords
     };
     Locations.insert(newDoc);
   }
 });
}
}, 10000);
The Node/Meteor server will publish all the locations in real-time to all the connected clients (web-browsers) who are subscribing. Meteor is super awesome at handling all the complex pub/sub stuff.
// server-side publications.js
Meteor.publish("locations", function (){
return Locations.find({},{sort:{logged:1}});
});
subscription is handles through a React data container
// client-side subscription
export default createContainer(() => {
Meteor.subscribe('locations');
let locations = Locations.find({});
return {
 locations: locations.fetch(),
 route: locations.fetch().map( loc => {
   return loc.coords
 }),
 currentLocation: locations.fetch().pop().coords
};
}, Map);
Lastly the data is pushed to a MapBox map. Whenever new data is inserted from the Hologram Cloud the map is updated automatically. The Map UI code gets a little hairy, check it out on GitHub.
Software Getting Started
- Clone simple-asset-tracker repository
- Copy
/app/settings-example.jsonto/app/settings.json
- In
/app/settings.jsonset yourmapbox_accessToken,hologram_api, andhologram_device_tag
- cd into
/appand run$ npm install -dev
- run
$ meteor --settings settings.json
- check out your app running locally at


Comments
Please log in or sign up to comment.