


Hardware components | ||||||
 |
| × | 1 | |||
| × | 1 | ||||
 |
| × | 1 | |||
Software apps and online services | ||||||
 |
| |||||
Hand tools and fabrication machines | ||||||
 |
| |||||
It’s something we’ve been looking at for a while and figuring out how to solve it. We have sets of speakers and projectors and the users keep losing the remotes, or misplaced/stolen. Usually this wouldn’t be a problem, we’ll just contact the supplier or manufacturer and order replacements. Except we can’t any more.
We have a set of Vision AV-1000 wall mounted active speakers, connected to an EPSON projector. Projector remotes are easy to come by, but the AV-1000 remote is no longer manufactured. The speakers do not have any manual controls for the input selection, bass/treble etc. only a volume control on the back.
The Solution?We decided to make our own speaker remotes, as cheaply as possible.
The idea is simple, we capture the IR signal from a remaining speaker remote and record the commands that get transmitted.
We did this by connecting up our IR Receiver to the Arduino, the receiver has 3 pins and from left to right GND, +5V, SIGNAL and using the Arduino IRRemote library.
Run the Examples > IRRemote > IRrecvDumpv2 example. (see image below with the IR Receiver connected to a Arduino Uno (for prototyping, you can use the Arduino nano, but you’ll have to upload/reset the sketches when testing)
If this is running correctly, point the speaker remote at the receiver and press a button – When the IRReceiver gets any data it will flash with the on board red LED, so you know it’s working.
Open the Arduino serial monitor and you should see an output of the data it has received. (see image below)
Luckily for us, the protocol used by the speaker remote has been identified as the NEC protocol, 32 bits. The IRRemote library has built-in functions to re-transmit this data. Now all we need to do is go through the speaker remote and recording the code of each button. (data below)
RESET: 827D58A7 MUTE: 827DD827 INPUT 1: 827D708F INPUT 2: 827D48B7 TREBLE UP: 827DF20D TREBLE DOWN: 827DCA35 BASS UP: 827DF00F BASS DOWN: 827DC837 VOLUME DOWN: 827D40BF VOLUME UP: 827DC03F
So we have the data we need to mimic the IR signals of our remote. That is all we need the IR Receiver for, so from now on we’ll disconnect it and carry on with the rest of the project.
In order for us to communicate with it, we decided that having software on the PCs was the best way to go, we could of made another remote but that would just get lost/misplaced eventually anyway.
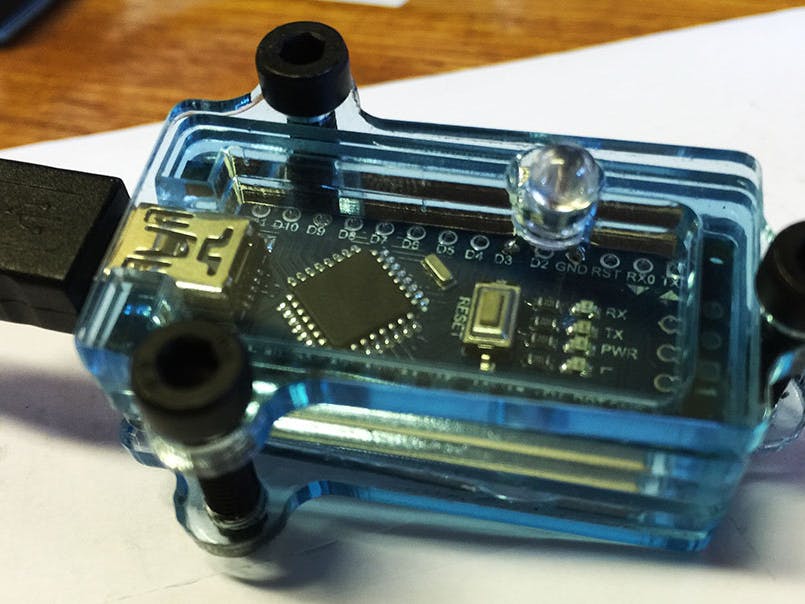
The next stage is to connect the IR LED and Resistor to the Arduino board. The IRRemote library transmits on Pin 3. It is a very basic circuit to connect these up. Using the Arduino nano, I soldered the resistor to one leg of the IR LED and the other side directly to the Pin on the board. This works perfectly, as you can push the LED down on the board to make a nice snug fit.
We’ll be using a simple VB.NET program to communicate with the Arduino, this will write to the serial port and send a byte – In the Arduino sketch we will monitor the serial port for incoming bytes and match them up to the codes that get sent over IR. Simple!
Our Arduino Sketch/*
* IRremote: AV_Controller
* An IR LED must be connected to Arduino PWM pin 3.
* Version 0.1 01/04/16
*/
#include
IRsend irsend;
byte byteRead;
void(* resetFunc) (void) = 0; //declare reset function @ address 0
void setup() {
Serial.begin(9600);
Serial.println("***********************");
Serial.println("** AV-CONTROLLER **");
Serial.println("***********************");
Serial.println("Waiting for commands...");
}
void loop() {
if (Serial.available()) {
byteRead = Serial.read();
processResponse(byteRead);
}
}
void processResponse(byte byteInput) {
switch (byteInput) {
case '4':
Serial.println("Sending Command: TEST 4");
// irsend.sendNEC(0x827DD827, 32);
delay(40);
return;
break;
case 'a':
Serial.println("Sending Command: RESET");
irsend.sendNEC(0x827D58A7, 32);
delay(40);
Serial.println("Command Sent.");
return;
break;
case 'b':
Serial.println("Sending Command: MUTE");
irsend.sendNEC(0x827DD827, 32);
delay(40);
Serial.println("Command Sent.");
return;
break;
case 'c':
Serial.println("Sending Command: INPUT1");
irsend.sendNEC(0x827D708F, 32);
delay(40);
Serial.println("Command Sent.");
return;
break;
case 'd':
Serial.println("Sending Command: INPUT2");
irsend.sendNEC(0x827D48B7, 32);
delay(40);
Serial.println("Command Sent.");
return;
break;
case 'e':
Serial.println("Sending Command: TREBLE UP");
irsend.sendNEC(0x827DF20D, 32);
delay(40);
Serial.println("Command Sent.");
return;
break;
case 'f':
Serial.println("Sending Command: TREBLE DOWN");
irsend.sendNEC(0x827DCA35, 32);
delay(40);
Serial.println("Command Sent.");
return;
break;
case 'g':
Serial.println("Sending Command: BASS UP");
irsend.sendNEC(0x827DF00F, 32);
delay(40);
Serial.println("Command Sent.");
return;
break;
case 'h':
Serial.println("Sending Command: BASS DOWN");
irsend.sendNEC(0x827DC837, 32);
delay(40);
Serial.println("Command Sent.");
return;
break;
case 'i':
Serial.println("Sending Command: VOLUME DOWN");
irsend.sendNEC(0x827D40BF, 32);
delay(40);
Serial.println("Command Sent.");
return;
break;
case 'j':
Serial.println("Sending Command: VOLUME UP");
irsend.sendNEC(0x827DC03F, 32);
delay(40);
Serial.println("Command Sent.");
return;
break;
case 'x':
Serial.println("Resetting System...");
resetFunc();
return;
break;
break;
case 't':
Serial.println("OK");
return;
break;
break;
default:
break;
}
Serial.println("Unknown command.");
}
The basics of the sketch are as follows, we detect incoming data on the serial port. If the byte matches one in our switch case we send the corresponding command, if not then we throw an unknown command in there.
We can test the above code by connecting to our COM port using PuTTy, open up PuTTy and enter the COM port that the Arduino is detected on. Upon connecting you should see the output from the Serial println in the setup() function.
Type a letter ‘a’ for example, to send the RESET command and you should see output. You can actually test this with the set of speakers, it should RESET the volume/bass/treble etc. you can see the expected output on the screenshot below.
Now that we have a working application we need to make it look nice, we can’t expect people to PuTTy into a Serial port and send commands can we? We’ll crack on with designing the Desktop application.
The .NET ApplicationThe first thing we need to do is communicate with the serial port. We actually wrote an article on this very recently, linked here. You can see that we automatically detect which COM port to use by sending a check string. The application loops through the available COM ports and sends a ‘t’ string, if one of the COM ports replies with ‘OK’ we have the correct port. This saves the user from selecting which port to send data to.
The sending of commands is wrapped into a small function called sendCommand, .NET code below: (it also toggles the colour of a Picturebox, to emulate the flashing of the LED remote)
 Sub sendCommand(data As String)
        PictureBox2.BackColor = Color.Green
        If connected = True Then
            If data <> "" Then
                Try
                    Using com As IO.Ports.SerialPort =
                   My.Computer.Ports.OpenSerialPort(comPort)
                        com.WriteLine(data)
                        com.Close()
                    End Using
                Catch ex As Exception
                    MessageBox.Show(ex.Message)
                End Try
            End If
        End If
        PictureBox2.BackColor = Color.White
    End Sub
The rest of the code you can find below, it is just a case of using sendCommand(‘a’) or whatever string you want to send to the COM port. The rest of the application is just a fancy GUI. Code and Screenshot of the application running are below.
You can find the full .NET application code below. It is developed in VS 2015 Community.
Imports System.Threading

Public Class Form1
    Dim connected As Boolean
    Dim comPort As String

    Private Sub Form1_Load(sender As Object, e As EventArgs) Handles MyBase.Load
        portConfig()
    End Sub

    Sub portConfig()
        For Each p As String In My.Computer.Ports.SerialPortNames
            Try
                Using com As IO.Ports.SerialPort =
               My.Computer.Ports.OpenSerialPort(p)
                    com.ReadTimeout = 1000
                    com.WriteLine("t")
                    Dim data As String = com.ReadLine()
                    If InStr(data, "OK") Then
                        lblConnection.Text = "Connected to " & p
                        comPort = p
                        connected = True
                    End If
                    com.Close()
                End Using
            Catch ex As Exception

            End Try
        Next
    End Sub

    Sub sendCommand(data As String)
        PictureBox2.BackColor = Color.Green
        If connected = True Then
            If data <> "" Then
                Try
                    Using com As IO.Ports.SerialPort =
                   My.Computer.Ports.OpenSerialPort(comPort)
                        com.WriteLine(data)
                        com.Close()
                    End Using
                Catch ex As Exception
                    MessageBox.Show(ex.Message)
                End Try
            End If
        End If
        PictureBox2.BackColor = Color.White
    End Sub

    Private Sub ConnectToolStripMenuItem_Click(sender As Object, e As EventArgs) Handles ConnectToolStripMenuItem.Click
        portConfig()
    End Sub

    Private Sub ResetDeviceToolStripMenuItem_Click(sender As Object, e As EventArgs) Handles ResetDeviceToolStripMenuItem.Click
        sendCommand("x")
    End Sub

    Private Sub ExitToolStripMenuItem_Click(sender As Object, e As EventArgs) Handles ExitToolStripMenuItem.Click
        Application.Exit()
        End
    End Sub

    Private Sub Form1_Paint(sender As Object, e As PaintEventArgs) Handles Me.Paint
        Label1.Parent = PictureBox1
        Label1.BackColor = Color.Transparent

        Label2.Parent = PictureBox1
        Label2.BackColor = Color.Transparent

        Label3.Parent = PictureBox1
        Label3.BackColor = Color.Transparent

        Label4.Parent = PictureBox1
        Label4.BackColor = Color.Transparent

        Label5.Parent = PictureBox1
        Label5.BackColor = Color.Transparent

        Label6.Parent = PictureBox1
        Label6.BackColor = Color.Transparent

        Label7.Parent = PictureBox1
        Label7.BackColor = Color.Transparent

        Label8.Parent = PictureBox1
        Label8.BackColor = Color.Transparent

        Label9.Parent = PictureBox1
        Label9.BackColor = Color.Transparent

        Label10.Parent = PictureBox1
        Label10.BackColor = Color.Transparent
    End Sub

    Private Sub Label1_Click(sender As Object, e As EventArgs) Handles Label1.Click
        sendCommand("a")
    End Sub

    Private Sub Label2_Click(sender As Object, e As EventArgs) Handles Label2.Click
        sendCommand("b")
    End Sub

    Private Sub Label3_Click(sender As Object, e As EventArgs) Handles Label3.Click
        sendCommand("c")
    End Sub

    Private Sub Label4_Click(sender As Object, e As EventArgs) Handles Label4.Click
        sendCommand("d")
    End Sub

    Private Sub Label5_Click(sender As Object, e As EventArgs) Handles Label5.Click
        sendCommand("e")
    End Sub

    Private Sub Label6_Click(sender As Object, e As EventArgs) Handles Label6.Click
        sendCommand("f")
    End Sub

    Private Sub Label7_Click(sender As Object, e As EventArgs) Handles Label7.Click
        sendCommand("g")
    End Sub

    Private Sub Label8_Click(sender As Object, e As EventArgs) Handles Label8.Click
        sendCommand("h")
    End Sub

    Private Sub Label9_Click(sender As Object, e As EventArgs) Handles Label9.Click
        sendCommand("j")
    End Sub

    Private Sub Label10_Click(sender As Object, e As EventArgs) Handles Label10.Click
        sendCommand("i")
    End Sub

    Private Sub Form1_Resize(sender As Object, e As EventArgs) Handles Me.Resize
        If Me.WindowState = FormWindowState.Minimized Then
            NotifyIcon1.Visible = True
            NotifyIcon1.Icon = SystemIcons.Application
            NotifyIcon1.BalloonTipIcon = ToolTipIcon.Info
            NotifyIcon1.BalloonTipTitle = "AV Controller"
            NotifyIcon1.BalloonTipText = "Controller is minimized. Click the icon in the tray to open."
            NotifyIcon1.ShowBalloonTip(50000)
            ShowInTaskbar = False
        End If
    End Sub

    Private Sub NotifyIcon1_MouseDoubleClick(sender As Object, e As MouseEventArgs) Handles NotifyIcon1.MouseDoubleClick
        ShowInTaskbar = True
        Me.WindowState = FormWindowState.Normal
        NotifyIcon1.Visible = False
    End Sub
End Class
Now the device is working and the software to control it is up and running, it’s time to think about how we package it. If we left it exposed, it wouldn’t be long before things are spilled on it.
We took to 2D Design and designed very simple enclosure.
As you can see from the 2D Design screenshot on the left, it is a very basic design connected together with threaded plastic (going through the holes) The final laser cut product is below:
The Final ProductWe have accomplished the following for this project:
- Captured our original remote’s IR data
- Developed a device (Arduino & IR LED) to re-transmit this data back.
- Designed an enclosure so it sits nicely next to the PCs.
This has been a very fun project and it will serve it’s purpose well. All we need to do is plug in the device to a PC and fire up our .NET application to control the rooms speakers. The next thing to add is Projector and Aircon control.
The total cost of the project is roughly £4. This was with components sourced from mainly eBay.


Comments
Please log in or sign up to comment.