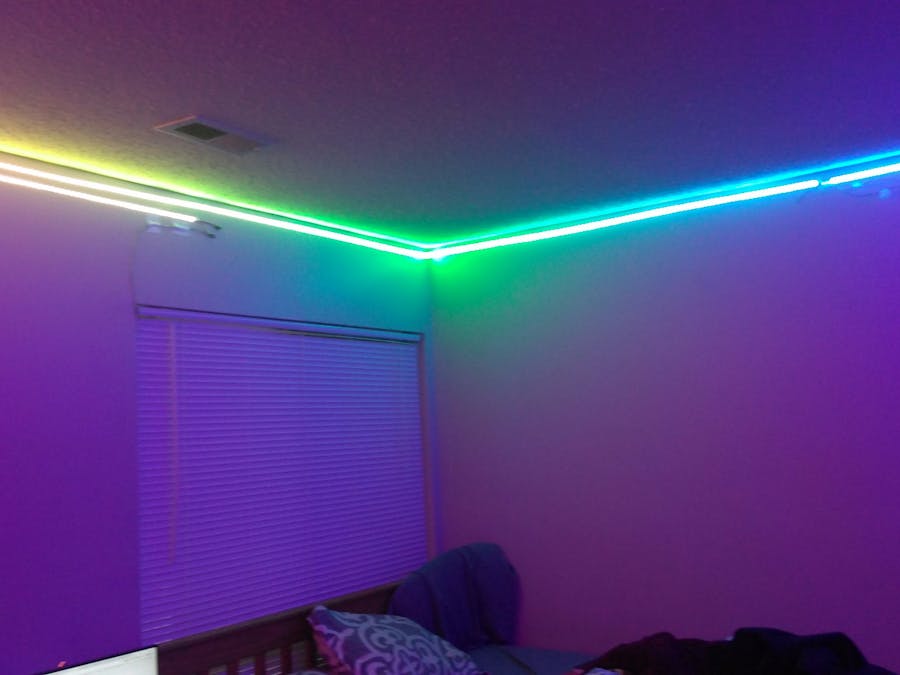
This project started when I moved into my apartment and realized that my bedroom didn't have lights. Like anybody would, my first reaction was to put up too many LED lights and program them to turn on whenever I tell my phone to turn them on. This project turned out to be surprisingly easy and I am here to show you how to do it for yourself.
On a side note, when I started this project I used an ESP8266-12e which was unreliable and the lights would turn off after some time. One of my classes then required me to do an IoT project using the Photon from Particle and all of the issues I've had in the past are now gone. When I started the project I used this guide which I have linked as while it won't help much if you use the Photon, which I highly suggest, it is a great reference.
VideoWiringWiring this project is stupidly easy. The Photon needs power, but not too much. I am using a USB cable plugged into my computer for now but plan on eventually adding a buck power adapter. My lights run on 12 volts and what will eventually happen is that I plug the buck power converter between the 12 volts from the power supply and the Vin pin on the photon making sure not to give it too much juice as the Photon can only handle up to around 5.5 volts.
Any digital pin may be used as long as the wiring matches the code. I chose D1 because it sounded nice.
CodeThe code works in two phases. Every time a new light setting is given to the controller, setLight is called. setLight changes LedChange to true and LedMode to the new desired mode.
int setLight(String command){
   LedChange = true;
     if(command == "Lights Off"){
         LedMode = "Off";
     }
     else if(command == "Lights Low"){
         LedMode = "W_Low";
     }
     else if(command == "Lights Med"){
         LedMode = "W_Med";
     }
     else if(command == "Lights High"){
         LedMode = "W_High";
     }
     else if(command == "Red Low"){
         LedMode = "R_Low";
     }
     else if(command == "Red Med"){
         LedMode = "R_Med";
     }
     else if(command == "Red High"){
         LedMode = "R_High";
     }
     else if(command == "Yellow Low"){
         LedMode = "Y_Low";
     }
     else if(command == "Yellow"){
         LedMode = "Y_Med";
     }
     else if(command == "Yellow High"){
         LedMode = "Y_High";
     }
     else if(command == "Blue Low"){
         LedMode = "B_Low";
     }
     else if(command == "Blue"){
         LedMode = "B_Med";
     }
     else if(command == "Blue High"){
         LedMode = "B_High";
     }
     else if(command == "Rainbow"){
         LedMode = "Rainbow";
     }
}
The second phase is the main loop with two types of LED control: static and dynamic. During static light modes, the light strip is set and left alone until LedChange is set to true again. During dynamic lighting like the rainbow function, the lights change in a loop that gets kicked when LedChange is set to true allowing the controller to set another light mode.
void loop() {
   if(LedChange){
       LedChange = false;
       if(LedMode == "Off"){
           colorAll(strip.Color(0, 0, 0), 5);
           ThingSpeak.setField(1, 0);
           ThingSpeak.writeFields(myChannelNumber, myWriteAPIKey);
       }
       else if(LedMode == "W_Low"){
           colorAll(strip.Color(60, 2, 50), 5);
                       ThingSpeak.setField(1, 15);
           ThingSpeak.writeFields(myChannelNumber, myWriteAPIKey);
       }
       else if(LedMode == "W_Med"){
           colorAll(strip.Color(120, 6, 100), 5);
                       ThingSpeak.setField(1, 30);
           ThingSpeak.writeFields(myChannelNumber, myWriteAPIKey);
       }
       else if(LedMode == "W_High"){
           colorAll(strip.Color(180, 15, 150), 5);
                       ThingSpeak.setField(1, 44);
           ThingSpeak.writeFields(myChannelNumber, myWriteAPIKey);
       }
       else if(LedMode == "R_Low"){
           colorAll(strip.Color(30, 0, 0), 5);
                       ThingSpeak.setField(1, 4);
           ThingSpeak.writeFields(myChannelNumber, myWriteAPIKey);
       }
       else if(LedMode == "R_Med"){
           colorAll(strip.Color(90, 0, 0), 5);
                       ThingSpeak.setField(1, 12);
           ThingSpeak.writeFields(myChannelNumber, myWriteAPIKey);
       }
       else if(LedMode == "R_High"){
           colorAll(strip.Color(180, 0, 0), 5);
                       ThingSpeak.setField(1, 24);
           ThingSpeak.writeFields(myChannelNumber, myWriteAPIKey);
       }
       else if(LedMode == "Y_Low"){
           colorAll(strip.Color(60, 0, 50), 5);
                       ThingSpeak.setField(1, 14);
           ThingSpeak.writeFields(myChannelNumber, myWriteAPIKey);
       }
       else if(LedMode == "Y_Med"){
           colorAll(strip.Color(120, 0, 100), 5);
                       ThingSpeak.setField(1, 29);
           ThingSpeak.writeFields(myChannelNumber, myWriteAPIKey);
       }
       else if(LedMode == "Y_High"){
           colorAll(strip.Color(180, 0, 150), 5);
                       ThingSpeak.setField(1, 43);
           ThingSpeak.writeFields(myChannelNumber, myWriteAPIKey);
       }
       else if(LedMode == "B_Low"){
           colorAll(strip.Color(0, 40, 0), 5);
                       ThingSpeak.setField(1, 43);
           ThingSpeak.writeFields(myChannelNumber, myWriteAPIKey);
       }
       else if(LedMode == "B_Med"){
           colorAll(strip.Color(0, 120, 0), 5);
                       ThingSpeak.setField(1, 43);
           ThingSpeak.writeFields(myChannelNumber, myWriteAPIKey);
       }
       else if(LedMode == "B_High"){
           colorAll(strip.Color(0, 200, 0), 5);
                       ThingSpeak.setField(1, 43);
           ThingSpeak.writeFields(myChannelNumber, myWriteAPIKey);
       }
       else if(LedMode == "Rainbow"){
           uint16_t i, j = 0;
           ThingSpeak.setField(1, 33);
           ThingSpeak.writeFields(myChannelNumber, myWriteAPIKey);
           while(!LedChange){
               if(j == 256){
                   j=0;
               }
               for(i=0; i<strip.numPixels(); i++) {
                   strip.setPixelColor(i, Wheel((i+j) & 255));
               }
               j++;
               strip.show();
               delay(WaitTime);
           }
       }
   }
}
One way to control the Photon is with another Photon. Patrick and I did this through the subscribe and publish functions available by Photon. The lights subscribe to a channel and the second Photon publishes to it.
Particle.publish("****YOUR_STRING_HERE****", "DATA_TO_THE_OTHER_PHOTON");
What is sent:
void setup() {
 strip.begin();
 strip.show(); // Initialize all pixels to 'off'
 Particle.function("light",setLight);
 Particle.subscribe("****YOUR_STRING_HERE****", myHandler);
}
When the subscribe function triggers, it calls the myHandler finction which re-saves the data sent and sends it on to the setLight function from earlier.
void myHandler(const char *event, const char *data){
   String data2 = (String)data;
   setLight(data2);
}
This is a video of us testing the Photon to Photon and Android to Photon functionality. We used IFTTT to link my phone to the Photon.
A log is also kept of when my lights are at what brightness as a percentage from 0 to 100. ThingSpeak.com is used for this.


_91FsJoZS5Q.jpg)


Comments
Please log in or sign up to comment.