

Hardware components | ||||||
 |
| × | 1 | |||
 |
| × | 2 | |||
 |
| × | 1 | |||
 |
| × | 1 | |||
 |
| × | 1 | |||
 |
| × | 1 | |||
 |
| × | 1 | |||
 |
| × | 1 | |||
 |
| × | 1 | |||
Software apps and online services | ||||||
 |
| |||||
| ||||||
Hand tools and fabrication machines | ||||||
| ||||||
Install the Arduino IDE (Integrated development environment) which you can download for Mac OS X, Windows and Linux.
If you are completely unfamilliar with Arduino IDE, you could watch the video below. So you can understand better how it works.
Step 2For this project we used some sensors.We are going to learn some useful things about them. These sensors are very popular on the market because of their low cost and high accuracy at the same time.
DHT11 SensorThe DHT11 sensor combines temperature and humidity in a module. It is quite handy in remote control applications such as weather station, home environment systems, garden monitoring systems.Humidity Range: 20-90% RHHumidity Accuracy: ±5% RHTemperature Range: 0-50 °CTemperature Accuracy: ±2% °COperating Voltage: 3V to 5.5V
There is an IC which contains the calibration system and the conversion of the ohmic measurement to a relative humidity measurement. Finally it controls the transmission of data signal between the DHT11 and the Arduino A 10K Ohm pull-up resistor is required between the signal line and the 5V line to make sure the signal level remains high by default (see data sheet for more information).There are two different versions of DHT11 you can come across. One type has four pins, and the other type has three pins and is mounted on a small PCB. The PCB mounted version is nice because it includes a surface mounted 10K Ohm pull up resistor for the signal line. Here are the pinouts for both versions.
Soil Moisture Sensor
It refers to soil moisture. So the soil water content. This can be measured using a soil moisture sensor consisting of two sensors that act as detectors. It can measure the moisture content in soil based on the change in resistance between the two cables. The resistance between the two cables varies inversely with the amount of moisture in the ground. This can be measured using a soil moisture sensor consisting of two sensors acting as a detector. It can measure the moisture content in soil based on the change in resistance between the two cables. The resistance between the two cables varies inversely with the amount of moisture in the ground.
Light Dependant Resistant (LDR)
A photoresist or photo-conductive cell is a light-controlled variable resistor. The resistance of a photoresistor decreases with increasing incident light intensity; in other words, it exhibits photoconductivity. A photoresistor can be applied in light-sensitive detector circuits, and light-activated and dark-activated switching circuits.
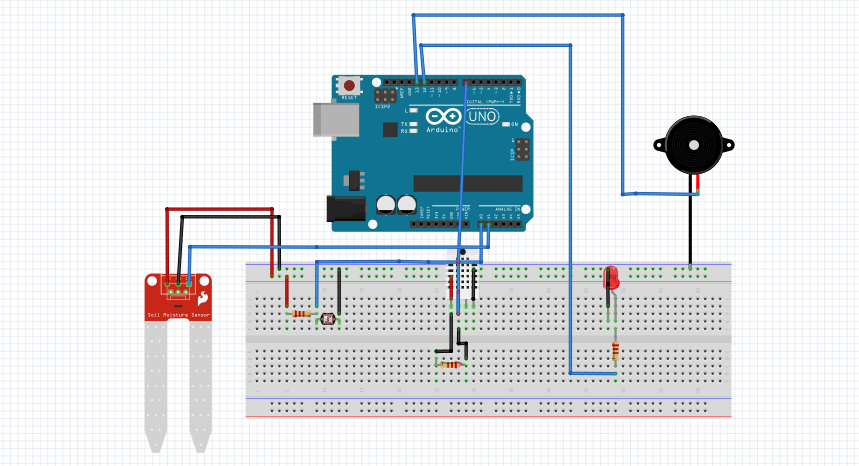
Step 3Now we are going to assembly the parts as the schematics below.
After assembling we have to upload the code on the microcontroller.
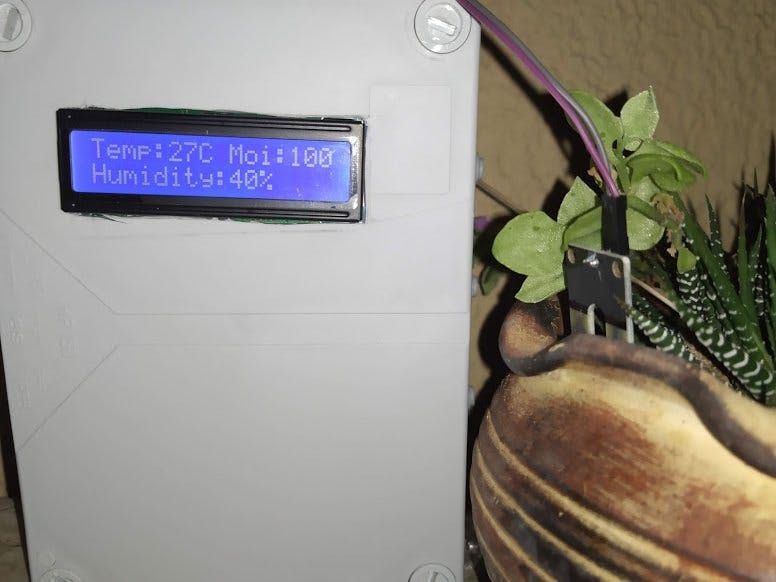
Step 5Now I'll show you my results. The following photos show my SmartGardenSystem as it was finally done
In summary, I would like to say to all hacksters that we can do many updates such as shrink or board creation for all sensors. It is an original and built as a cool home automation project. If anyone wants to make adjustments or updates, I'm willing to support him.
I hope you enjoy it!


Comments