


Hardware components | ||||||
_wzec989qrF.jpg?auto=compress%2Cformat&w=48&h=48&fit=fill&bg=ffffff) |
| × | 1 | |||
| × | 1 | ||||
 |
| × | 1 | |||
 |
| × | 1 | |||
Software apps and online services | ||||||
 |
| |||||
Do you need to control high-powered motors from an pin? Do you need to control something from a sensor that just doesn't give much output? Want to toggle power to a hacked device, replacing a physical button? The transistor has got your back. But before we get to hacking, let's declare a few things:
Basic Knowledge- BJT vs. (MOS)FET: These are different types of transistors. I'm working with bipolar junction transistors (BJT). FETs (field-effect transistors) usually look a bit beefier, with a built-in heatsink. Each has three pins, but BJTs use the terms "
collector, base, and emitter" for them, while FETs call them "source, gate, and drain". - Collector: Similar to the positive leg on an LED, this is where power flows in.
- Base: This is the "trigger" pin coming from your controller, sensor, or whatever.
- Emitter: Like the negative leg on your LED, this is the ground side of your transistor.
Even transistors of similar types may put these legs in a different order, so double-check your part! An easy way is to Google image-search "[part number] pinout".
- Part numbers: Make sure you took the right transistors! You can read the datasheet to be safe. Things to watch out for: it must be able to handle the power you're pushing through; double-check which way to hook it up; and it should be the right type ( PNP vs NPN ).
- NPN vs. PNP: NPN transistors are normally "off" (disconnected), unless you're applying power to the base pin. PNP transistors are normally "on" (allowing current to flow), unless your signal is high.
- Transistor vs. Relay: If you're toggling something that's really power-hungry, consider using a relay instead. They're slower, because they use magnets to toggle a conductive metal switch inside a little box. But that also makes them a bit safer, because of the physical isolation between the leads.
We'll just run the Arduino Blink sketch, since that gives a great visualization of what's going on.
The SetupI'm using a DC motor for this example, since they tend to ride the edge between what an Arduino pin can toggle on its own, and needing a little help.DC motors are common in wheeled robots and R/C vehicles. They have two terminals, and one gets connected to power, the other to ground. Based on which way 'round you put the wires, the motor will spin clockwise or counter-clockwise.
Try plugging one wire directly into pin 13, and one directly into ground, to start with. Little haptic motors (and their twins, cell-phone vibe motors) will run perfectly happily on the small power supply. But kick it up to small-robot standards, and you'll have to prod the motor to get it spinning even when the power's on.
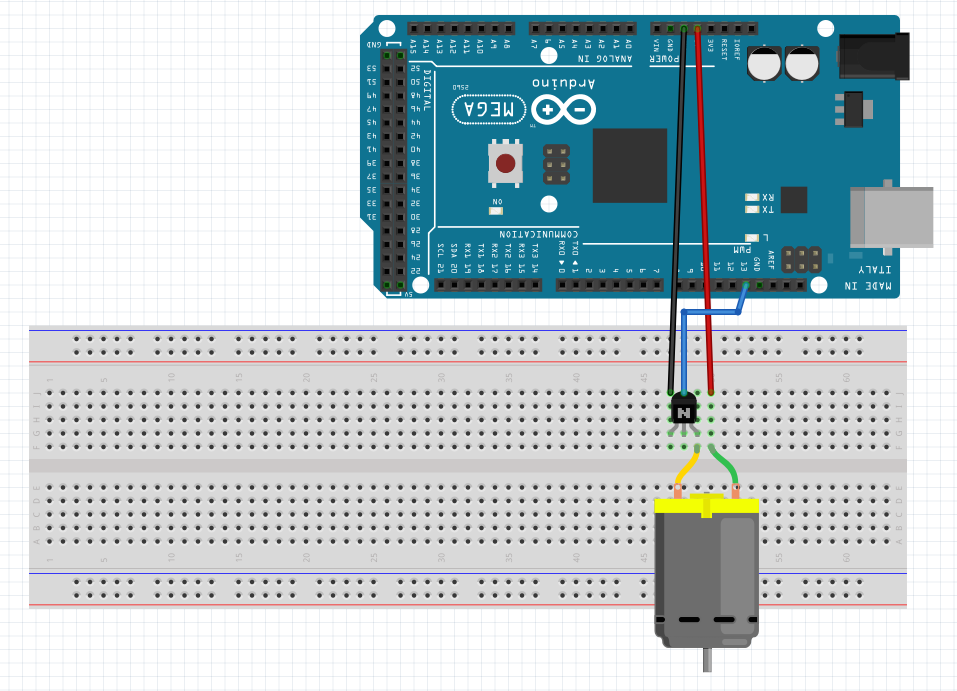
Now, unplug your Arduino and connect the circuit on a breadboard: plug one of the motor's wires into the 5V pin on your Arduino, if there is one; otherwise, skip ahead to the next bit with the external battery. Now, connect the transistor:
- BASE (middle) leg to digital pin 13
- COLLECTOR to the motor's other wire
- EMITTER to ground pin
Plug in the Arduino again! Your motor should be going like crazy, then off and on again, just like you'd expect. Make sure your motor is ready to handle that much voltage, and unplug it quickly if you think something goes wrong.
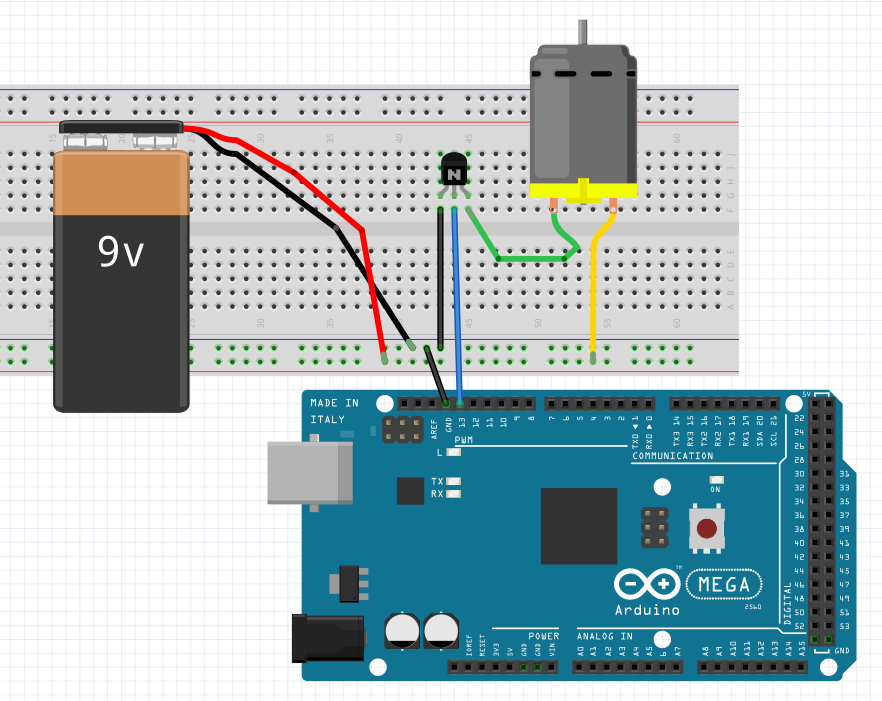
Plan B : External Power
We can power stuff directly from the digital pin, or use that to control 5V from the Arduino. The next step is to add an external source.Ffor example, in case you want to control a light that takes 9V.
The main thing to note is that you're tying both grounds together: the one from the power source, and the one for the controlling signal, meet to form a "common ground". This allows both power and data signals to flow through the same circuit.
Your motor's chosen ground wire is still tied to the collector; your digital control pin is still tied to the base; and GND is still tied to the emitter. But this time, the motor's designated power wire is sourced from the positive terminal of your 9V source, and the battery's negative terminal is tied to GND as well.
This circuit can also be used to amplify the amount of power to control a heavy-duty servo, or with NeoPixel strips that want to run on their own power source, or anything similar!


Comments
Please log in or sign up to comment.