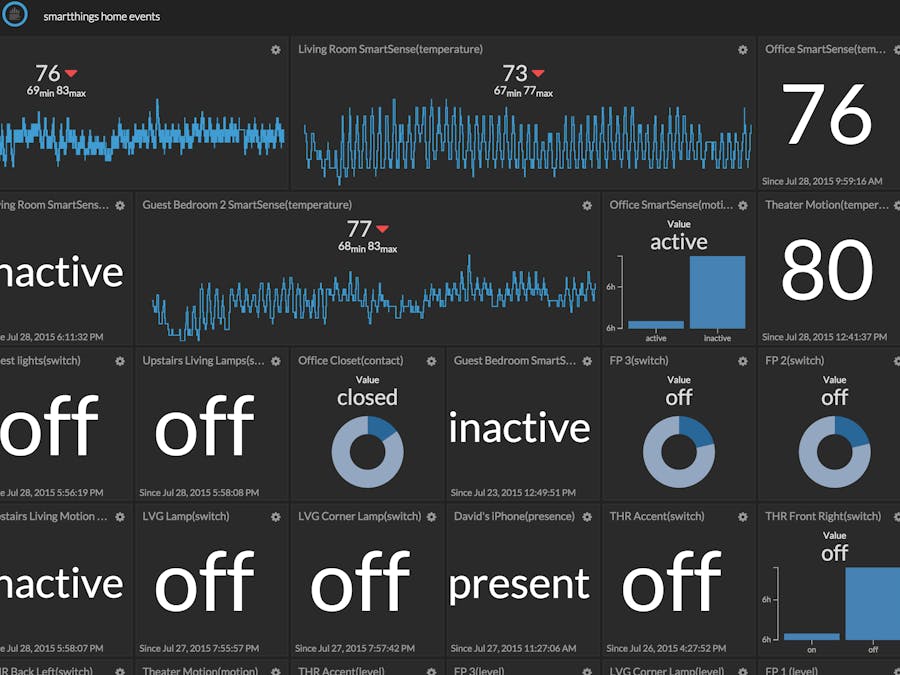
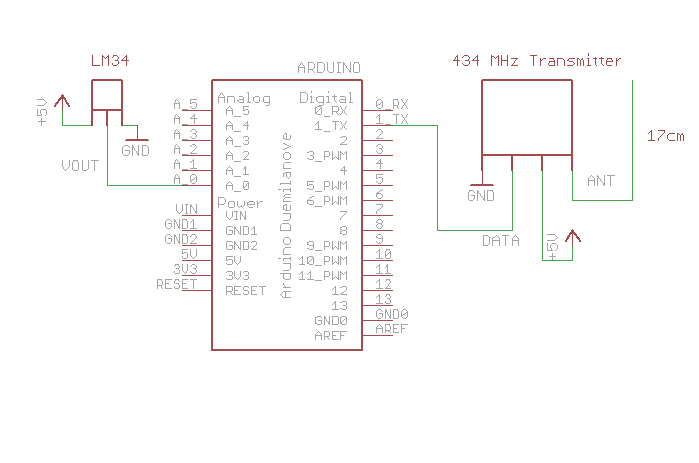
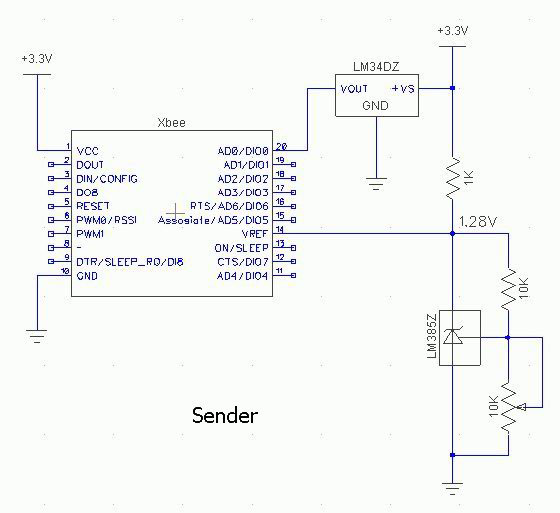
Let's see what we need to set up a smart home system using MediaTek Linkit. Since there are lot of experts here to guide you on the hardware hookup to read the sensor data, I will concentrate on creating apis and setting up ultra low cost $15 local server to capture all your sensor data. Optionally, I log the data to azure.
SetupThe sensors transmit there data via radio signals using xbee or any low cost transceiver to the MediaTek LinkIt. The MediaTek linkIt receives all the raw sensor data, packages it into json object using adruinojson library and makes a POST request to the local server. The local server hosts then nodejs web application and receives all the sensor data as json objects.
The local server is being used as pre-processor and adds the utc time and signature. Any data validation, conversion and filtration can be processed here. The local server logs all the data to cloud service in our case azure storage services. Alternatively, MediaTek linkIt can directly post the json objects to azure storage services. I setup a local server just to prove that a $15 pc can be as powerful enough to handle our data. we can log our data into any no-sql db even in our local server completely elimination the need for external cloud storage. I leave all this upto you guys.
I assume that you know how to read sensor data using sensors and microcontroller like arduino or mediaTek. To limit the scope of this project I am going to assume that the sensor data are available to MediaTek Link It. You can use low cast radio transceiver or Xbee to transmit and receive the radio signals from sensors attached to microcontoller like MediaTek. Beginners can use the MediaTek linkIt groove starter kit to read the external environment data like temperature, humidity, light etc.
Json Json JsonJson has become the de facto standard for iot and its been widely adopted. Having said about the prerequisite, lets begin by modeling our sensor data. The main purpose is to capture as many data you can and pass it to the server. The server can do all heavey lifting works like analytics, data conversion, machine learning etc.
The 'desired' json object will be the desired state of the sensor data. For example when we record the temperature, the desired value of 24 means we need to sync the value to the cloud with the value of 24. Our clients like web app or mobile app will be updated to this value.
When we want to turn on a light we say, the desired state as on. It means the light is turned on or will be turned on. All our client applications will use this state to reflect the changes to the user. I mean, the icon in our web app will be turned on or off.
This is not a international standard, I just came up with this. So, please feel free to use your own convenient format.
Temperature
{
 "deviceid" : "iot/myhome/livingroom/thermostat"
"desired" : { "temperature" : "24", "humidity": "80"},
 "timeutc": "2015-11-23T00:41:48.824Z",
 "singedBy" : "localserver"
}
Microphone
{
 "deviceid" : "iot/myhome/livingroom/mic"
"desired" : {"intensity" : "66"},
 "timeutc": "2015-11-23T00:41:48.824Z",
 "singedBy" : "localserver"
}
Distance
{
 "deviceid" : "iot/myhome/livingroom/obstacle"
"desired" : {"proximity" : "150"},
 "timeutc": "2015-01-01",
 "singedBy" : "localserver"
}
PIR
{
 "deviceid" : "iot/myhome/livingroom/pir"
"desired" : {"motion start" : "2500", "motion end" : "5345"},
 "timeutc": "2015-11-23T00:41:48.824Z",
 "singedBy" : "localserver"
}
GPS
{

"deviceid" : "iot/mydevice/location"

"desired" : {"lat" : "25.5", "long" : "32.2"},

"timeutc": "2015-11-23T00:41:48.824Z",

"singedBy" : "localserver"

}
Moisture
{

"deviceid" : "

/iot/myhome/garden/moisture"

"desired" : {"moisture": "20"},

"timeutc": "2015-11-23T00:41:48.824Z",

"singedBy" : "localserver"

}
Gas
{

"deviceid" : " /iot/myhome/kitchen/gas"

"desired" : {"leak": "No"},

"timeutc": "2015-11-23T00:41:48.824Z",

"singedBy" : "localserver"

}
Light
{

"deviceid" : " /iot/myhome/livingroom/light"

"desired" : {"intensity": "60"},

"timeutc": "2015-11-23T00:41:48.824Z",

"singedBy" : "localserver"

}
Or use this,
Living Room
{

"deviceid" : "/iot/myhome/livingroom"

"desired" : { "temperature" : "25",

                     "humidity" : "80",

                     "window": "open",

                      "door": "closed",

                     "light": "80",

                      "noise":"low"}

}
Bed Room
{

"deviceid" : "/iot/myhome/bedroom"

"desired" : { "temperature" : "24",

                    "humidity" : "70",

                    "window": "closed",

                    "door": "closed",

                    "light": "80",

                    "ac":"on"

                    "noise":"low"}

}
Please refer the ino file attached to the software section to log the data into local server. The sensor data are simulated, you can pass in the actual reading to respective json object
Local ServerLocal server adds a overhead but will be verify helpful in many ways. We can make use of local server as a pre-processor for out iot data. Data can be filtered, time stamped and signed
A tiny PC and nodejs is an excellent choice for local server. We can choose any tiny pc like raspberry pi, odriod, banana pi, beagle bone etc. I have choosen orange pi ($15) for this project.
Setup
Raspberry pi 2 or Orange Pi with any flavour of linux os that supports nodejs 5. I have chosen orange pi with arch linux for arm7. Installed nodejs and npm. Download my iotapp from github and navigate to /your/local/path/iotapp and run npm install. The basic expressjs app starts to listen on your port 3000.
Browse to your-local-ip:3000 to check if the default expressjs view is rendered. I have created these apis to post the sensor data
/iot/myhome/livingroom/thermostat - Temperature api
/iot/myhome/livingroom/mic - Sound api
/iot/myhome/livingroom/pir - Presence sensor api
/iot/myhome/livingroom/distance - Distance sensor api
/iot/myhome/mydevice/location - gps tracker api
/iot/myhome/garden/moisture - soil moisture sensor api
/iot/myhome/kitchen/gas - gas leak sensor api
/iot/myhome/livingroom/light - light sensor api
/iot/myhome/livingroom - other api for living room
/iot/myhome/bedroom - other api for bed room
To setup local server. Clone the source code iotapp from my github. Modify the index.js to put your cloud ip address or domain name where aspnet5 application is hosted in azure
Remote ServerPublishing data to the cloud has become popular now a days. We can purchase subscription from iot data provide like amazon, azure,spark fun, pubnub, initial state and many other. I have choosen azure for this demo. Data analytics, data mining and machine learning algorithm can be developed to process our data.
Download the iotwebapp from my github. I created it using visual studio 2015 targeting asp.net5. These apis were setup to post the iot data. The api logs the iot in the azure storage tables
The deviceid parameter can be set to identify if the sensor location.
These api's have been setup,
api/iot/myhome/thermostat - asp.net5 web api to log all the thermostat data
api/iot/myhome/microphone- asp.net5 web api to log all the microphone data
api/iot/myhome/pir - asp.net5 web api to log all the pir data
api/iot/myhome/distance - asp.net5 web api to log all the distance sensor data
api/iot/myhome/device/location - asp.net5 web api to log the gps data
api/iot/myhome/moisture - asp.net5 web api to log the moisture sensor data
api/iot/myhome/gas - asp.net5 web api to log the gas sensor data
api/iot/myhome/light - asp.net5 web api to log all the light sensor data
api/iot/myhome/livingroom - asp.net5 web api to log all the living room attributes/ sensor data. we can use this one api to push all the sensor values.
api/iot/myhome/bedroom - same as above, i have created one to log the details for my bedroom
To setup remote server. Clone the source code iotwebapp from my github. Create a azure storage table. Modify the IoTController.cs and put your azure storage table account name and key. Use this domain name or ip in the local server
ConclusionThere are lot of areas to be refactored in the code. Please feel free to modify and let me know if you get struck.


_ztBMuBhMHo.jpg?auto=compress%2Cformat&w=48&h=48&fit=fill&bg=ffffff)


Comments
Please log in or sign up to comment.