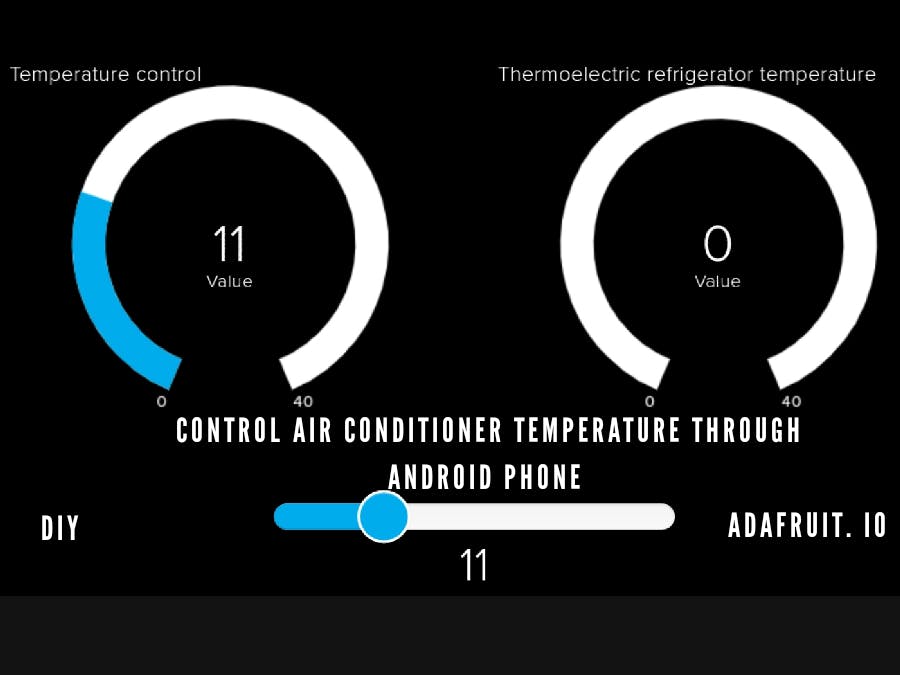
In this project, we can monitor the current temperature of the air conditioner and control the temperature by moving the slider in Adafruit. The dashboard user interface is very simple and precise, everyone can use it seamlessly.
Working of the projectWe can assign our desired temperature by moving the slider. Once the temp is set, the Arduino code compares the AC temp with current room temperature. In this project, a DHT11 is used to measure room temperature.
Suppose if we set the temperature to 24 degrees Celcius and the room temperature is 26 degrees. As the assigned temperature is less than the current temperature of the room, the AC will be running till it reaches the assigned temperature.
You can watch the working video.
I also have added an LCD display so that we can understand the condition of the air conditioner, whether it is on or off. It also shows the assigned temperature and current temperature of the room.
What is NodeMCU and how does it work?We can say NodeMCU is a combination of Arduino Nano and ESP8266 WiFi module. It becomes a power module because of this combination, with this thing we can do all the projects related to Arduino and ESP8266.
In this project, we used a DHT11 to sense temperature. It sends the temperature value to Adafruit server and displays the value in the gauge. There is also a slider to control the temperature, the assigned temperature will also show in the gauge.
Setting up the Adafruit dashboardStep 1: Create a account in adafruit.io
Step 2: Sign in to the account
Step 3: Create a dashboard
Give the dashboard name as AC. you can choose your desired name, but you need to change the name in the code as well.
Create another dashboard named "temp" for showing the room temperature. Follow the previous step to create dashboard.
Step 4: Add gauges and slider into the dashboard
Click on the + button to add gauges and slider.
Add gauge for showing assigned temperature.
When we click on the gauge it will ask for selecting the feed, select the AC feed.
After that, give the feed a name, set gauge minimum and maximum values, and update the block.
Create a slider for controlling the temperature.
When we click on the slider it will ask for selecting the feed, select the AC feed.
After that give the feed a name, set slider minimum and maximum values, and update the block.
NB: You can set the slider incremental value according as you wish. I'll set it as 1 degree.
Add a gauge for showing the air conditioner temperature, but in this case choose the feed as temp.
Click on the plus button.
Click on the gauge button.
Chosse the feed as temp.
Give the gauge a name and set the gauge maximum and minimum value.
Now the Adafruit dashboard setup is complete..
Step 5: Upload the code to NodeMCU
Before uploading the code, we need to add our WiFi name and password into the code, as well the Adafruit username and AIO key.
Adafruit username and AIO key can be obtained from the dashboard.
For that click on the key button in the dashboard.
And in the next window it shows the username and AIO key.
Copy this username, AIO key and add it into your code.
Step 6: Upload the code into NodeMCU by selecting the port, board name, etc.
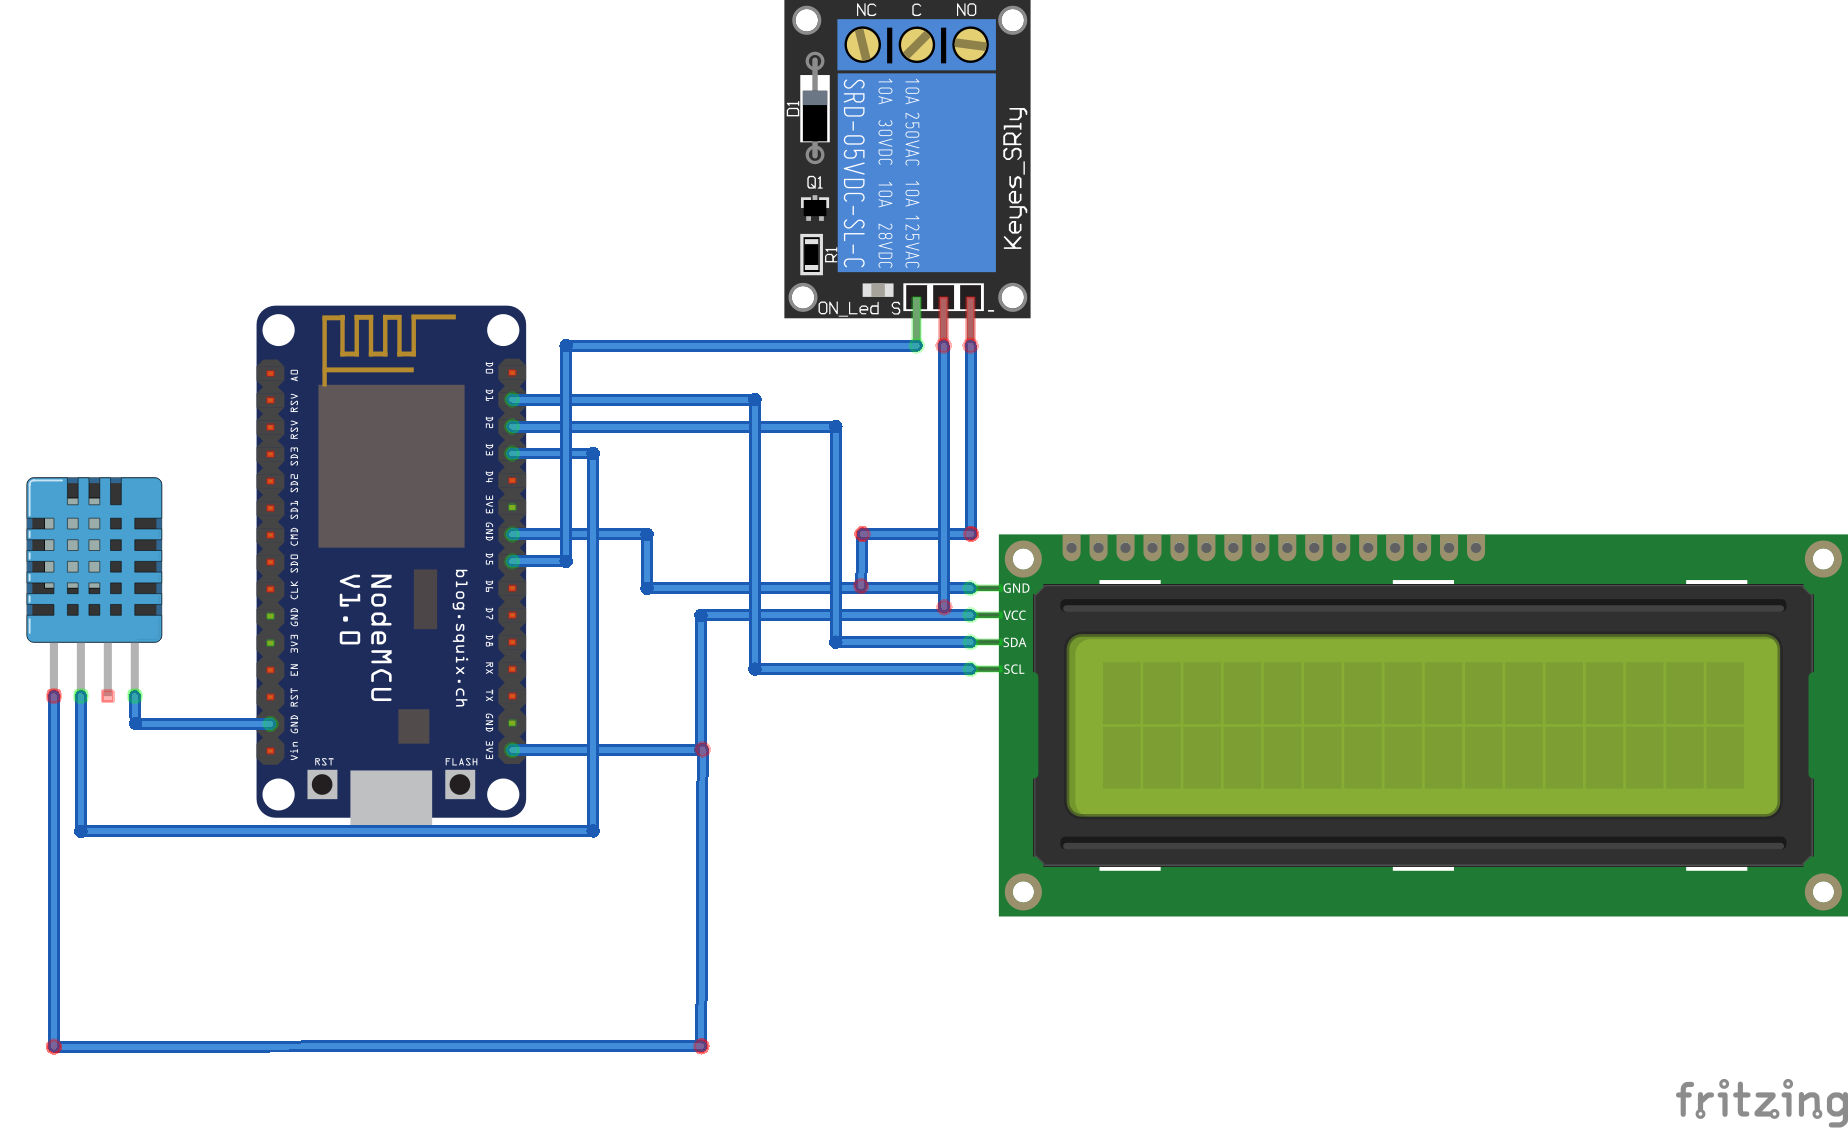
SchematicsFor making the LCD connection easier iI used i2c module, you can learn how to connect I2C module to LCD display by watching this video:
DiagramConnect SCL pin to D1
SDA to D2
DHT11 data pin to D3
Relay data in pin to D5
Connect the vcc, gnd of NodeMCU, relay, LCD display, DHT11 to power supply.
Wow, the project is complete! You can watch the working of the project down below.
For making this project a success, I will give you some tips:
- Split this project into parts.
- First of all, try to monitor the sensor data into Adafruit.
- After that, check whether the slider is working.
- Then set up the LCD display. The library may vary according to which LCD display used. Actually, the LCD display is not required. The choice is yours!
- If you have any doubts regarding this project, you can ask me in the comment section. I am always here to help.
Send me your valuable feedback to this project!
Have a great day, hacksters!
Insanescience


Comments
Please log in or sign up to comment.