Today we look at the control of a motor and influence the rotation speed via inputs of the serial monitor. In addition, I point out a difference to the Particle Photon.
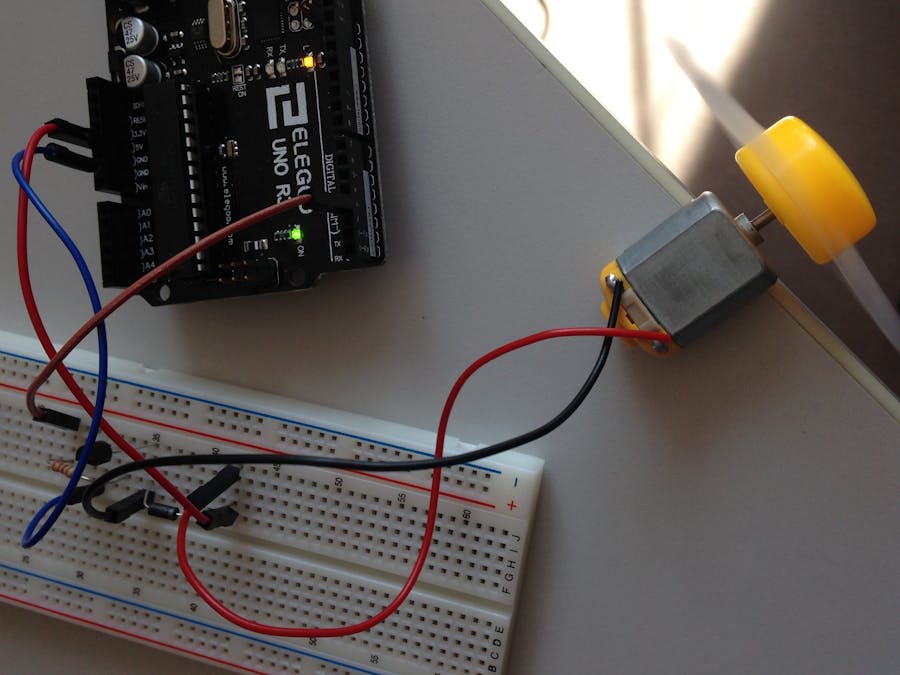
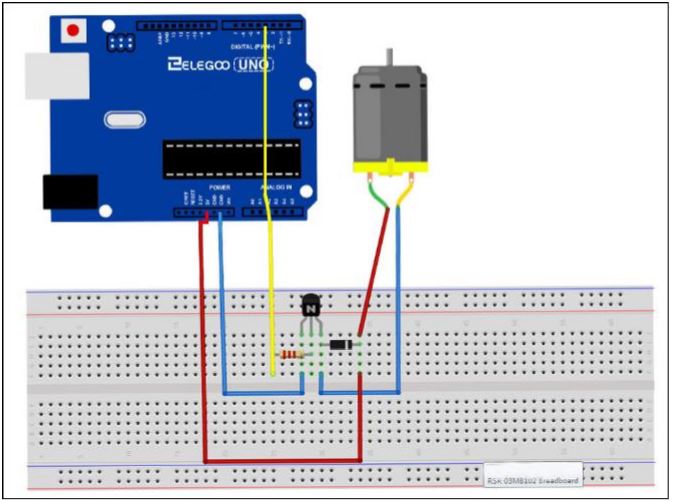
Following the schematic of the manufacturer from its instruction lesson number 22, the set-up with the additional components in the set can be quickly solved.
Serial MonitorThe speed of the torque can be influenced by the serial monitor and must be at least 50. From this 50, the corresponding voltage is generated at the port of the motor. Let's take a closer look: How does our input reach the engine? Within the loop, the serial is obeyed and the input is converted into an integer; a reaction is triggered by means of a loop:
If (Serial.available()) { Int speed = Serial.parseInt ();
As an edge note, I represent the variant with a Particle Photon. Here, the command for reading the inputs is addressed first with Serial.read, and then the variable is checked:
Void setup() {
Serial.begin (9600);
}
Void loop() {
If (Serial.available()) {
Char ch = Serial.read();
If (ch == '?') {
Serial.print ("Hello World - I run since ms()=");
Serial.println (Millis());
}
}
Serial.println ("HelloUser - type in a '?' And press enter);
delay (2000);
}
Information about a servo motor is available here.
You will find more under my account.
Update 23.12.2017I have found another DC motor in the drawers and this can be problem-free also operate with device and code: the model RF-300CA is sold as a solar engine, since a small solar module is there. I have closed the circuit with crocodile terminals and executed the code: by entering "50" the starting current could be reached. More about this in the network from a supplier as well as information about setting the speed via the gears in the housing.
The very simple case would be to ensure the power supply via a LiPo battery: thus the tiny turns wild.


_ztBMuBhMHo.jpg?auto=compress%2Cformat&w=48&h=48&fit=fill&bg=ffffff)


Comments
Please log in or sign up to comment.