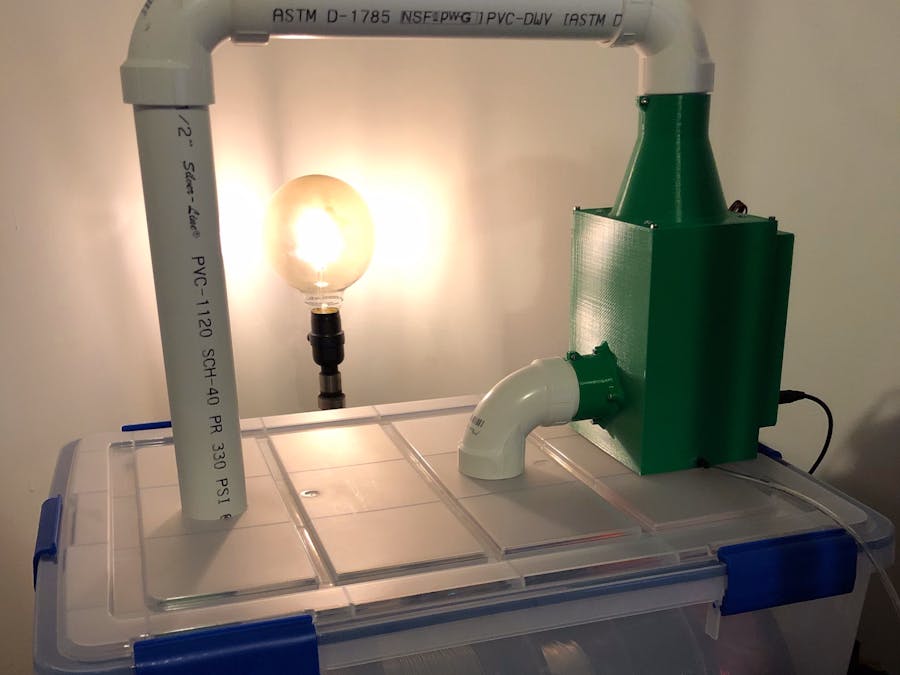
After building this project you should have a fully functioning dehumidifier for your 3D printer dry box to keep your filament dry and ready to use. The dehumidifier works using a Peltier device which transfers heat from one side of the device to the other producing a hot and cold side. The cold side of the device produces condensation thereby removing moisture from the air within the dry box. The Peltier is sandwiched between two heat sinks in which a fan blows across. The fan provides cooling for the hot side of the Peltier while also blowing off built up condensation on the fins of the cold heat sink. The dehumidifier is controlled by two Particle Photons. One Photon controls the Peltier device while the other reads the humidity and temperature inside the dry box. The two photons communicate with one another to determine whether the Peltier should be on or off and whether the power level should be set to one or two (low or high). The high power mode kicks in when the humidity level has reached approximately 30%. At this point further moisture can only be removed from the air by going below freezing. The desired target humidity and other parameters can be set at the top of the code using the predefined variables.
AssemblyFirst, cut the original barrel plug off of the power supply and solder on the new high current barrel plug.
Assemble the two heat sinks and the Peltier module using thermal paste and the clamp bracket. Attach the clamp bracket using the fasteners included with the large heat sink. Make sure to orient the large heatsink with the fins running in the long direction of the clamp as shown in the picture. Otherwise the heatsink will not fit into the enclosure correctly. Note: The springs included with the heatsink will not be used for this project.
Reference the circuit schematic to assemble the electronics. Connectors can be used for the low current portions of the circuit if desired. Note: Insert the rocker switch and high current barrel jack into the electronics enclosure box before attaching these two components to the rest of the circuit. Also ensure that the wires carrying 12V to the photon in the filament box are long enough to reach it by traveling through the outlet air pipe and into the filament box.
Place the Peltier assembly inside its enclosure and fasten with four M3x16 screws. Warning: Tighten screws only until they are snug.
Fasten the 90mm fan onto the top pipe connector using the appropriate fasteners for your chosen fan. Note: Orient the fan to pull air in through the small end of the top pipe connector.
Attach the top pipe connector and the electronics enclosure to the Peltier assembly enclosure while guiding the wires through the cut outs of the enclosure. Use four M3x12 screws for the top pipe connector and four M3x6 screws for the electronics enclosure (WARNING: Stop tightening the screws for the electronics enclosure as soon as you feel any resistance or you will strip the threads. This is very easy to do since the screws only have 3mm of engagement with the plastic.) Note: The cut outs may be need to be enlarged for certain wire sizes.
Attach the side pipe connector to the Peltier assembly enclosure using four M3x10 screws. (WARNING: Only tighten the screws a small amount after first feeling resistance or your will strip the threads. There is only 6mm of engagement here.)
Route air to and from the dehumidifier using 2-1/2" PVC pipe or pipe of equivalent outer diameter. An M3 screw and nut can be used to tighten the clamp onto the pipe.
Screw the hose barb into the drain outlet near the bottom of the Pelter enclosure assembly. Attach the polyurethane hose and route to desired location. Note: Super glue or appropriate sealant may be needed to prevent leaks around the threads on the hose barb. If the hose barb cannot be successfully threaded into the printed part the polyethylene hose can be encouraged to fit into the hole without the barb and held in place with super glue or other.
ThingSpeak logs real time humidity and temperature of the dry box as well as the power state of the dehumidifier. The status of the dehumidifier can be checked at anytime from anywhere to ensure that the system is functioning properly. Note: The charts displayed above contain data that was reported every 30 seconds instead of the 5 minute default set in the code. ThingSpeak Page


Comments
Please log in or sign up to comment.