OK, so it has now been a few weeks since the IOT2020 was announced; and I have presented numerous posts on how to get your IOT2020 up and running with Linux, Node-red and MQTT.
What about Arduino Scripts, I hear you ask, it claims to be compatible so let’s see it done. Ask no more. I will show you how to interface the following devices.
A simple white LEDThere is a PWM LED compatible driver on board so no need for a resistor (You can add one if you like), the LED is strapped between pins 9 and GND (Pin 14!). No separate power required.
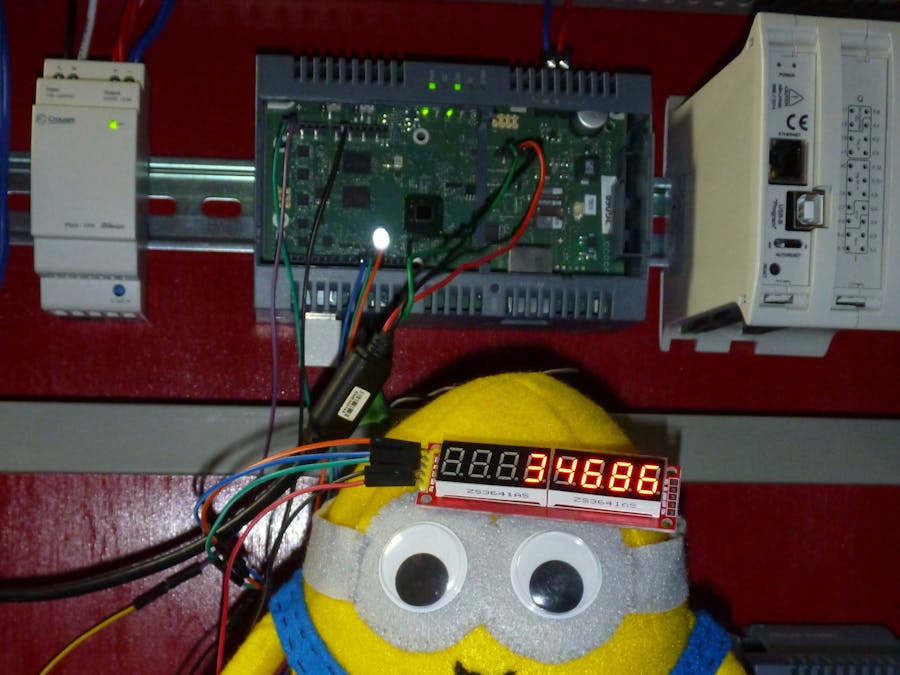
A Seven Segment 8 Digit LED display driven by a MAX7219 so it uses a SPI connection. This is hooked up to pin 10 for Select (SS - Slave Select). Pin 11 for Data (MOSI - Master out, Slave in) and pin 13 for clock (SCK - Slave Clock). Power from a separate 5V USB adapter.
A 4 line 20 character LCD Display (known as a 2004). This has a PCA8574 driving it so the bus of choice here is I2C. The device is wired for address 0X20. Power from the external USB adapter.
Finally, we will also include an OLED Display of 128x64 resolution from Sparkfun. This too is driven by the I2C bus. Again Power from the external USB adapter.
The following is an Arduino R3 pinout to show you it is identical to the IOT2020 Arduino Header pinout. And to help you find the right connections.
Be aware the VIN is at the same voltage as the IOT2020 supply so can be in excess of 24V. You have been warned!
With everything wired up, mine looked like this. I needed a helper to hold the displays so one of my Minions stepped in to help.
Here is the video to show you everything.
So the first thing you will discover is that SPI will work, PWM will also work as does standard GPIO. A great start but what about I2C.
With the current version of the image (2.1 at time of testing), the I2C is not enabled but a simple Linux command will fix that (Well until you reboot that is). Just run:
modprobe i2c-dev
Now I2C will work. You can make this permanent by adding the following files:
- Folder:
/etc/modules-load.d/
- File Name:
galileo-i2c0-i2cdev.conf
- Content:
i2c-dev
Save and you’re done. Now I2C will work even after a reboot. Now to the Arduino Sketch. Download and install the latest IDE from Arduino.
If you have the micro USB of the IOT2020 attached to your PC when you run the IDE for the first time it may well identify the IOT2020 and ask if you want to install the hardware libraries for it. It will identify the IOT2020 as an Intel Galileo, it is normal, if not then go to the "Board manager" and type in 'i586', you will be presented with the 'Intel 586 Boards' accept this and let it install.
Now you’re ready to test out a sketch. Make sure you select the 'Intel Galileo 2' for hardware an the appropriate COM port, it should be identified as an Intel Galileo.
Load up blink example sketch and compile and upload. The user LED should now be blinking. If you have the hardware and are more adventurous you can try my sketch attached to this post. If you only have some hardware then comment out what is not connected.
As a hint, every one of these devices already has individual libraries that I tried first, and they all work individually too, so play away. So, there it is. Nice and easy way to get Arduino Sketches up and running on your IOT2020. The great thing is the sketch will also automatically run even if you reboot the IOT2020. Nice.
Now a final word of caution. Some sketches will make use of direct IO knowledge, for instance directly write to ATMEGA328 ports in order to gain speed for driving a Neopixel for instance. These sketches will most lightly NOT work for obvious reasons. But then the IOT2020 is not meant for edge device activity or critical timing based applications, after all it is running LINUX. I will show you how to integrate edge devices in future videos.
None of the above requires the IOT2020 to have network connectivity or additional drivers loaded over and above the image on the SD card. It does require the latest version of the Arduino IDE loaded on your host PC. I tried this on a Windows 10 64bit machine only. Success on MAC or LINUX is assumed but not guaranteed. Ports etc. may of course be different in your situation than that shown on the video.
If you have questions, please ask. Enjoy.


Comments
Please log in or sign up to comment.